DSG-423 ENGINE
02-10
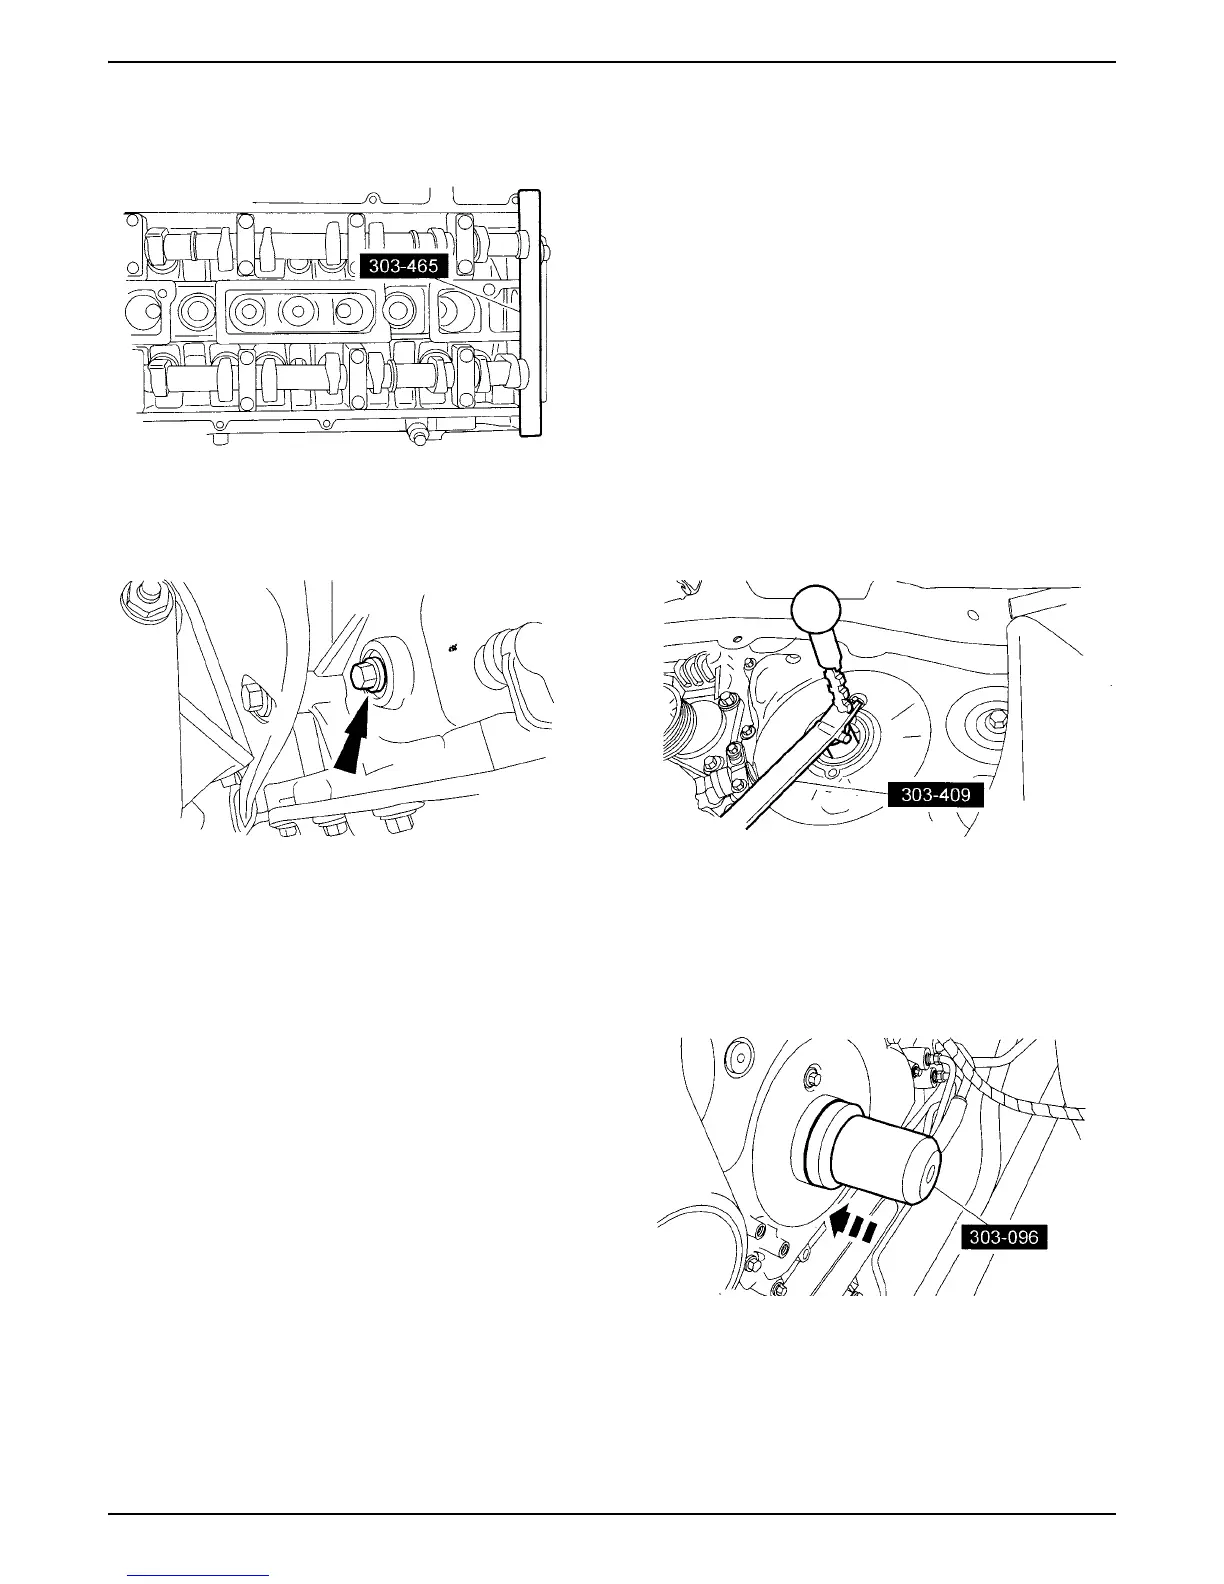
8. Using special tool 303-465, check the position of the
camshaft. If it is not possible to install the special
tool, correct the engine timing.
9. Remove all special tools and 6mm bolt.
10.Install the plug bolt.
• Tighten to 20 Nm (15 lb-ft).
11.Install camshaft cover -- Refer to“Camshaft Cover -
Installation” on page 7 of this section.
12.Install accessory drive belt -- refer to Section 6.
13.Install or reconnect any other components that were
removed or disconnected.
Crankshaft Front Seal - Removal
CAUTION: The crankshaft, the crankshaft sprocket
and the pulley are fitted together by friction, with
diamond washers between the flange faces on each
part. For that reason, the crankshaft sprocket is
also unfastened if you loosen the pulley. Therefore,
the engine must be retimed each time the damper is
removed. Otherwise severe damage can occur.
1. Remove and/or disconnect components to allow
access and removal of the crankshaft front seal.
Label if necessary to allow for correct reinstallation.
2. Remove crankshaft pulley -- Refer to“Crankshaft
Pulley - Removal” on page 8 of this section.
CAUTION: Use care not to damage the engine front
cover or the crankshaft when removing the seal.
3. Using special tool 303-409, remove the crankshaft
front seal.
Crankshaft Front Seal - Installation
1. Lubricate the new crankshaft front seal with clean
engine oil prior to installation.
2. Using special tool 303-096, install the crankshaft
front seal.
3. Install the crankshaft pulley -- Refer to“Crankshaft
Front Seal - Installation” on page 10 of this section.
4. Install or reconnect any other components that were
removed or disconnected.