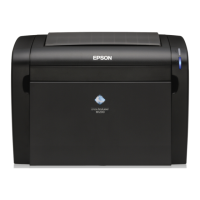
The Operator Panel
Note:
Before starting the operation described below, confirm that the Select Function screen is displayed
on the LCD panel.
1. Press the System button.
2. Select Admin Menu and then press the
button.
3. Select Maintenance and then press the
button.
4. Select Non-Genuine Mode and then press the
button.
5. Select On and then press the
button.
6. Press the
button until the top page is displayed.
The printer switches to the Non-Genuine Mode.
The Printer Setting Utility
The following procedure uses Windows XP as an example.
1. Click start — All Programs — EPSON — your printer — Printer Setting Utility.
Note:
The window to select a printer appears in this step, when multiple print drivers are installed on your
computer. In this case, click the name of the desired printer listed in Printer Name.
The Printer Setting Utility appears.
2. Click the Printer Maintenance tab.
3. Select Non-Genuine Mode from the list at the left side of the page.
The Non-Genuine Mode page is displayed.
4. Select the check box next to On, and then click the Apply New Settings button.
Epson AcuLaser MX14 Series User’s Guide
Troubleshooting 300

 Loading...


