L1800 Revision A
Disassembly And Assembly Disassembling the Printer Mechanism 55
Confidential
3.4 Disassembling the Printer Mechanism
3.4.1 APG Assy
1. Remove the Upper Housing / Printer Cover. (p.50)
2. Disconnect the APG Motor connector cable from connector CN118 (red) on the
Main Board.
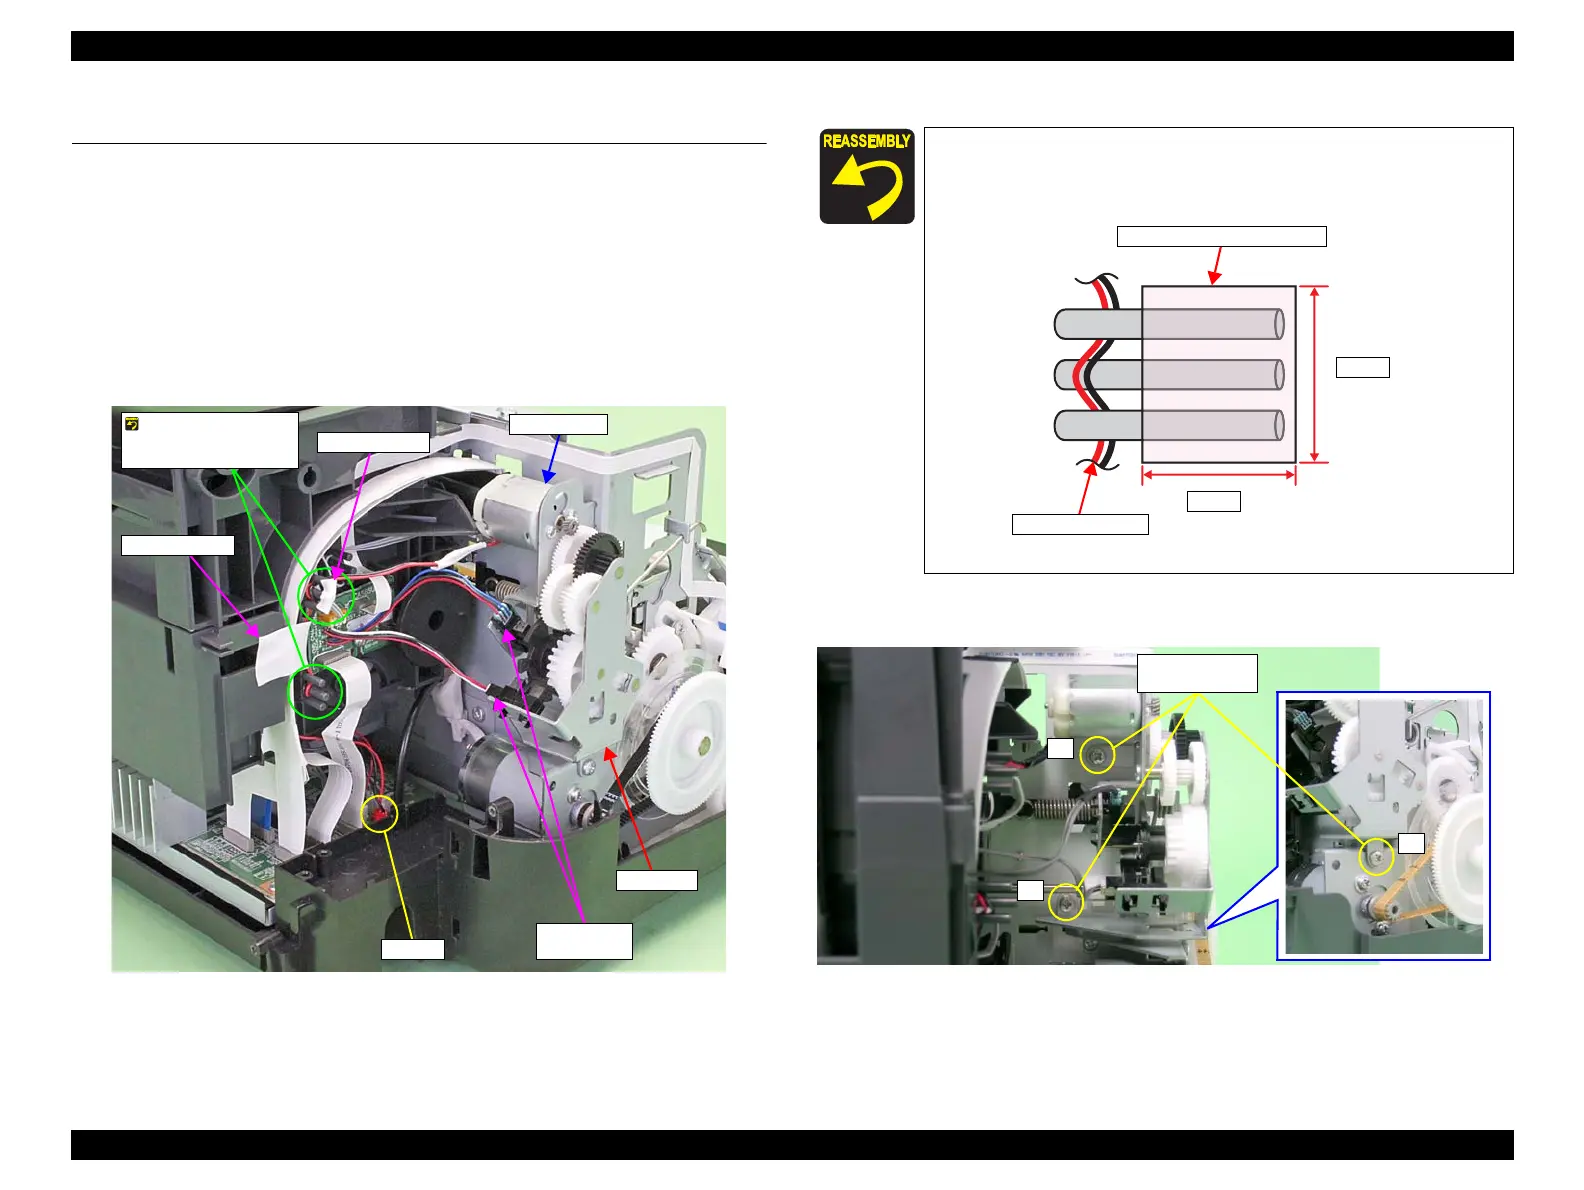
3. Peel off the acetate tape A and acetate tape B, and release the APG Motor cable
from the ASF Assy.
4. Disconnect the cables from the two APG Sensor connectors.
Figure 3-35. Disconnecting the Cables
5. Remove the three C.B.S. M3 x 6 screws that secure the APG Assy, and remove the
APG Assy from the Main Frame.
Figure 3-37. Removing the APG Assy
APG Assy
APG Motor
APG Sensor
connectors
CN118
Hook the APG Motor
cable on the two tabs
of the ASF Assy.
Acetate tape A
Acetate tape B
Referring to Figure 3-35, correctly route the APG connector
cable.
Apply the acetate tape A according to the standard below.
Figure 3-36. Applying the Acetate tape A
APG Motor cable
Acetate tape A (18 x 13 mm)
5 mm
18 mm
1
2
2) C.B.S. M3x6
(8±1 kgf.cm)

 Loading...


