Functions 5. Drive Unit Setup
114 RC700 Series Rev.3
Type in a name for the new Manipulator. (Example: RB1
Robot1)
Type in “Serial No.” on the Hofs sheet.
(or the serial number on the Manipulator’s nameplate)
Any serial number can be used, but it is recommended to
use the number described above.
If there are no other motion systems installed, “Standard”
should be already selected.
Select a Drive Unit for your Manipulator. (DU1, DU2,
DU3) DU numbers are configured by the dip switch on
the front side and indicated by the indication labels.
Select a Manipulator type.
This item cannot be changed.
Select a Manipulator series.
Select a Manipulator model.
All Manipulators available for the motor driver currently
installed in the Drive Unit will be displayed.
5)
OK> button. The EPSON RC+ will restart.
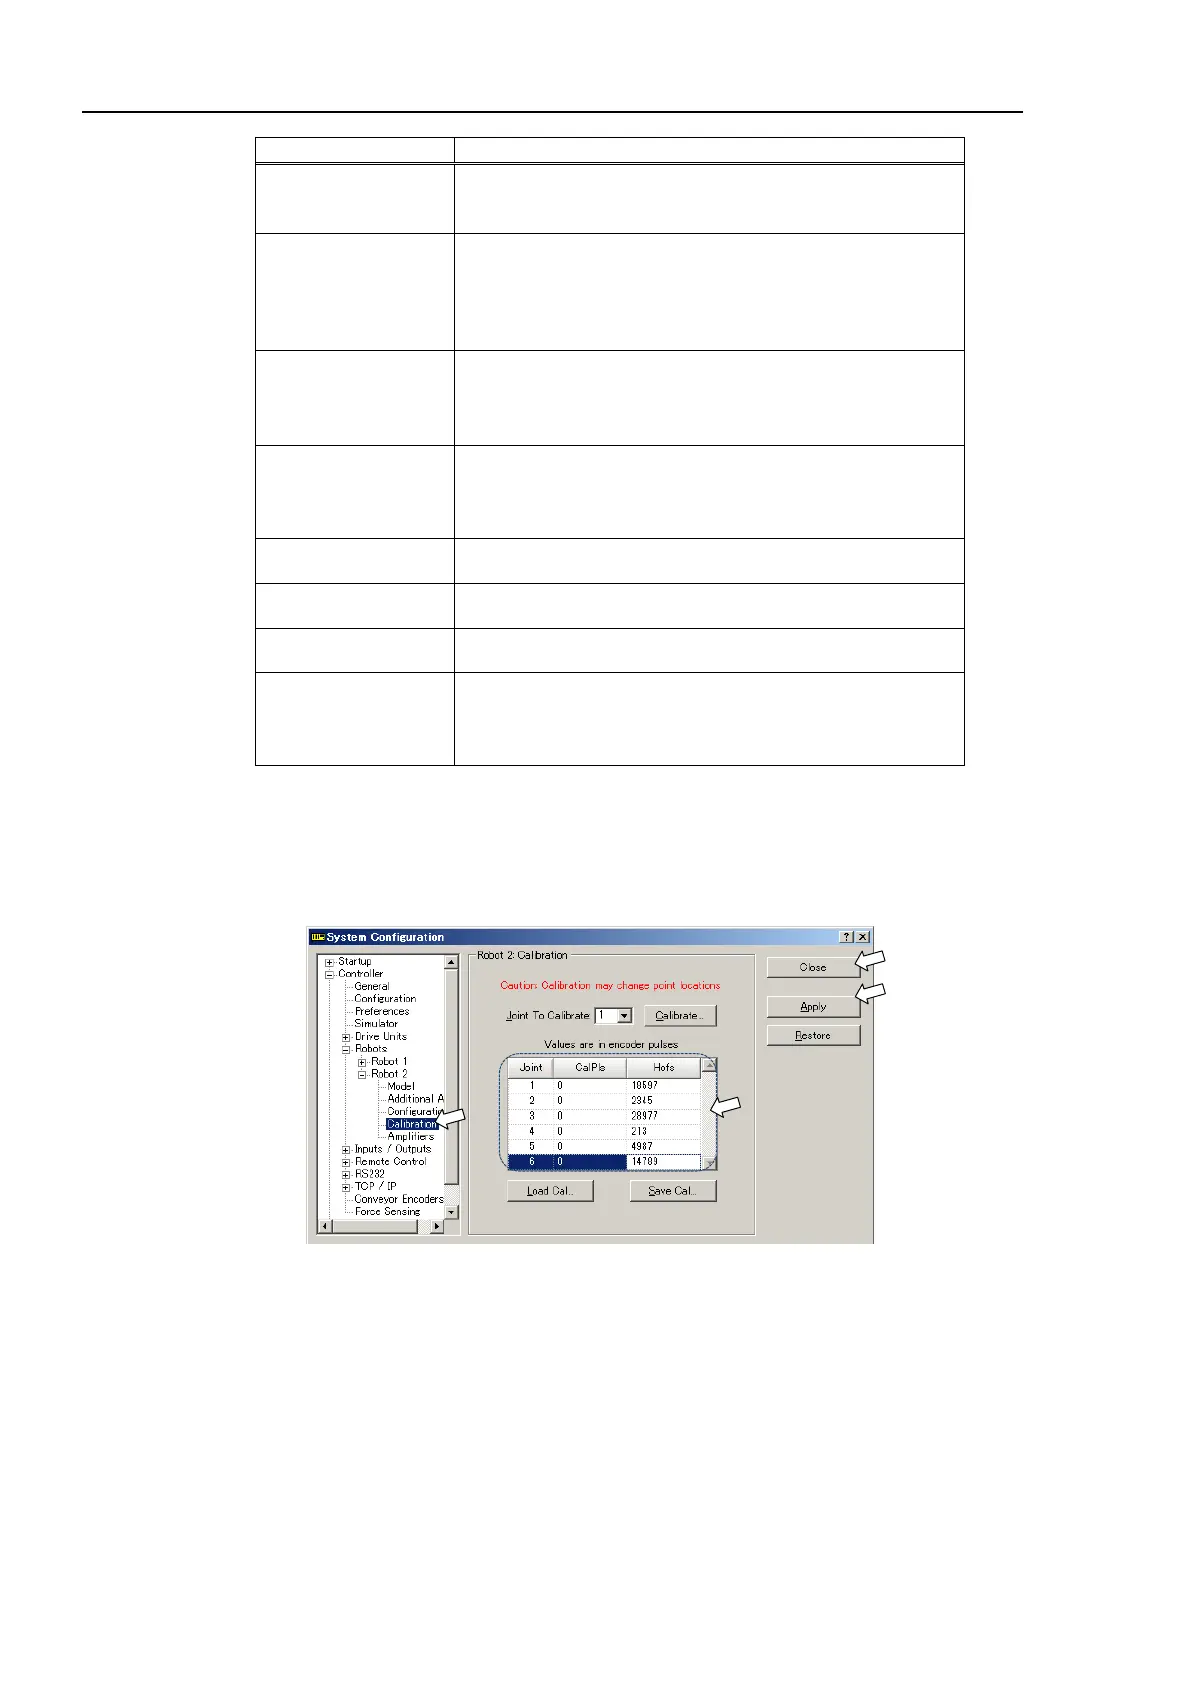
[Controller]-[Robots]-[Robot **]-[Calibration] in the tree on the left.
Following dialog box will appear.
Type in the values on the Hofs sheet to [CalPls] and [Hofs].

 Loading...


