EW50 Industrial LTE Cellular Gateway
279
7.1.5 Network Scan
"Network Scan" function lets the administrator specify how the device will connect to the mobile system for
data communication for each 3G/4G interface. For example, the administrator can specify which generation of
mobile system is used for connection, 2G, 3G or LTE. Moreover, he/she can define their connection sequence
for connecting to mobile systems. The administrator can also scan the mobile systems available manually,
then select the target operator system and apply it.
Network Scan Setting
Go to Service > Cellular Toolkit > Network Scan tab.
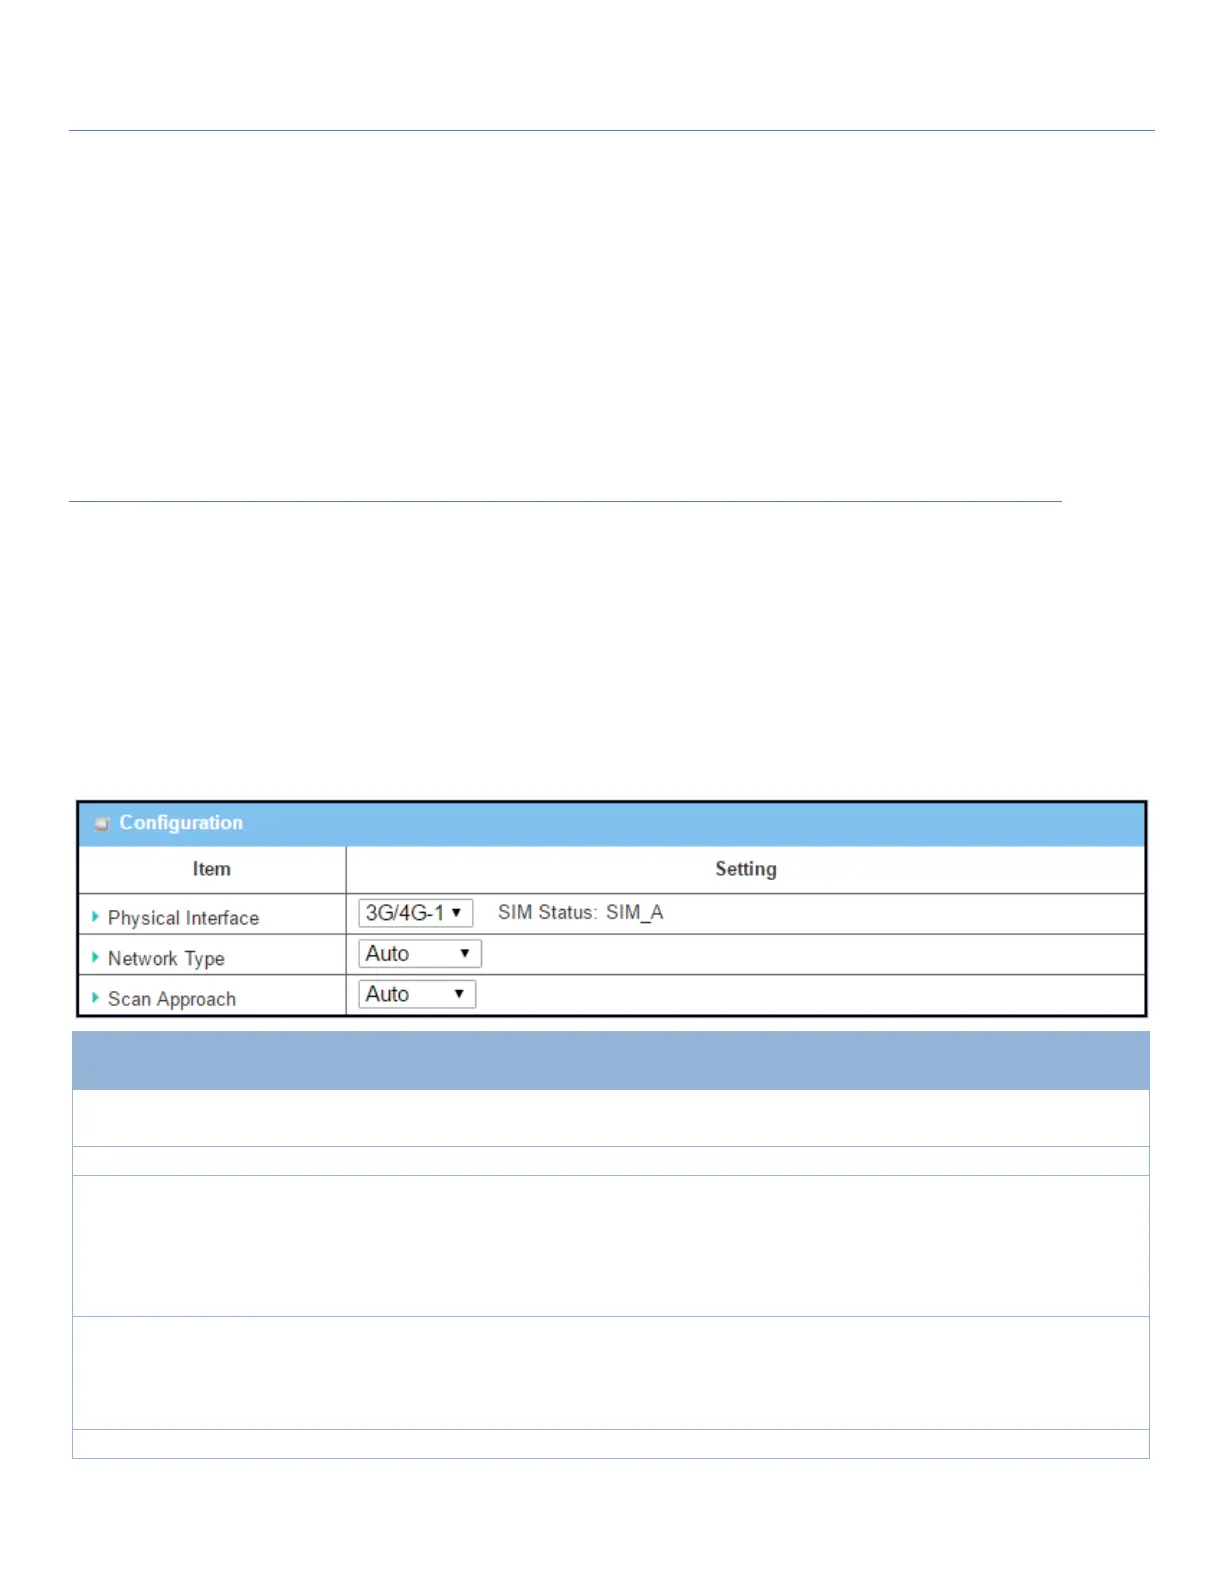
In the "Network Scan" page, there are two windows for the Network Scan function. The "Configuration"
window lets you select which 3G/4G module (physical interface) is used to perform Network Scan, and the
system will show the current used SIM card in the module. You can configure each 3G/4G WAN interface by
executing the network scan one after another. You can also specify the connection sequence of the targeted
generation of mobile system, 2G/3G/LTE.
Network Scan Configuration
The box is 3G/4G-1 by
default
Choose a cellular interface (3G/4G-1 or 3G/4G-2) for the network scan function.
Note: 3G/4G-2 is only available for products with dual cellular modules.
Show the connected cellular service (identified with SIM_A or SIM_B).
Auto is selected by
default.
Specify the network type for the network scan function.
It can be Auto, 2G Only, 2G prefer, 3G Only, 3G prefer, or LTE Only.
When Auto is selected, the network will be registered automatically;
If the prefer option is selected, network will be registered for your option first;
If the only option is selected, network will be registered for your option only.
Auto is selected by
default.
When Auto selected, the cellular module registers automatically.
If the Manually option is selected, a Network Provider List screen appears.
Press Scan button to scan for the nearest base stations. Select (check the box)
the preferred base stations then click Apply button to apply settings.
Click Save to save the settings
 Loading...