Do you have a question about the EVOCA Cafection Symbol and is the answer not in the manual?
Guidelines for parts that come into contact with food.
Essential safety precautions to prevent hazards.
Details on electrical connection requirements and safety.
Conditions requiring immediate equipment disconnection.
Covers product warranty terms, coverage, and limitations.
Step-by-step process for returning parts under warranty.
Information regarding responsibility for shipment damage.
Diagram illustrating the external components of the brewer.
Diagram showing the rear components and connections.
Diagram detailing the internal parts and layout.
Exploded view and labels for the brew group assembly.
Illustrated step-by-step explanation of the brewing mechanism.
Diagram of the hot water tank and its sensors.
Visual guide for removing and installing bean hoppers.
Information on the equipment's water temperature setpoint.
Conditions and prerequisites for installing the brewer on-site.
Technical specifications including capacities, electrical, and weight.
Instructions for safely removing the unit from its packaging.
Steps for ensuring the brewer is level for optimal performance.
Procedure for placing the drip tray and grill correctly.
Detailed steps for connecting the water supply line.
Guidelines for safely connecting the brewer to the power supply.
Instructions for filling bean hoppers and ingredient canisters.
Process for correctly installing the filter paper roll.
Steps for installing an optional chute kit for waste disposal.
Procedure for installing a plate to hide the chute hole.
Checklist for confirming proper installation and initial operation.
Information on installing and configuring payment systems.
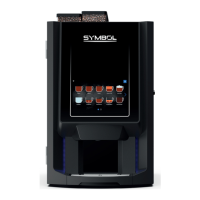
Overview of the brewer's touch screen interface for selecting beverages.
Specific instructions for ordering an iced coffee beverage.
Features and installation height for ADA compliance.
Explanation of different user access levels and their permissions.
Description of the functions available in the main Service tab.
Information on viewing machine status, logs, and serial numbers.
How the password entry screen works for accessing certain tabs.
Accessing and modifying beverage recipes and their settings.
Configuration options for system settings, language, and temperature.
Managing video playlists and screen saver settings.
Accessing sales counts, free vends, and user sales data.
Procedure for restoring the brewer to its default factory parameters.
How to perform a standard rinse cycle using the brewer's interface.
Using the interface to clean brew group and grinder.
General guidelines and methods for effective cleaning and sanitizing.
List of essential tools for performing maintenance and cleaning.
Recommended schedule for cleaning various internal and external parts.
Maintaining general cleanliness of the brewer and surrounding area.
Procedures for cleaning the brewer's external surfaces like the screen and doors.
Detailed instructions for cleaning and sanitizing internal components.
Schedule outlining routine maintenance tasks and their frequency.
List of tools recommended for maintenance and service.
Inspection procedure for the overflow tray to detect leaks.
Maintenance and signs indicating the need for brew group service.
Maintenance and replacement guidelines for outlet valves.
Procedure for deliming the hot water tank and replacing components.
Importance of grinder maintenance and burr replacement.
Steps for safely draining the hot water tank.
Procedure for preparing the unit for extended storage.
Instructions for removing and installing the brew group assembly.
Guidelines for replacing sensitive electronic components.
Troubleshooting common grinder issues like jams.
Explanation of common warning messages and their implications.
Description of error messages and potential causes.
| Programmable | Yes |
|---|---|
| Milk Frother | Yes |
| Model | Cafection Symbol |
| Coffee Bean Hopper | Yes |
| Grinder | Yes |
| Auto Shut-off | Yes |