IN1806 and IN1808 Series Scaling Presentation Switchers • Installation 21
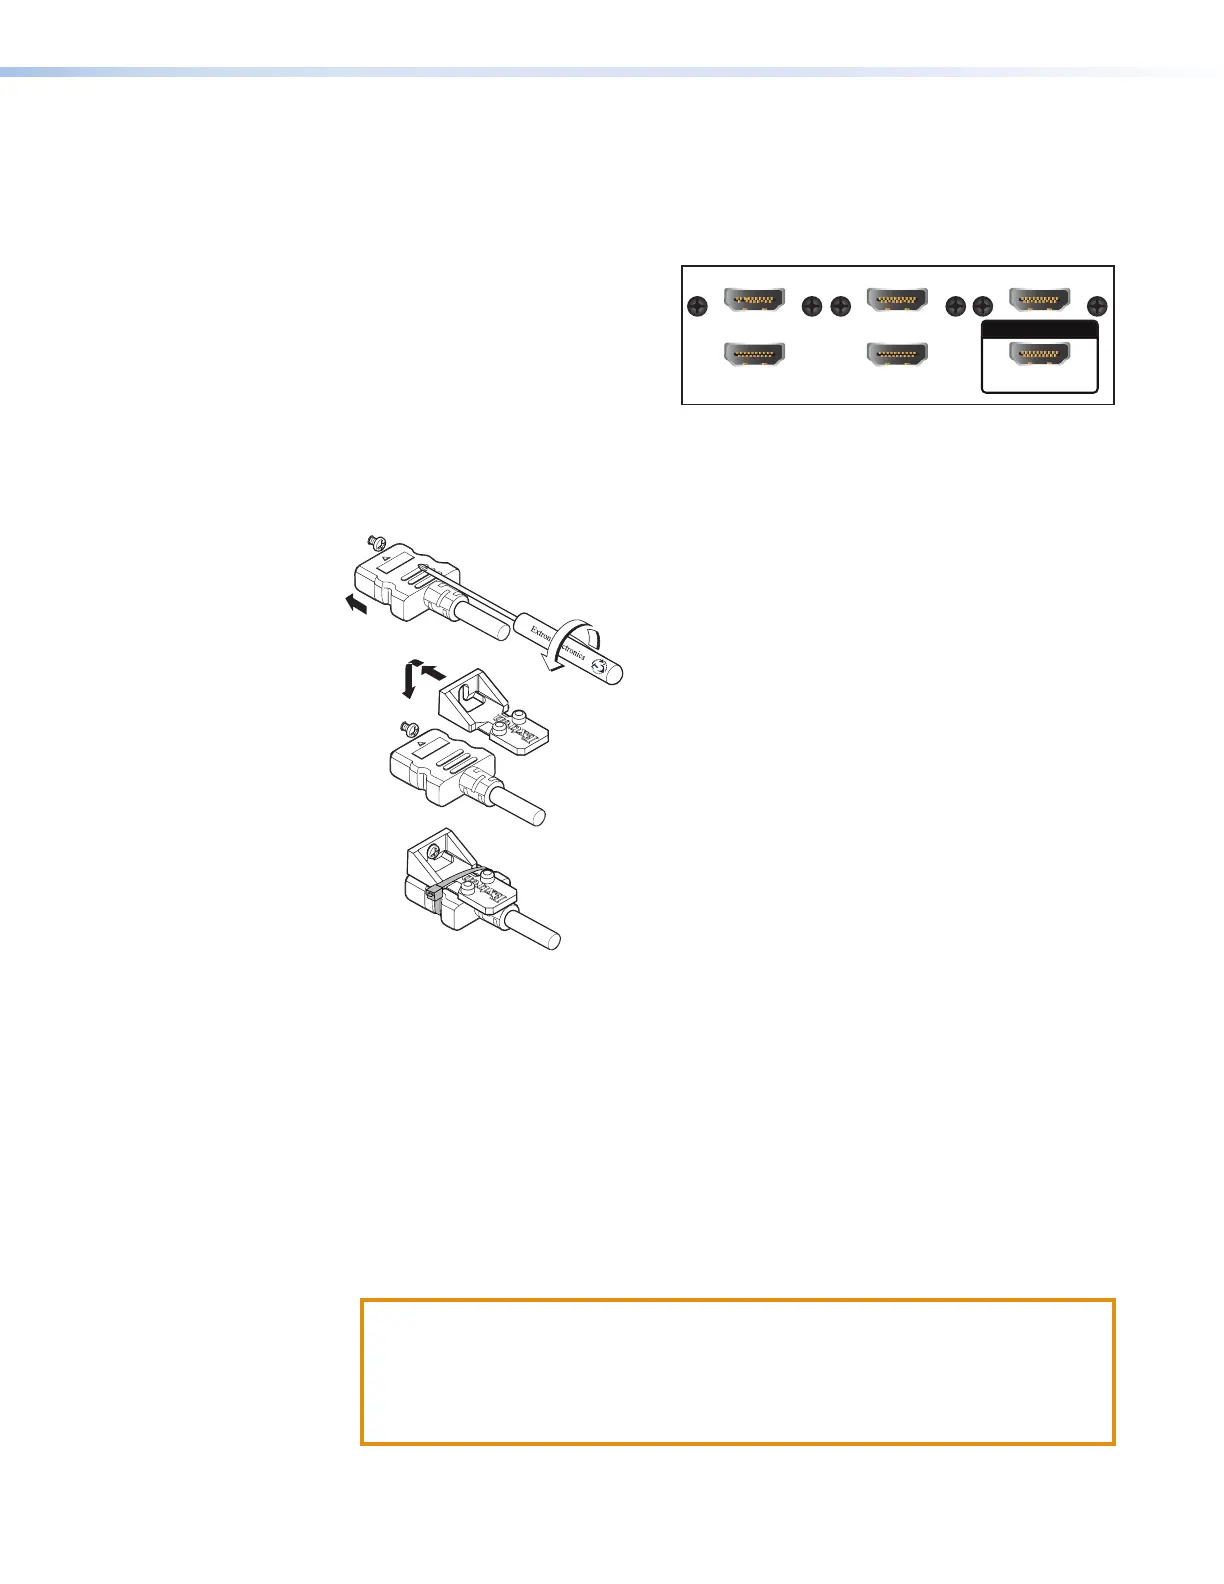
The IN1806/IN1808 connectors require the LockIt brackets to be mounted as follows:
• HDMI inputs 2, 4, and 6 — Side mounted. Can be stacked with the connectors below
them.
• HDMI inputs 3 and 5, HDMI Loop Out — Stack mounted. Because these connectors
have no mounting screws of their
own, each must be stack-mounted
with the connector above it:
• HDMI Input 2 with HDMI Input 3
• HDMI Input 4 with HDMI Input 5
• HDMI Input 6 with Loop Out
• HDMI Output 1A — Top mounting (shown in figure 12)
Bracket mounting procedure
To securely fasten an HDMI cable to a device:
3
3
4
2
Figure 12. Top Mounting a LockIt Cable Lacing Bracket
1. Plug the HDMI cable into the panel connection (see figure 12,
1
).
2. Loosen the HDMI connection mounting screw from the panel enough to allow the
LockIt lacing bracket to be placed over it (
2
). The screw does not have to be removed.
3. Place the LockIt lacing bracket on the screw and against the HDMI connector, then tighten
the screw to secure the bracket (
3
).
4. Loosely place the included tie wrap around the HDMI connector and the LockIt lacing
bracket as shown. If using a stacked pair of connectors (such as HDMI Inputs 2 and
3), place the tie wrap around both connectors and the bracket (see figure 11 on the
previous page).
5. While holding the connector securely against the lacing bracket, use pliers or a similar
tool to tighten the tie wrap, then remove any excess length (
4
).
ATTENTION:
• Do not overtighten the HDMI connection mounting screw. The shield to which
it is fastened is very thin and can easily be stripped.
• Ne serrez pas trop la vis de montage du connecteur HDMI. Le blindage auquel
elle est attachée est très fin et peut facilement être dénudé.
LOOP OUT
3
2
5
4 6
12