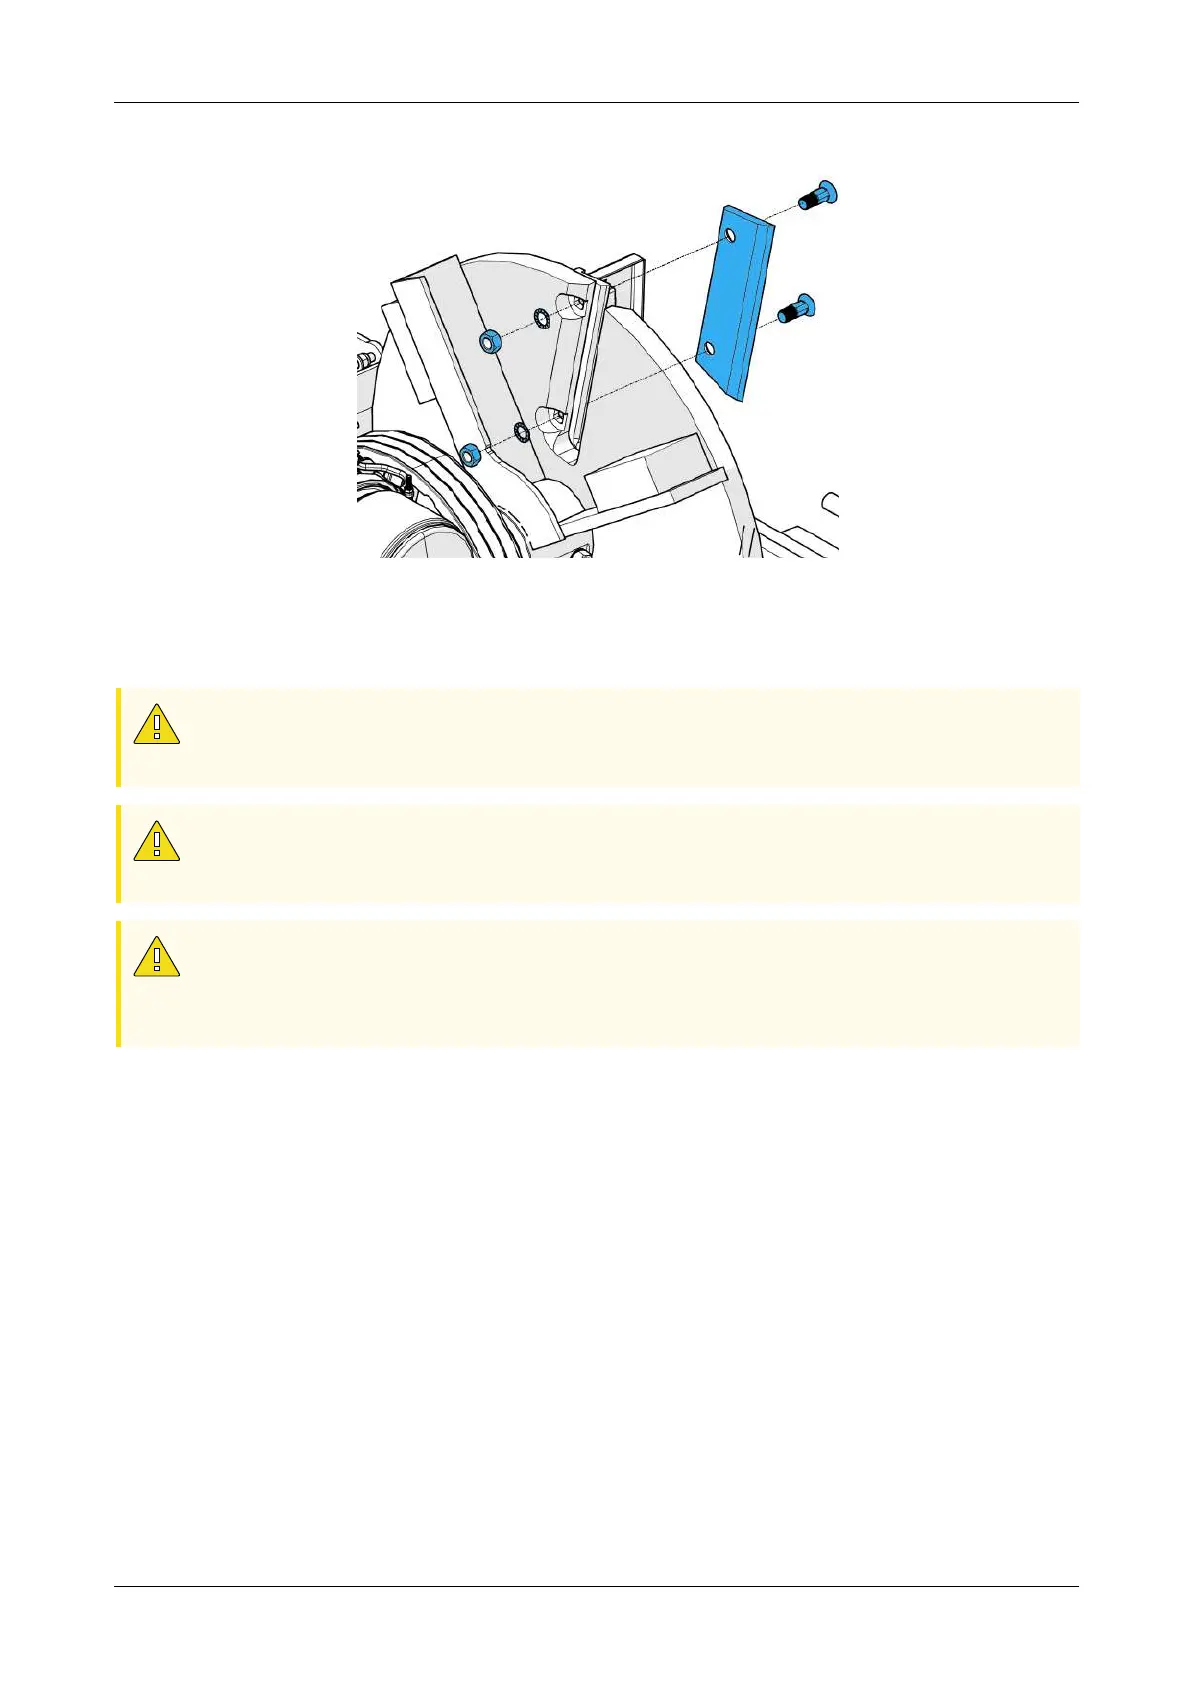
Figure 53 - Blade removal
Installing the replacement blades:
CAUTION
Use genuine Först blades and blade bolt sets only. Replace the blade bolt sets
every time the blades removed
CAUTION
When fitting a blade bolt set, NO lubricant or anti-seize compound is to be
applied to the bolts. (310Nm is a dry torque).
CAUTION
The replacement blades must not have any debris underneath them when
tightened, the smallest amount of debris behind the blade could result in blade
failure causing damage to the machine.
5. Clean the blade bed thoroughly and remove any surface rust and debris.
6. Thoroughly clean and degrease the replacement blade.
7. Put the replacement blade against the blade bed.
8. Attach the blade using a new blade bolt set in the upper hole.
9. Fit the blade bolt set into the lower hole.
10. To locate the countersink of the bolt and blade, gently wiggle the blade when
tightening the nut by hand.
11. Before you torque the blade bolt set, make sure that the back edge of the blade
is tight against the flywheel blade bed heel.
Chapter 5: Maintenance
Redwood Global Ltd - ST6P
Operator and Maintenance Manual
85 12-00-001 v4.0