Available Process Images
Process Image
Types
Dip switch
8 7 6 5 4 3 2 1 Process image and configuration
OFF OFF - - - - - - Standard Image 320 Bit
OFF ON - - - - - - Economy Image 128 Bit
ON OFF - - - - - - Retrofit Image (scope dependent on bus module)
ON ON - - - - - - Not used
Changing/
Assigning Char-
acteristic Num-
bers/Program
Numbers (Retrofit
Mode)
For power sources in the TPS series, the material, the wire diameter, and the protective
gas shield can be selected using the program number. A bit width of 8 bits was defined
for this.
It is possible to assign a program number to a characteristic number (1-255) so that the
8-bit signal can be used in retrofit mode.
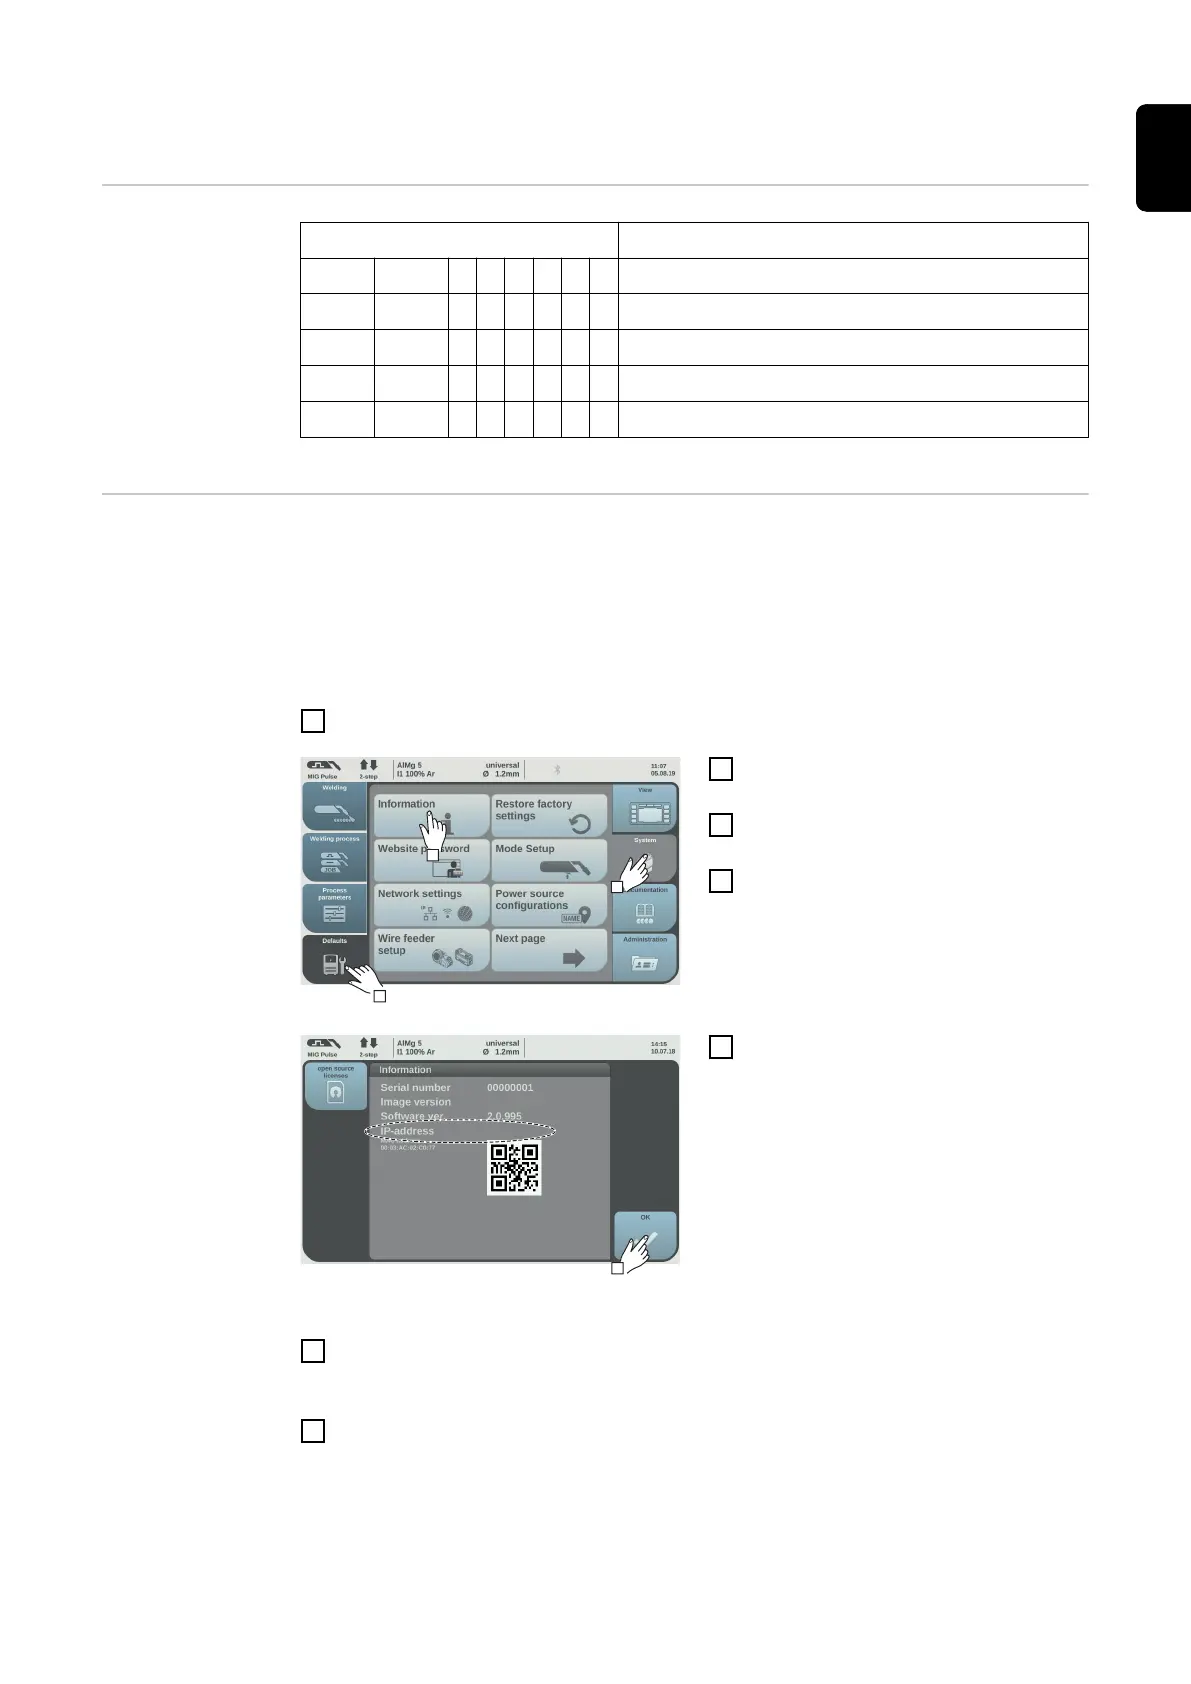
Note down the IP address of the power source used:
1
Connect the power source to the computer (for example using a LAN cable)
2
Select "Defaults" in the left sidebar of
the power source control panel
3
Select "System" in the right sidebar of
the power source control panel
4
Press the "Information" button on the
power source control panel
4
xx.x.xxx.x
1.9.0-16501.9508
5
Note down the displayed IP address
(example: 10.5.72.13)
Access website of the power source in the internet browser:
6
Enter the IP address of the power source in the search bar of the Internet browser
and confirm
- The website of the power source is displayed
7
Enter username and password
Factory setting:
Username = admin
Password = admin
- The website of the power source is displayed
43
EN-US