112
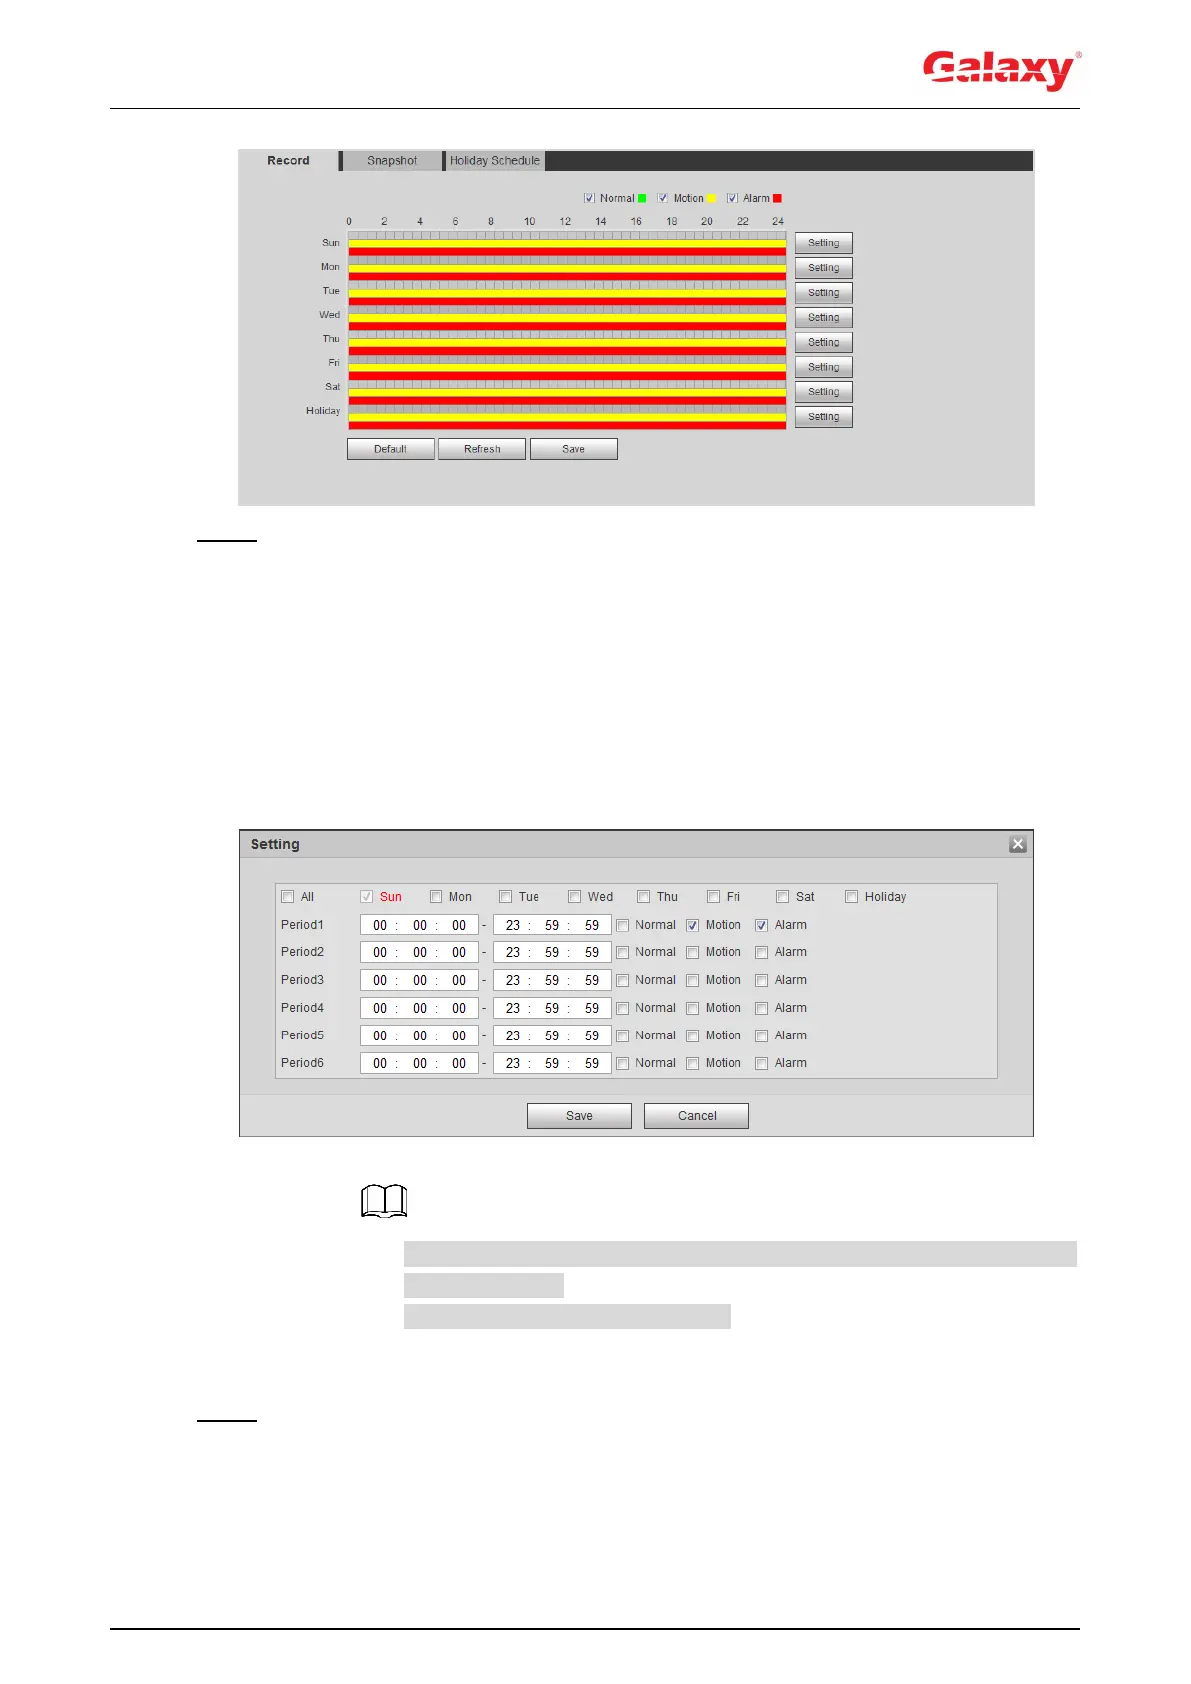
Figure 5-3 Record
Step 2 Set record plan.
Green represents normal record plan (such as timing recording); yellow represents
motion record plan (such as recording triggered by intelligent events); red represents
alarm record plan (such as recording triggered by alarm-in).
Method one: Select a record type, such as Normal, and directly press and drag
the left mouse button to set the time period for normal record on the timeline.
Method two: Enter an actual time period.
1) Click Setting next to a day.
The Setting interface is displayed. See Figure 5-4.
Figure 5-4 Setting (record time period)
2) Select a day, and the alarm type next to a period, and then set the period.
Select All or check boxes of some days to set the time period of multiple
days at one time.
You can set 6 time periods per day.
3) Click Save.
The Record interface is displayed.
Step 3 Click Save.
5.1.1.2.2 Setting Record Control
Set parameters such as pack duration, pre-event record, disk full, record mode, and record
stream.
 Loading...