143
The Face Database Config interface is displayed.
Step 2 Click next to the face database to be set.
The Face Database Config interface is displayed. See Figure 5-32.
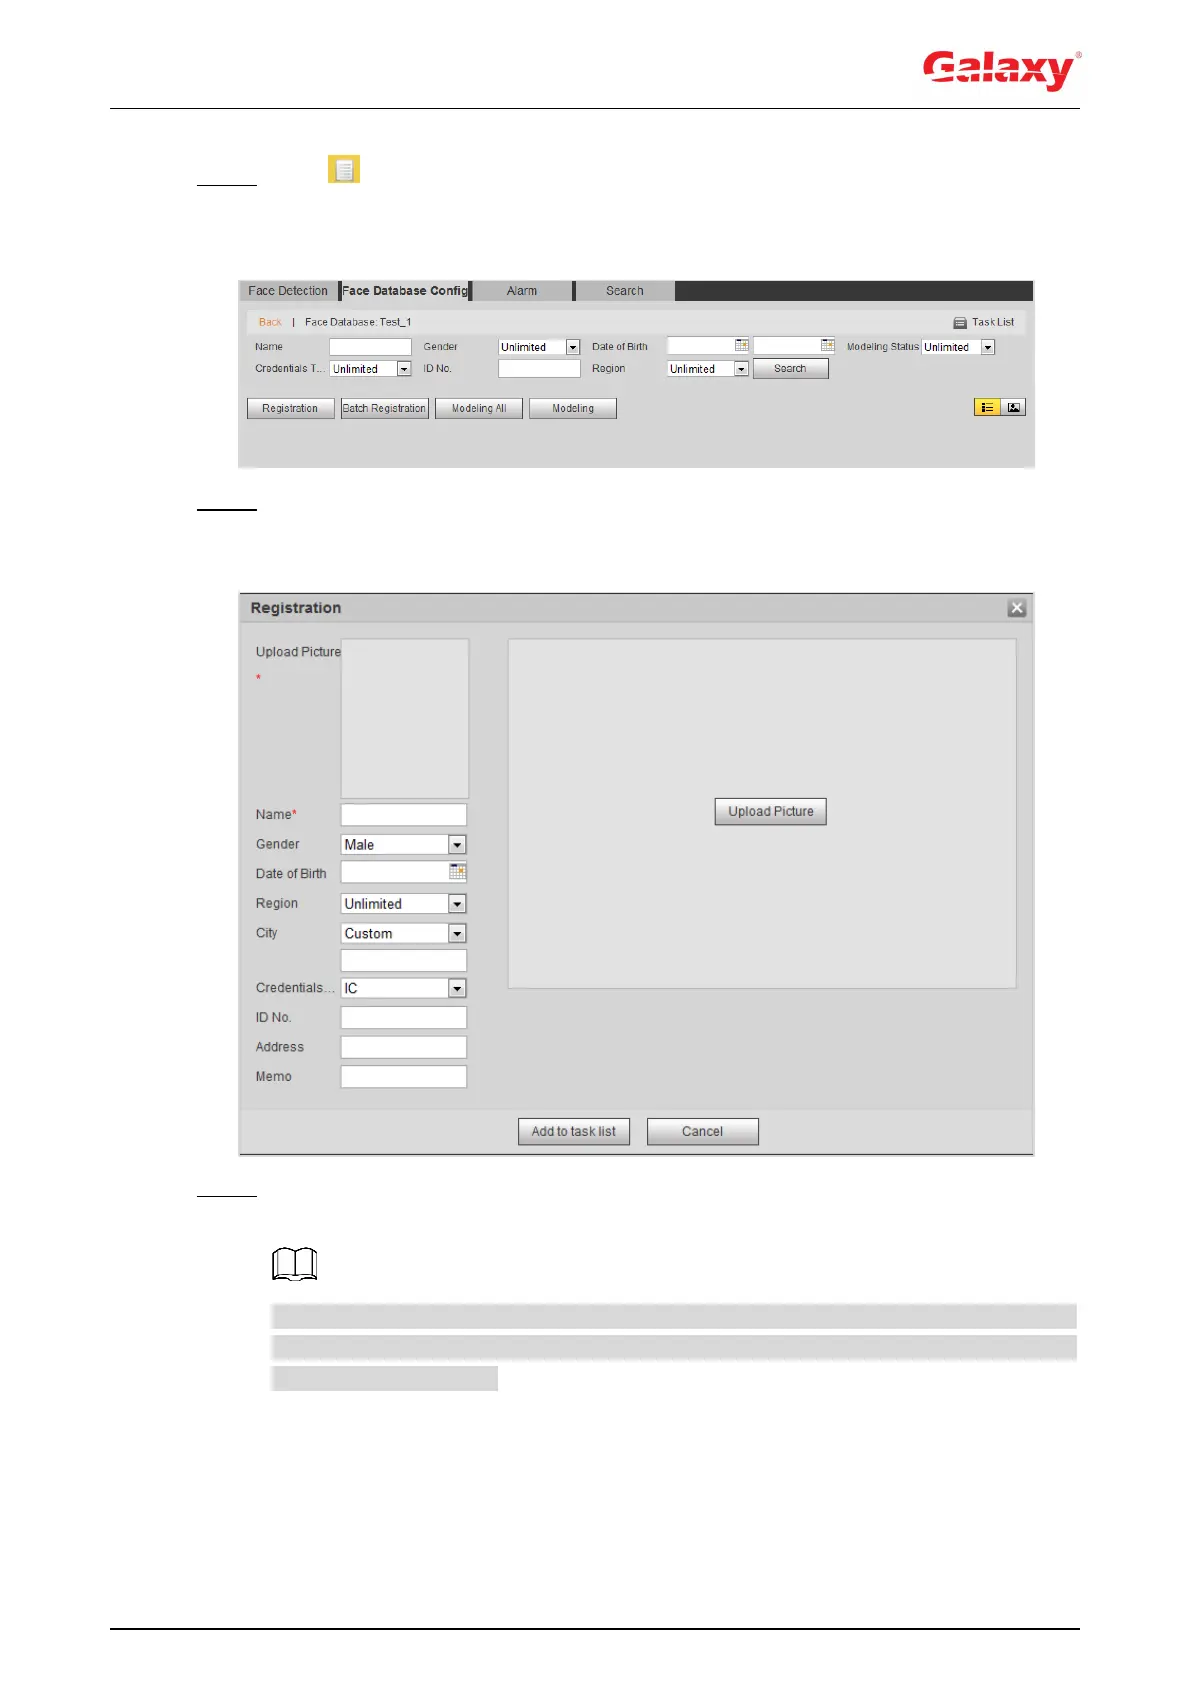
Figure 5-32 Face database configuration
Step 3 Click Registration.
The Registration interface is displayed. See Figure 5-33.
Figure 5-33 Registration (1)
Step 4 Click Upload Picture, select a face picture to be uploaded, and click Open.
The interface shown as Figure 5-34 is displayed.
You can manually select the area for a face. After uploading picture, box select a face
and click OK. When there are multiple faces in a photo, select the target face and click
OK to save face picture.

 Loading...