CHAPTER 5: CONNECTING TO DEVICES AND NETWORKS
D20E ETHERNET I/O MODULE INSTRUCTION MANUAL GE INFORMATION 81
12. Reboot the device, if necessary; see Rebooting the D20E on page 116
Result: The IP address assignment change is complete.
Normally, rebooting the D20E module is not required. However for some network security
control, rebooting is necessary when a new IP address is assigned onto a network.
To modify an IP
address using a Linux
OS Shell:
1. Connect a cable with a USB micro AB plug between the PC and D20E Ethernet I/O
Module as shown in Figure 13.
2. Run the terminal emulation application.
See section Terminal emulator on page 21 for details.
3. Logon to the D20E module with:
– IP address: 10.0.0.1.
–User ID root, and
– Password root.
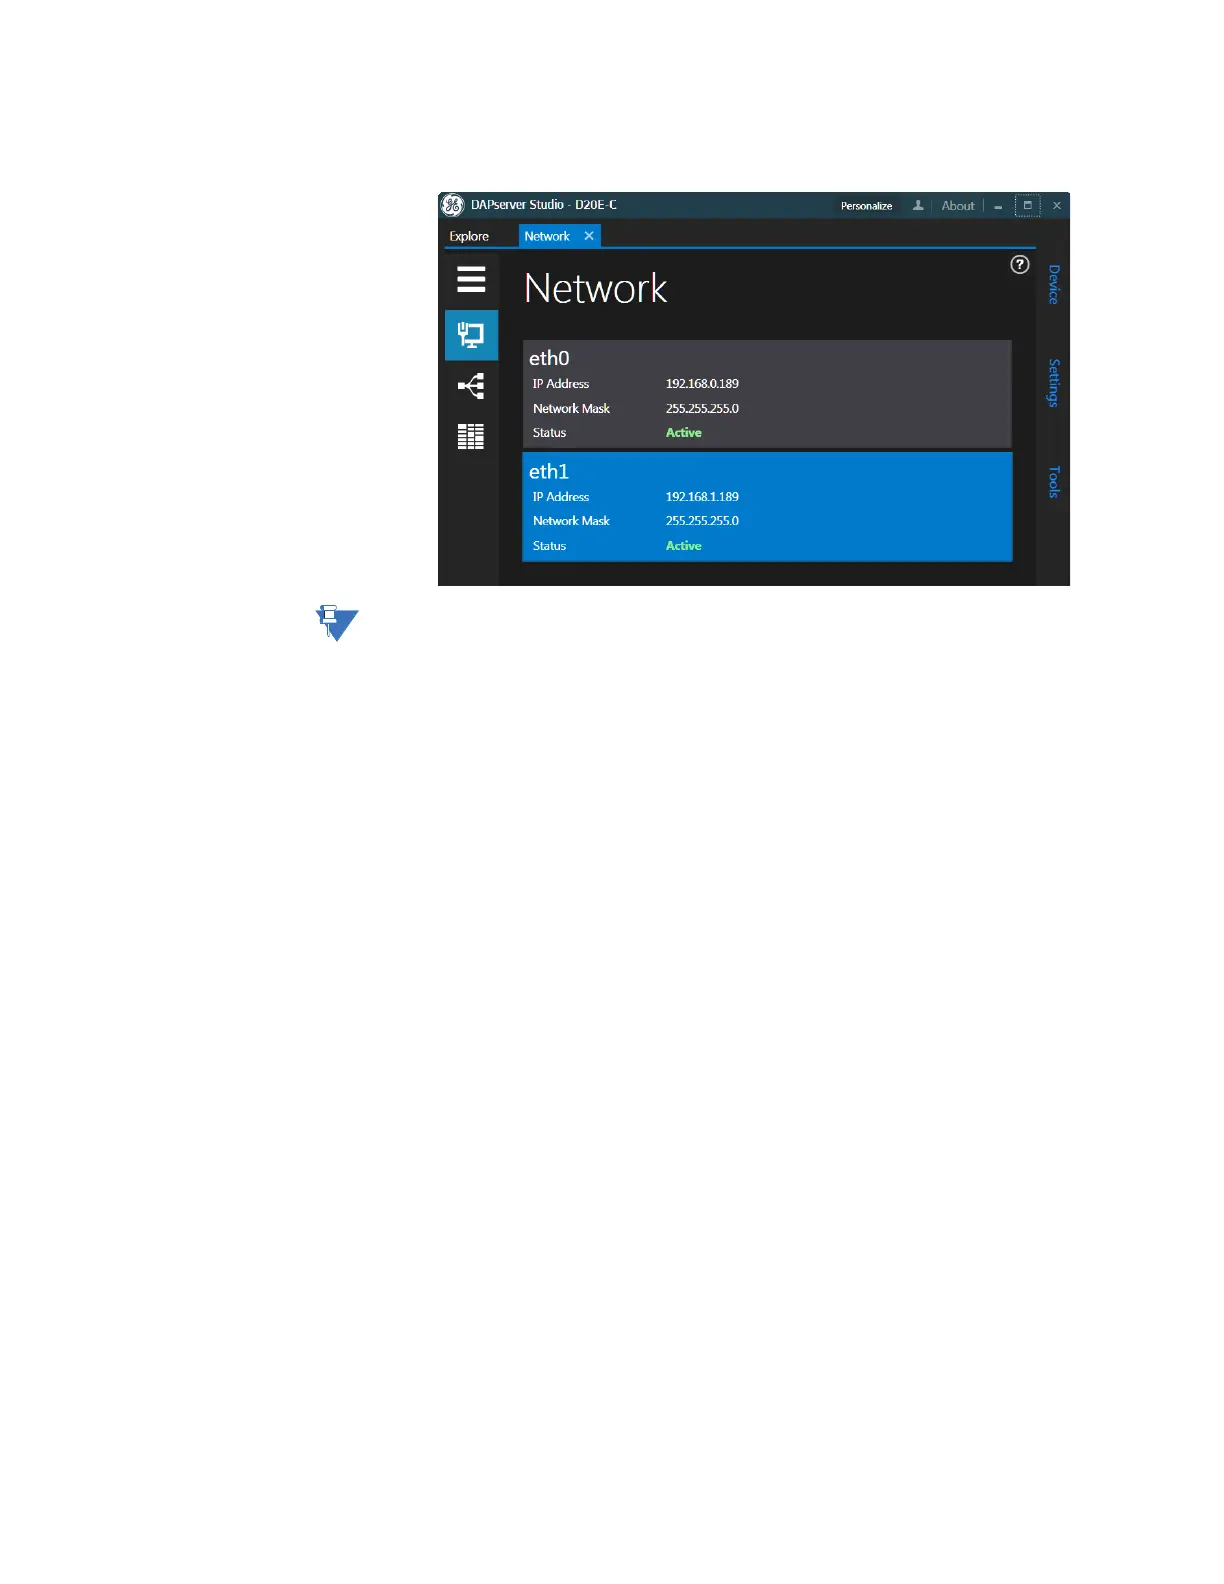
4. Execute the ifconfig Linux command to check the current IP addresses for LAN 1
(eth0) and LAN 2 (eth1).
The file name is ifcfg-eth0.
5. Change the directory with command CD /etc/sysconfig/network-scripts/.
6. Run the standard Linux vi command to open the file: vi ifcfg-eth0.
7. Edit eth0 with a new IP address; for example, 192.168.0.189 (or obtain an IP address
from your network administrator):
7.1. Open edit mode; press “i” (insert) and navigate with the arrow keys.
7.2. Change the IP Address.
7.3. Press Esc to exit insert mode.
7.4. Type “:” [Shift + ;].
7.5. Enter one of the following commands.
– wq command to write and quit (save changes)
– q! command to discard changes and quit
7.6. Exit the file by pressing Enter.
8. Repeat step 6. and step 7. for eth1 using the ifcfg-eth1 command.
9. Save the change.
10. Run the ifconfig command again to check that the IP addresses have changed as
expected.