25
Note: Changes are saved automatically saved when you move
between TAB menus.
6. The menus are displayed with options in the left-hand column and settings
in the right hand column. A cursor (highlighted menu) can be moved
using the Direction buttons
.
7. Press the [-, +] buttons to change the value or select options. By mouse,
use the scroll wheel.
8. Press the OK button to exit a menu and save changes.
Press CANCEL to exit a menu without changes.
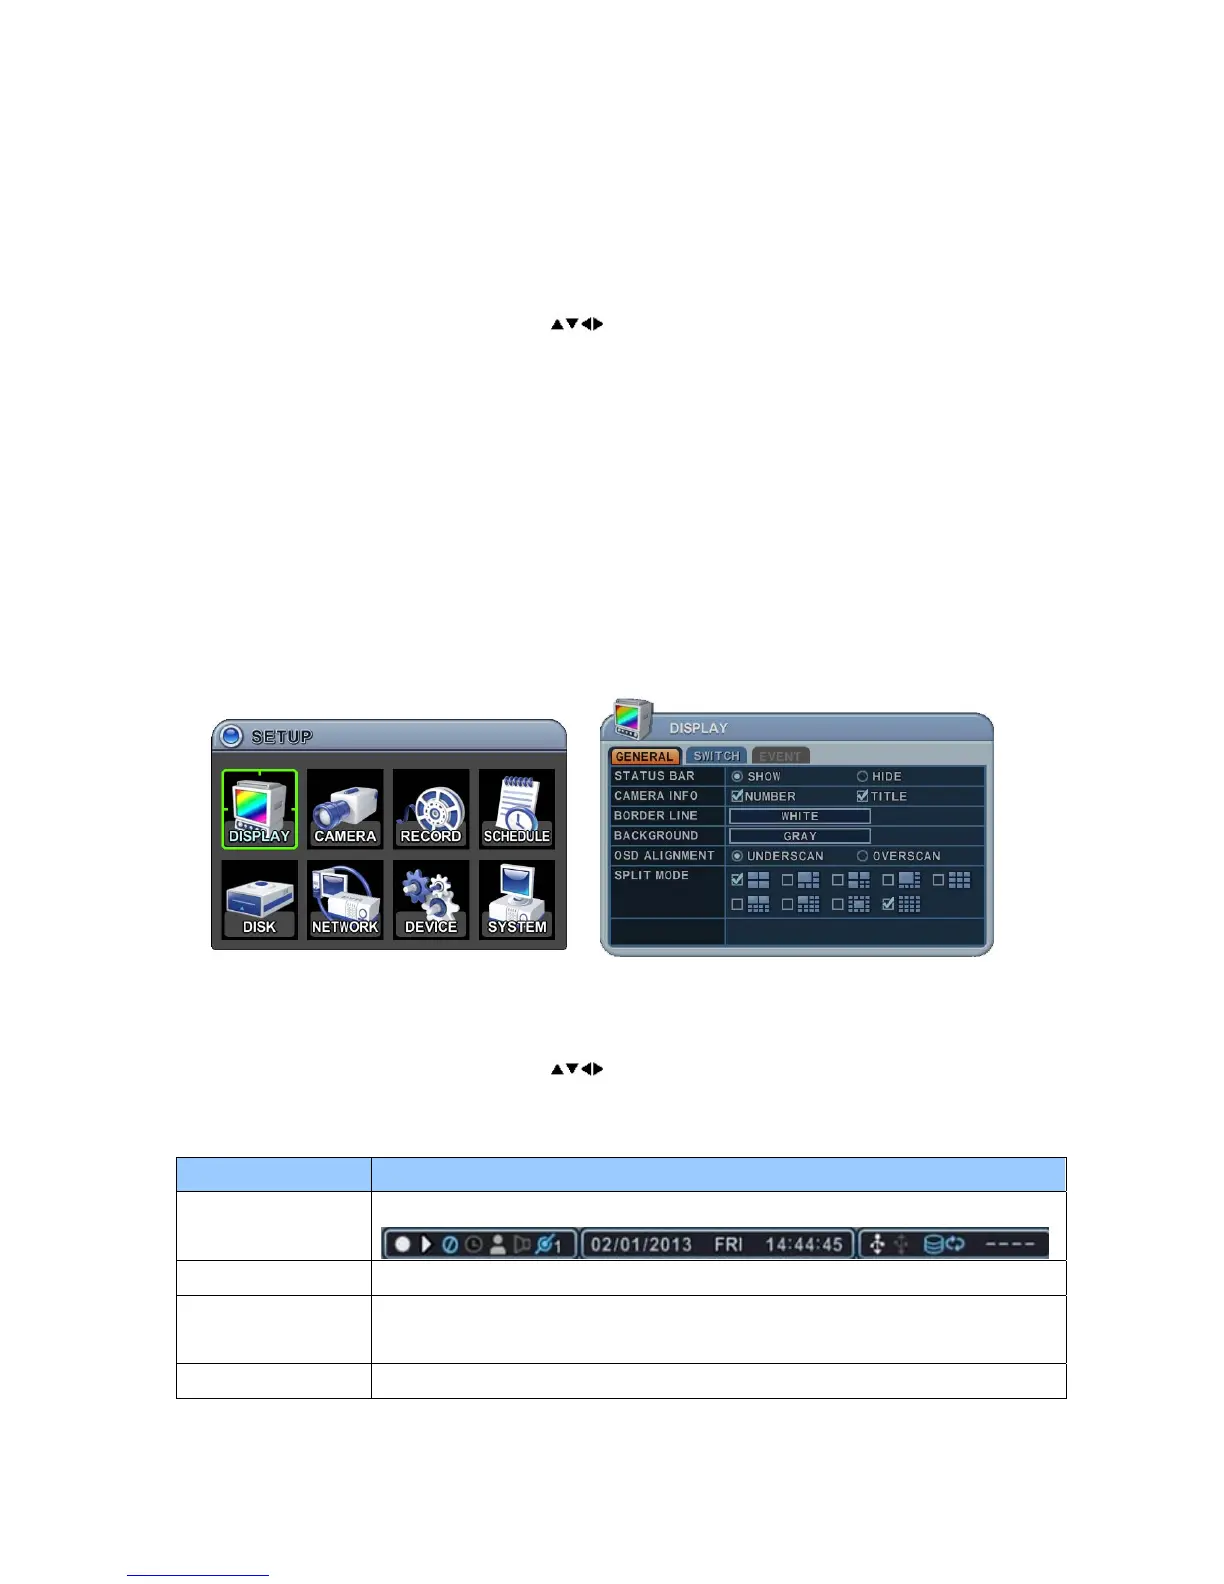
VI. SETUP
1. DISPLAY
1.1. General
1. The menus are displayed with options in the left-hand column and settings
in the right hand column. A cursor (highlighted menu) can be moved
using the Direction buttons
.
2. Change the options shown below using the [DEC/INC] buttons.
ITEM ADJUSTMENT
STATUS BAR
y Select “Show” or “Hide” the status bar on the Main Monitor.
CAMERA INFO y Select On Screen Display information for Camera Number and Title.
BORDER LINE
y Select the Border Line colour between cameras.
GREY Æ WHITE Æ BLUE Æ BLACK Æ DARK GREY
BACKGROUND y Select the Background colour on NO VIDEO status.