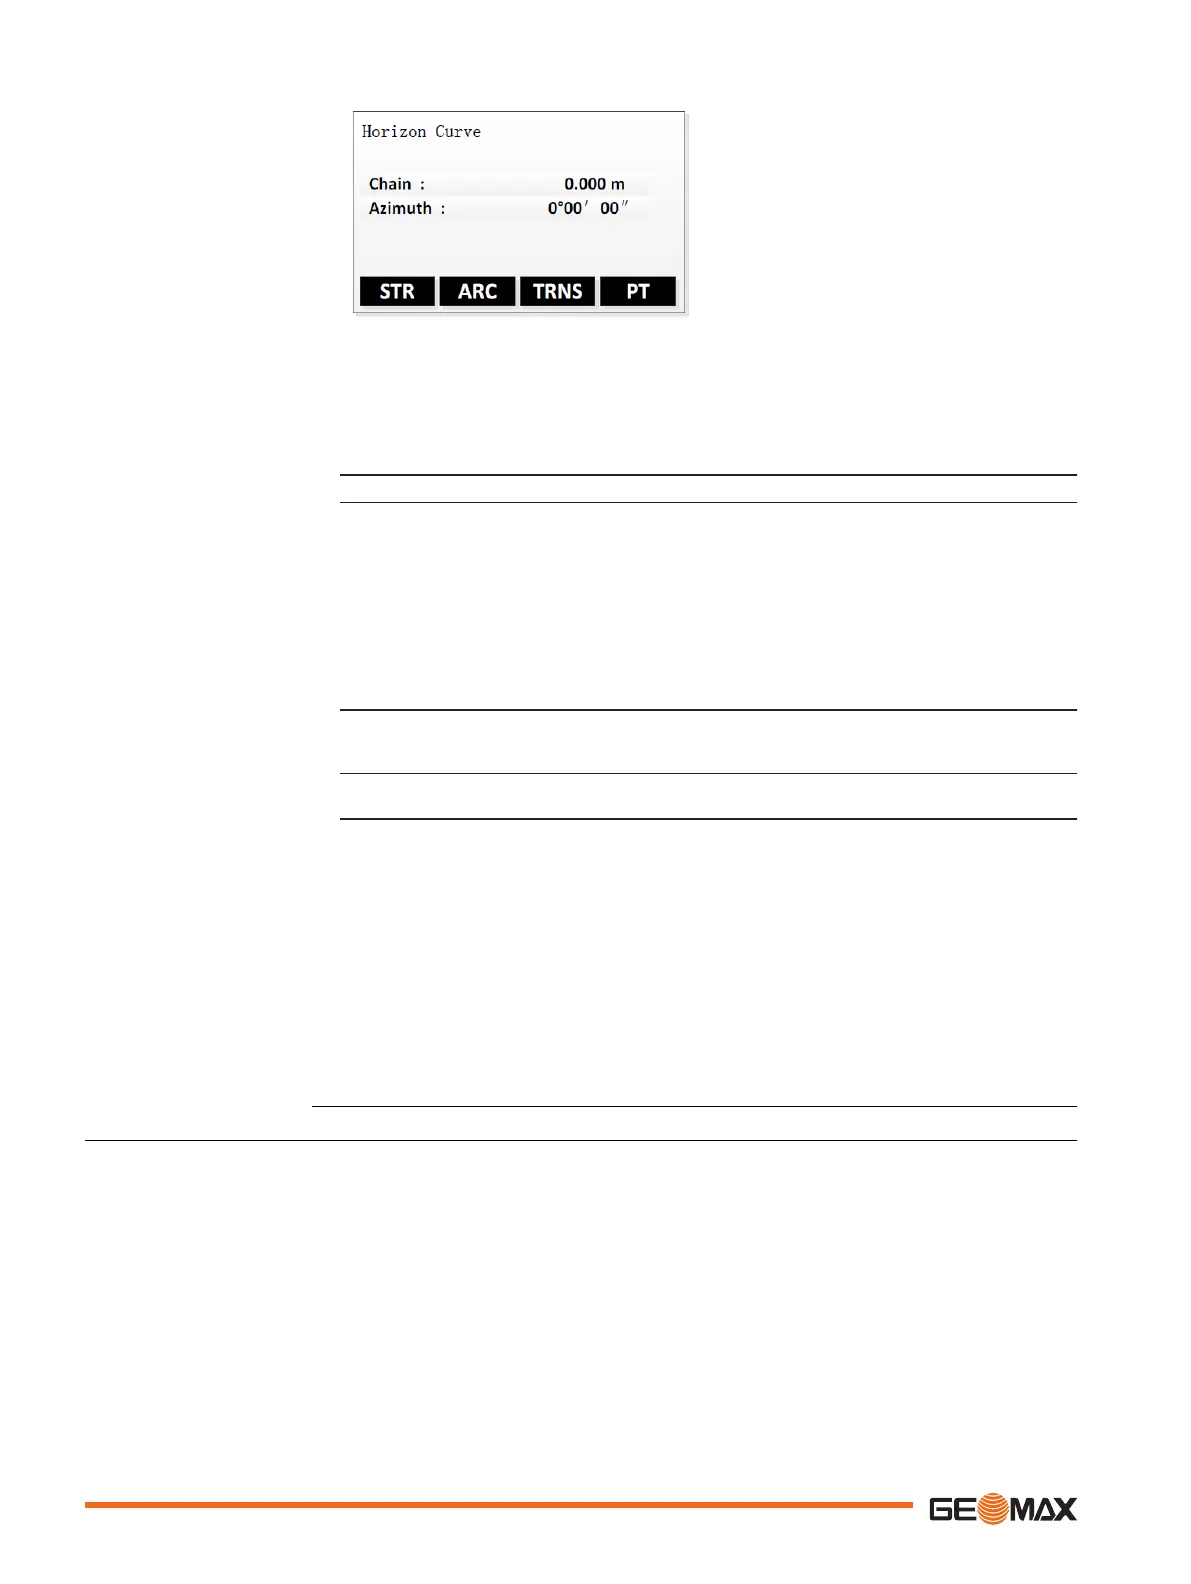
STR To add a straight line.
ARC To add a circular curve.
TRNS To add a transition curve.
PT To add a curve using the intersec-
tion method.
Step-by-Step
☞
When accessing HC list from Road menu, the currently defined road elements are
displayed in the "HC list" screen.
For each element, the type and the Northing coordinate are displayed.
1. To add road elements for horizontal curve, press Add.
2. The "Horizon Curve" screen displays the current chainage and azimuth.
•
To add a straight line, press STR.
Enter azimuth and distance. Press OK.
•
To add a circular curve, press ARC.
Enter radius and length. Press OK.
•
To add a transition curve, press TRNS.
Enter radius and length. Press OK.
•
To add a curve using the intersection method, press PT.
Enter Northing and Easting coordinates of the intersection point, the curve
radius and values for A1 and A2. Press OK.
☞
If there is no start point defined, the screen "Define start Pt" is displayed before you
can add any other element.
Enter chainage, Northing and Easting coordinates. Press OK.
3. Add as many elements as desired.
To return to the "HC list" screen, press the ESC key.
"HC list" screen
•
To select a road element, press the UP/DOWN keys.
•
To view details of the selected road element, press View.
-
To return to the "HC list" screen, press the ESC key.
-
To edit the data of the road element, press Edit.
-
To view details of the previous road element, press PREV.
-
To view details of the next road element, press NEXT.
•
To delete a selected road element, press Delete.
A start point cannot be deleted.
Next step
To save the entered road data and return to the road menu, press Save or the ESC key.
9.9.4 Vertical Curve Definition
A vertical curve consists of several intersection points, 30 at maximum. An intersection point is
defined by chainage, elevation and curve length. The curve lengths of start point and last inter-
section point must be zero.
Description
72 Application
 Loading...