User Manual
Page 83
[Backup Procedure]
1. Select [Connect Test] to test the status to DVR connection.
When network connection is successful, “Success Connect Test!“ message will appear in the message box.
2. Select [Lock] to get the record start/End time of DVR.
It will automatically update information every 10 seconds, or click Update button for immediate update.
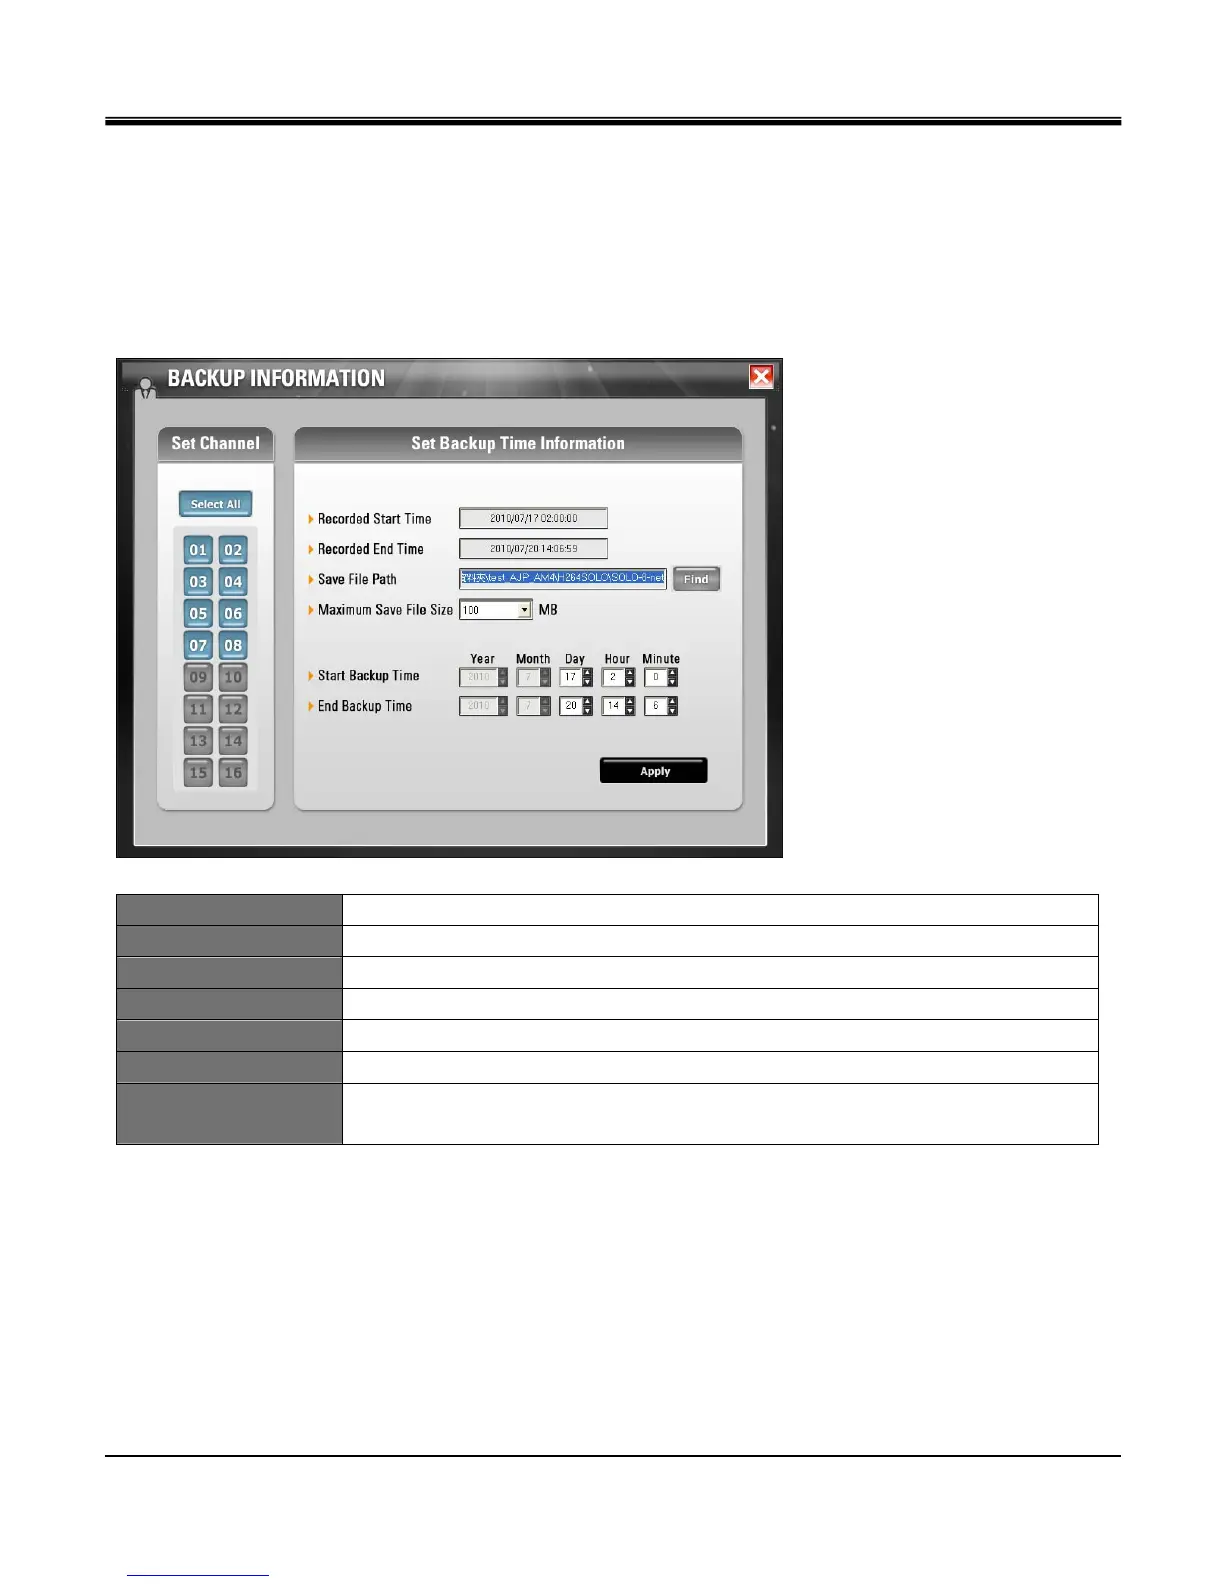
3. Click Set Backup Time button and set Start Time, End Time, Save File Path, File Size, and click Apply button.
Recorded Start Time Start time of recorded data on HDD at the time of clicking LOCK button.
Recorded End Time End time of recorded data on HDD at the time of clicking LOCK button.
Save File Size Configuring path for local PC that will retain the recorded information.
Maximum Save File Size Split file size into 10MB,50MB,100MB,150MB, 200MB ~ 700MB.
Start Backup Time Set start time of data to backup.
End Backup Time Set end time of data to backup.
Set Channel
Click SELECT ALL button to backup all channels, or select each channel to backup by
clicking the channel number (Grey: Off Blue: On)
4. Select [Start Backup] to active the backup function (User can stop anytime during backup)