COMPUSHIFT II Manual – COMPUSHIFT II Manual
•
•
•
•
•
•
•
•
•
•
•
•
•
•
3 Installation
Here is the sequence of steps for installation of COMPUSHIFT II.
Mount the Controller(see page 22)
Install the Transmission Harness(see page 22)
Install the Power & Engine Harness(see page 25)
Install or Connect a Throttle Position Sensor(see page 27)
Install the AccuLink TPS (Optional)(see page 27)
Install the Cable-Operated TPS (Optional)(see page 34)
Install the EFI TPS Adapter Harness (Optional)(see page 36)
Install the Switch-Shift Wiring Harness (Optional)(see page 37)
Install the A-B Mode Switch (Optional)(see page 39)
Install the Overdrive Cancel Switch (Optional)(see page 40)
Install the Manual TCC Switch (Optional)(see page 41)
Connect the Display(see page 42)
Checkout and Testing(see page 42)
Calibrate the Throttle Position Sensor(see page 42)
3.1 Mount the Controller
Look inside your passenger compartment and decide where to mount the COMPUSHIFT II controller. It needs to be
in a dry, cool, secure location -- the farther away from a heater outlet, the better. This photo shows the controller
vertically mounted on an under-dash kick panel, an ideal spot.
You can also mount the controller on the floor pan or under a seat – provided there's at least 1" of clearance and
free-flowing air around it. Make sure the engine exhaust system is not heating the spot where you plan to mount it.
Carefully consider the mounting location. The unit isnot waterproofso never mount the controller in the
engine compartment. Extreme shock and vibration, high temperature, or high input voltage can damage the
unit.
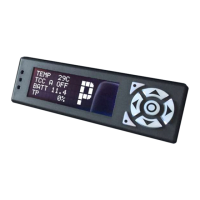
You will be able to use the Display to conveniently make adjustments to COMPUSHIFT II at your convenience,
so go ahead and mount the controller.
3.2 Install the Transmission Harness
Once you have selected a place to mount the COMPUSHIFT II Controller as explained on the page, Find & Mount the
Controller(see page 0), it's time to decide where to route the Transmission Wiring Harness.
When mounting the controller, please use only the unit's built-in flange (projected edge). Occasionally
clients will try makeshift methods, like hanging it from cable ties or wrapping the unit in foam and tossing
it under the seat. Don't do anything like this!
The COMPUSHIFT II controller is a sealed assembly. Do not open the controller case – this will void the
warranty!

 Loading...