User Manual of Digital Video Recorder
71
2. Click the Record tab, select the camera for schedule settings, and then check the checkbox of Enable
Schedule.
There are two ways to configure the record schedule for the selected camera.
Task 1: Edit the Schedule
Steps:
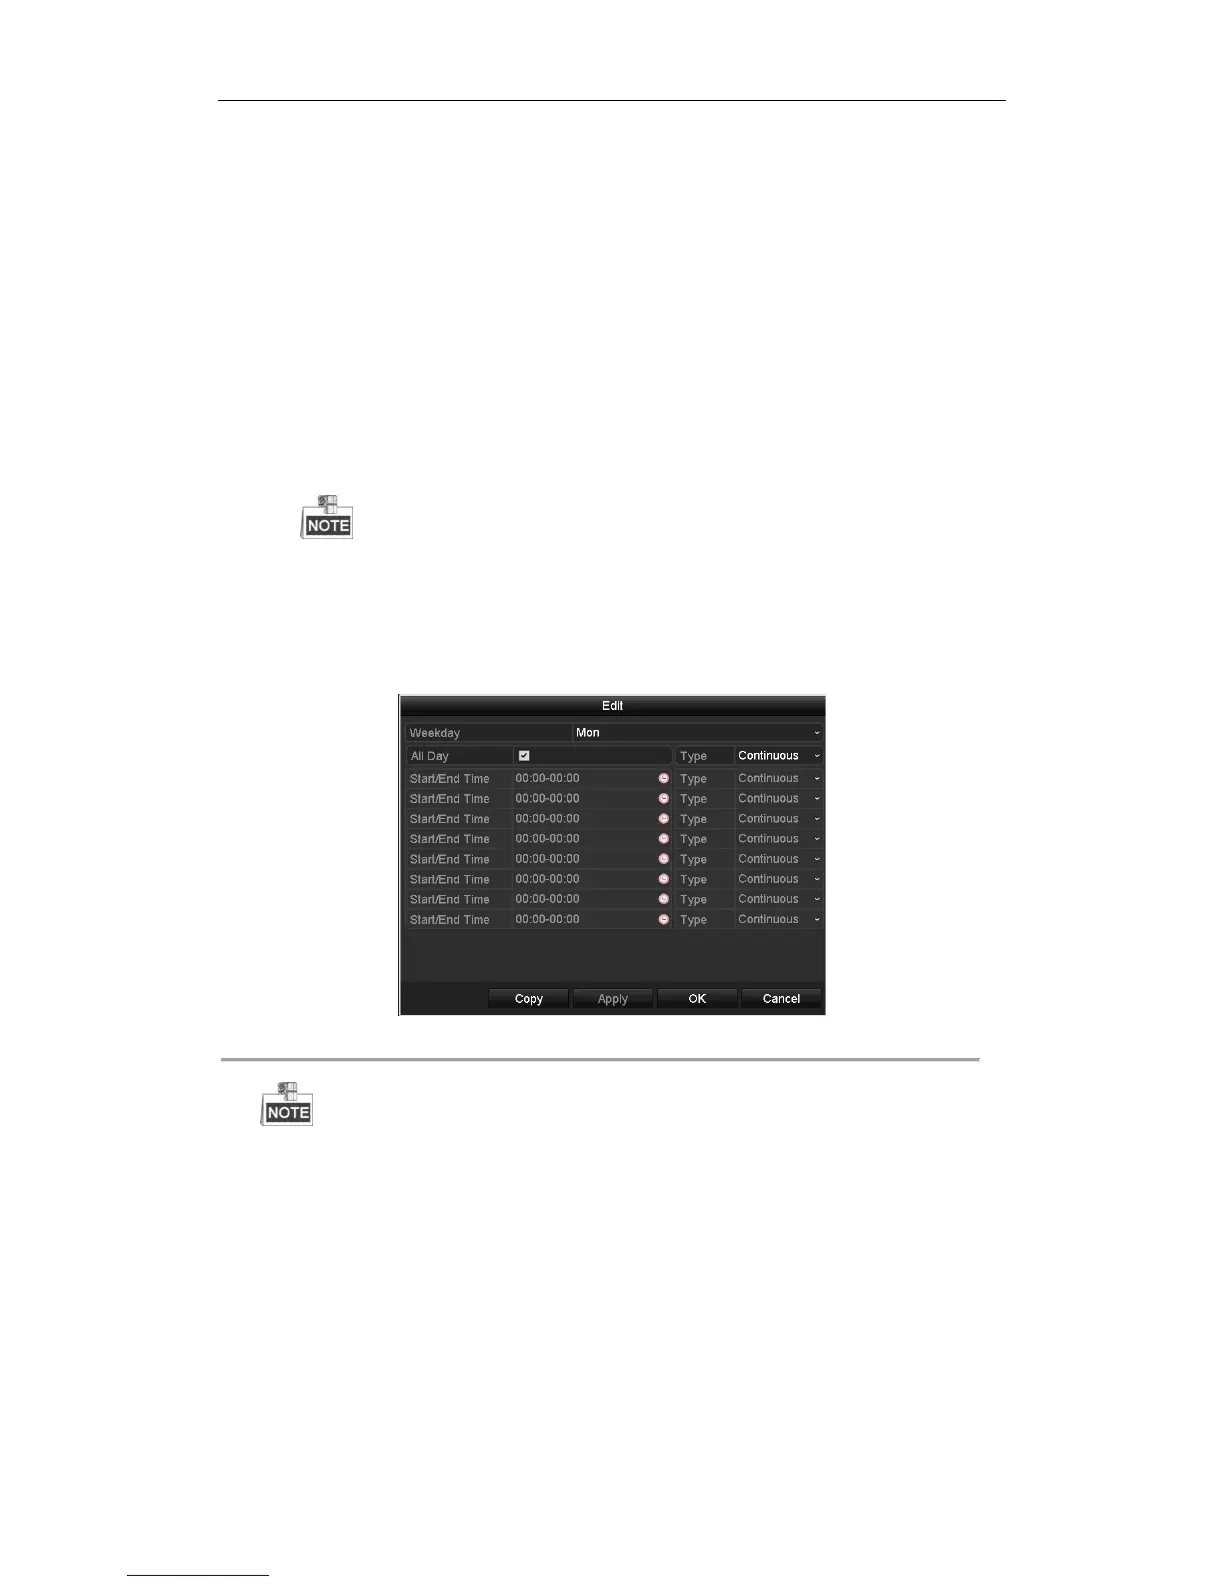
1) Click Edit.
2) In the message box, you can choose the day which you want to set schedule.
3) To set an all-day recording for the schedule, check the checkbox of All Day, and then select the
recording type from the drop-down list, including Continuous, Motion, Alarm, Motion | Alarm, Motion
& Alarm and VCA.
4) To set recording for different time periods, leave the checkbox of All Day blank, specify the start / end
time, and then select the recording type for the corresponding time period.
Up to 8 time periods can be configured for each day. And the time periods cannot be overlapped
each other.
5) Repeat the above steps 3)-4) to schedule recording/capture for other days in the week. Optionally, you
can also click Copy and copy the current schedule settings to other days.
6) Click OK to save settings and exit.
Figure 5. 11 Edit the Schedule
The Holiday option is available when you enable holiday schedule in Holiday settings. Refer to
Chapter 5.7 Configuring Holiday Record and Capture.

 Loading...