121
_____________________________________________________________________________________________
9.2 Setup for Printer
______________________________________________________________________________________________
1
2
3
4
5
6
7
8
9
10
11
12
13
14
15
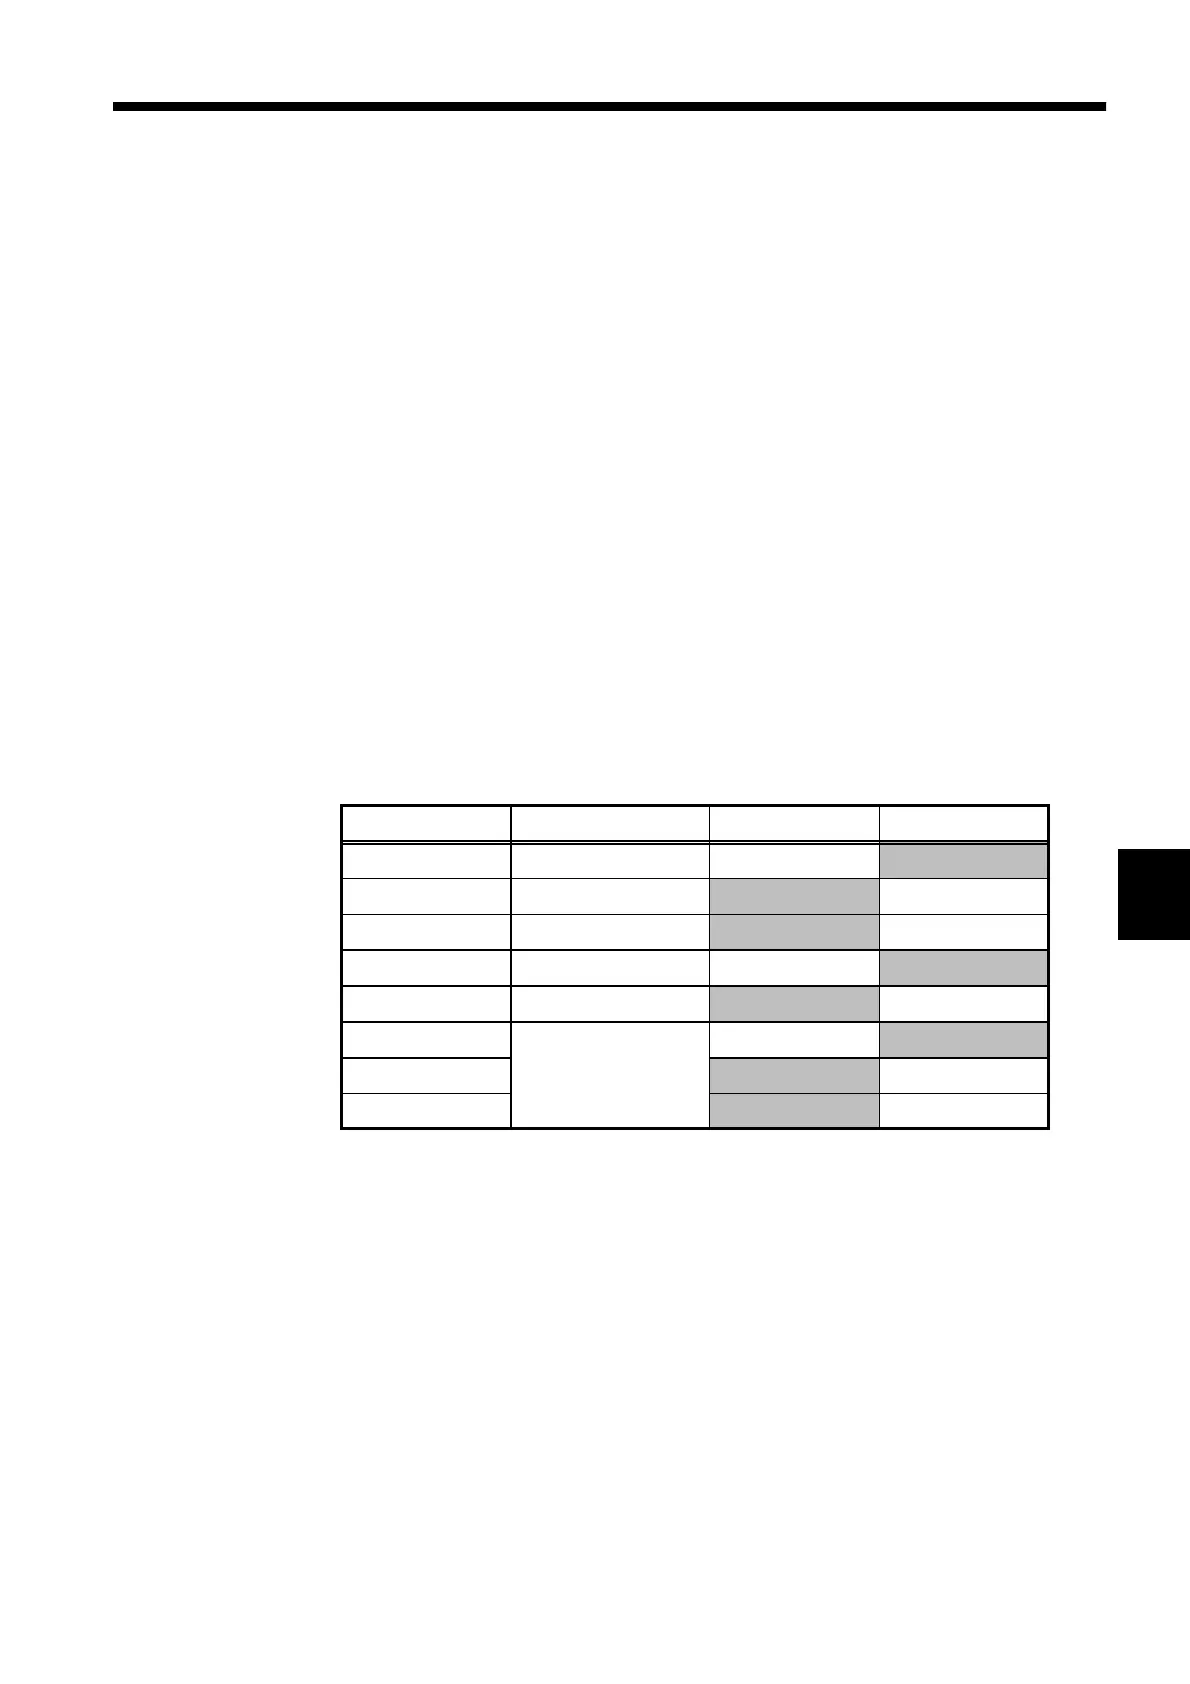
Switch NO. Function ON (ON LINE) OFF (FEED)
1 Input system setup parallel serial
2 Print speed High Low
3 Auto loading Enabled Disabled
4 Function LF+CR CR
5 Setup command Enabled Disabled
6
Print density
(Set to 100%)
OFF
7 ON
8 ON
9.2 Setup for Printer
Change the software DIP SW settings of the 9442 printer to allow use of the
printer with this unit.
1
. Switch off the 9442 PRINTER.
2
. Press and hold down the ON LINE switch while switching on the printer
once again. Release when the printer begins printing.
3
. The printer prints out the current settings. When printing is complete, it
will query as follows: Continue?: Push
*
ON-line SW
*
, Write?:Push
*
paper
Feed SW
*
.
4
. Press the ON LINE switch.
5
. The printer prints DIP SW-1 and prepares for setup of the software DIP
SW1. Set switch Nos. 1 through 8 for DIP SW1, in this order, as
indicated in the table below. The dark grey boxes indicate the settings to
be used with the 3237/38/39.
Software DIP SW1
To set a switch to ON, press the ON LINE switch once.
To set a switch to OFF, press the FEED switch once. Each pressing of a
switch prints your input, allowing you to check the result of the input. If you
make a mistake in setup, go back and start from step 1. After completing
setup for switch No. 8, you will again be prompted to answer, as follows:
Continue?: Push*ON-line SW*, Write?:Push*Paper feed SW*.
6
.Asin
4
and
5
, enter settings for switch Nos. 1 through 8 for DIP SW2
and DIP SW3.