6. CHECKUP AND MAINTENANCE
6-28
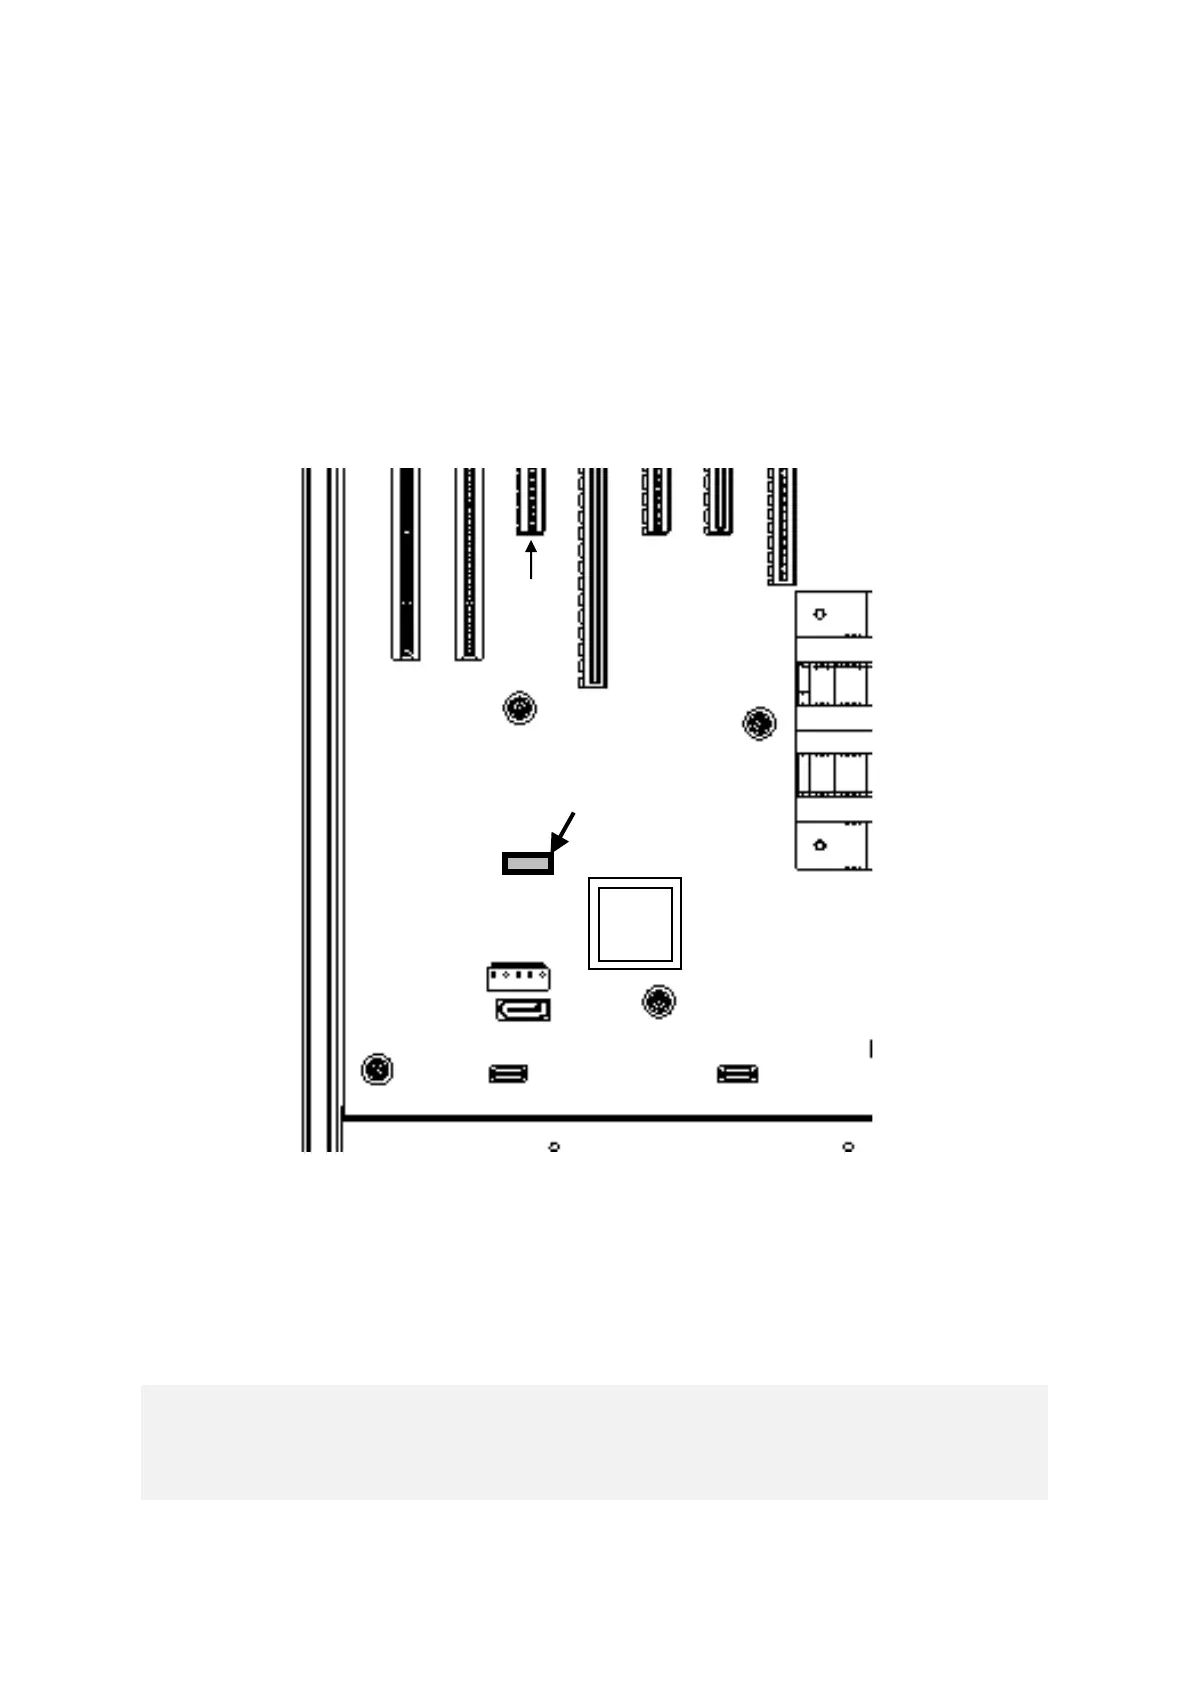
(2) Removing a jumper socket
[1] Follow the instructions in “6.3.3 Installing and removing the cover of the equipment”
to remove the cover of the equipment.
[2] When removing the jumper socket, follow the instructions in “6.3.4 Installing and removing
an extension board” to remove an extension board if the extension board is interfered with
the work.
[3] Remove the jumper socket from the JP2 pin. (The JP2 pin is located on the straight line of
the slot 5 connector.)
Figure 6-17 Removing a Jumper Socket
(3) Attaching a jumper socket
Follow the procedure described in “(2) Removing a jumper socket” in reverse to attaching
the jumper socket.