● Wear cotton gloves when replacing a drive in order to prevent failure caused by
static electricity. If you do not, the data stored on the drive may get corrupted.
● Make sure you check the correct procedure before you start the work. If you do not
follow the correct procedure, the data stored on the drive may be lost.
● Do not use a used drive, regardless of the model, as a replacement drive.
Failure to heed this instruction might result in the equipment not operating normally
or data in the drive being lost due to inconsistent configuration information.
● Do not replace the two drives at the same time. If you do, the data gets corrupted.
● When you replace a drive, make sure that you set the drive into the offline mode in
the Hardware status window, and then remove that drive and mount the
replacement drive. If you mount or remove a drive when the hardware status cannot
be checked, for example, immediately after the OS starts, a failure may result.
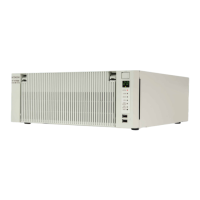
A drive is a replacement component that must be replaced periodically. (For information about
the recommended replacement cycle, see "APPENDIX HANDLING REPLACEABLE
COMPONENTS ".) Follow the procedure below for periodic replacement.
(1) If you replace the drive while the power to the equipment is turn off
1. Back up the data.
(See “(2) Backing Up Files” in “4. HARD DISKS DRIVES (HDDs)” in
“PRECAUTIONS”.)
2. Shut down the OS. Unplug the plug of the power cord from the outlet, and wait for at least
one minute. Then replace the drive mounted in drive bay 1 with a replacement drive. (See
"6.3.6 Installing and removing an HDD".)
3. Turn on the power to the equipment. Then the RAID controller automatically detects that
the replacement drive is mounted and starts the rebuild process. Confirm that the HDD1
status lamp is flashing.
4. The OS starts while the rebuild process is continuing. The time it takes to rebuild depends
on the application being run during the rebuild. For this reason, refrain from running
applications until the rebuild finishes. If you do not want to start the OS, turn on the
equipment and then, while the system initialization message is displayed, press the F2 key
to launch the BIOS setup menu.
5. When the HDD1 status lamp turns off, the rebuild process is complete. Also, in the
Hardware status window, confirm that both drives are healthy. If you launched the BIOS
setup menu in step 4, open the higher-level menu Exit, move the cursor to Exit Saving
Changes, and then press Enter. The message “Save configuration changes and exit now?”
is displayed. Press Enter to restart the equipment.