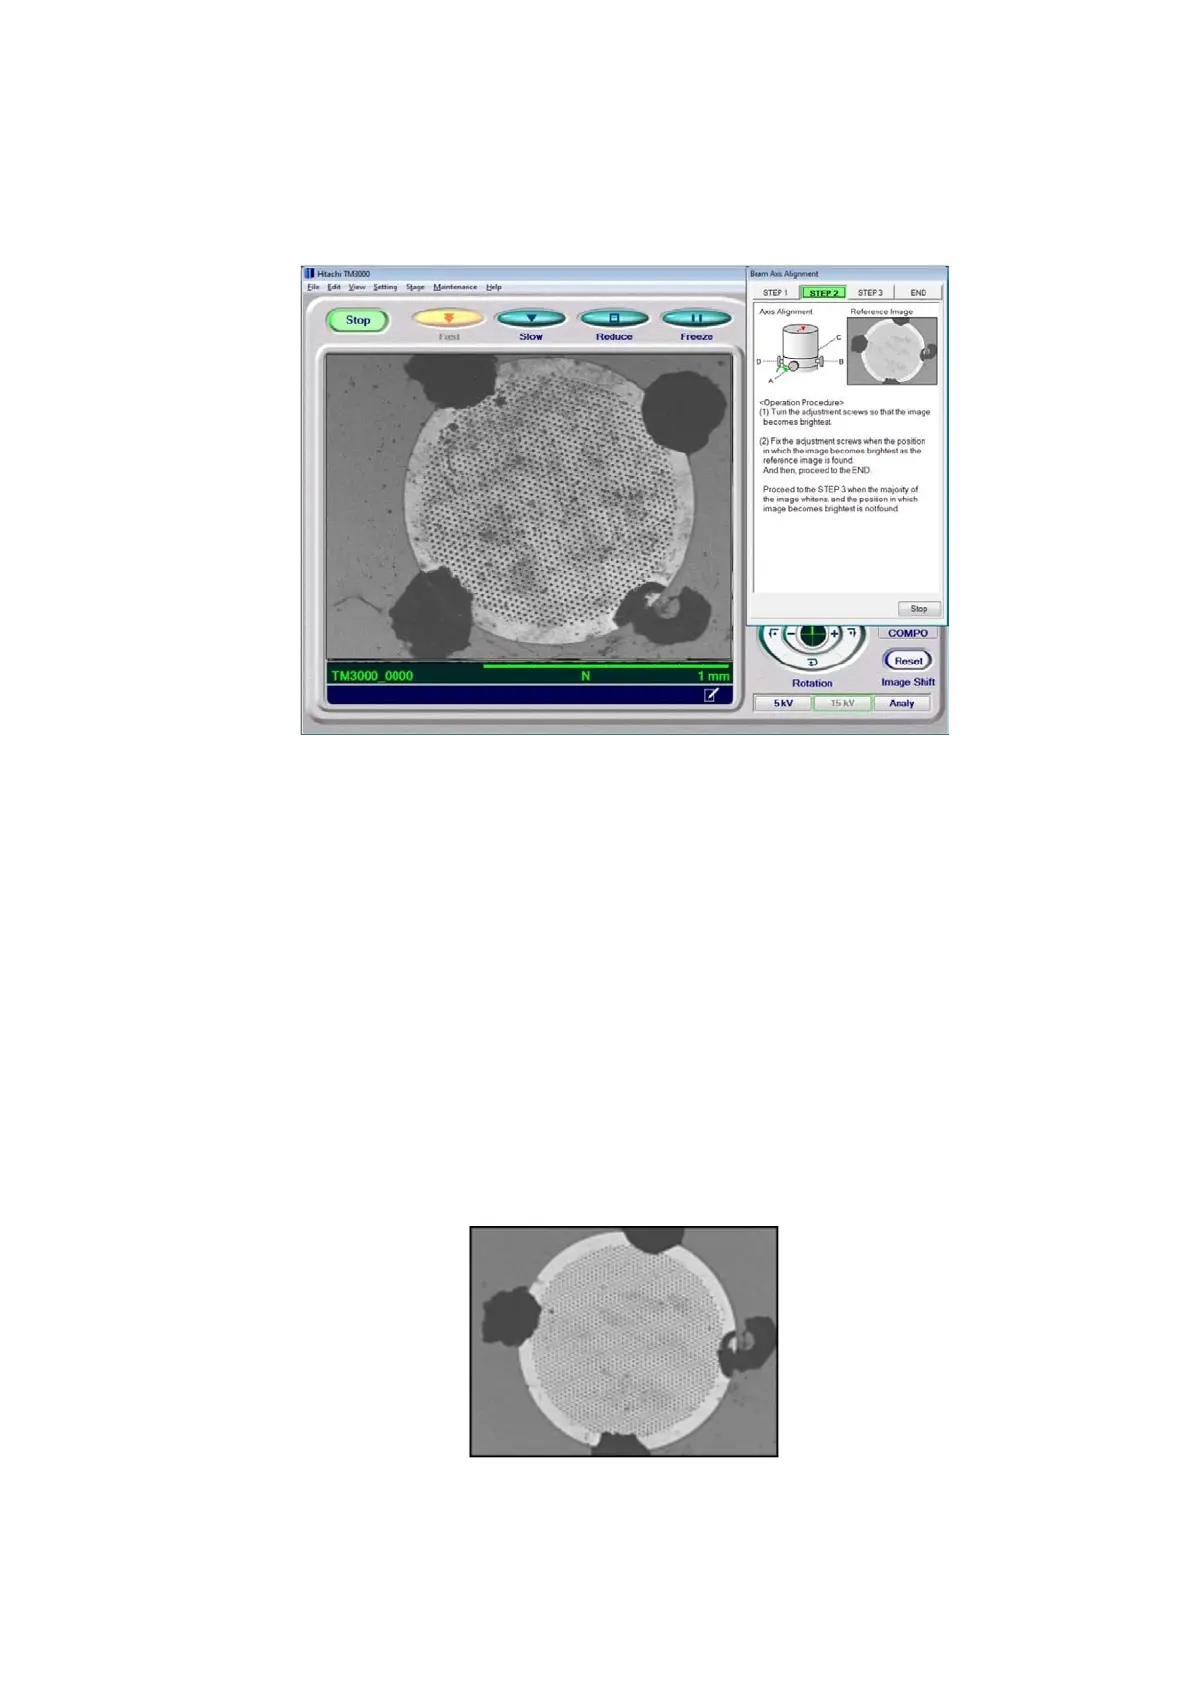
5 - 15
5. Beam Axis Adjustment STEP 2 Turn the four axis adjustment knobs, A, B, C, and D,
for the electron gun to move the electron gun, and adjust it so that the window will be the
brightest.
Figure 5.2-12 Beam Axial Adjustment STEP 2
5a. In a manner similar to STEP 1, adjust the axis so that the image on the observation
screen is the brightest. When the position in which the image on the observation screen is
the brightest is determined, go to Step 2). If a position in which most of the image turns white
cannot be found, click the [STEP 2] tab to return to STEP 2; if the image becomes dark, click
the [STEP 1] tab to perform axis adjustments.
5b. Gently tighten the axis adjustment knob to secure the electron gun. When tightening
the knob, use caution so that the brightness does not change, and tighten the four directional
knobs evenly, a little at a time.
5c. Click the [END] tab.
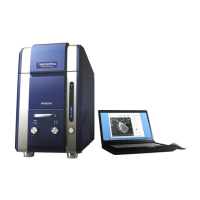
Figure 5.2-13 STEP 2 Reference Image