5 - 26
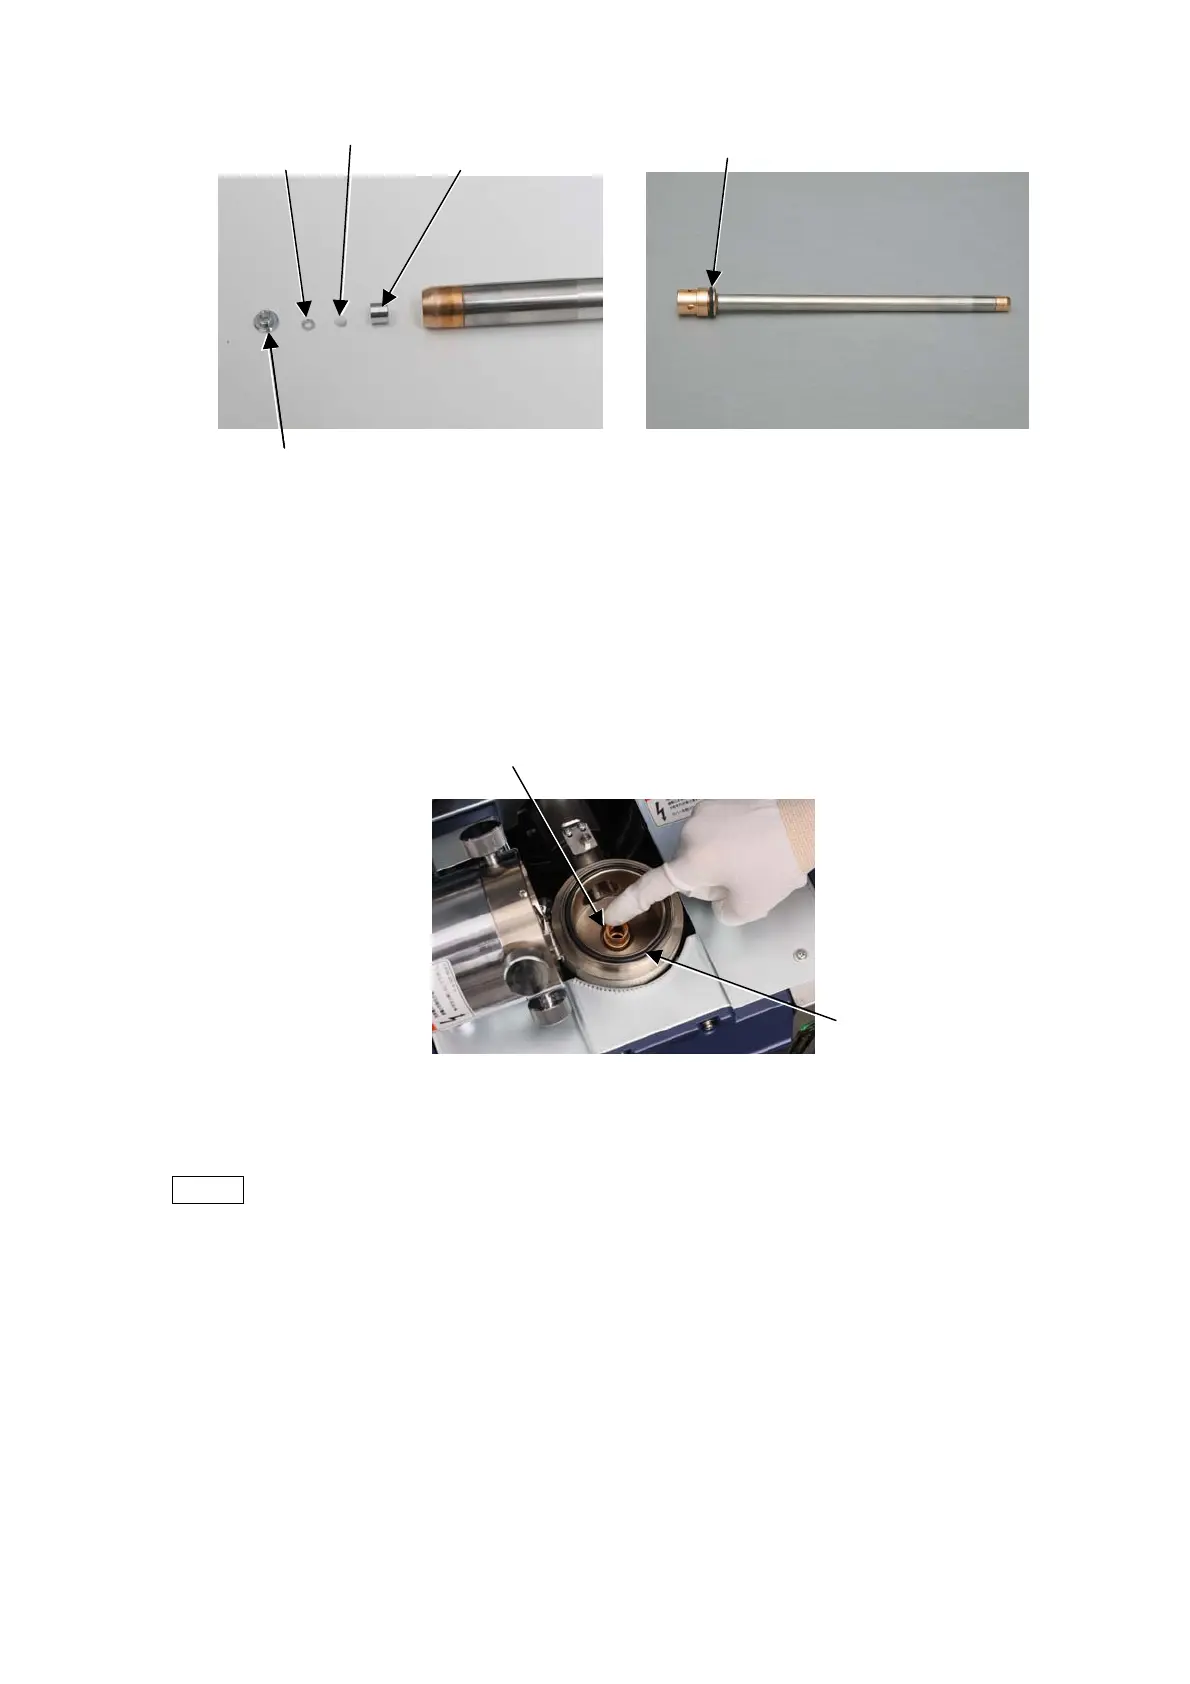
Figure 5.4-7 Figure 5.4-8 Liner Pipe
Objective Aperture Unit and Liner Pipe
8. Install the liner pipe.
Insert the liner pipe into the hole from which it was pulled out, and with fingers push it all the
way in.
Figure 5.4-9 Installing a Liner Pipe
NOTE
: If the liner pipe is not pushed all the way in, the anode cannot be fully inserted,
and the EVAC LED (blue) indicator on the front side of the main unit may fail to
light up, and observation cannot be conducted.
Insert the liner tube and attach the anode in the reverse procedure of Section 5.3 Steps 5. - 11. .
Finally, verify that the o-ring is properly fitted into the groove, and close the electron gun.
Press the [EVAC/AIR] switch to conduct evacuation.
After that, with reference to Section 5.2, perform beam axial adjustments.
O-ring
Push it in with finger
Objective aperture
O-ring
Spacer
Stopper
Aperture holder