Affirm Breast Biopsy Guidance System Service Manual
Chapter 4: Calibration Procedures
Page 58 MAN-05754 Revision 002
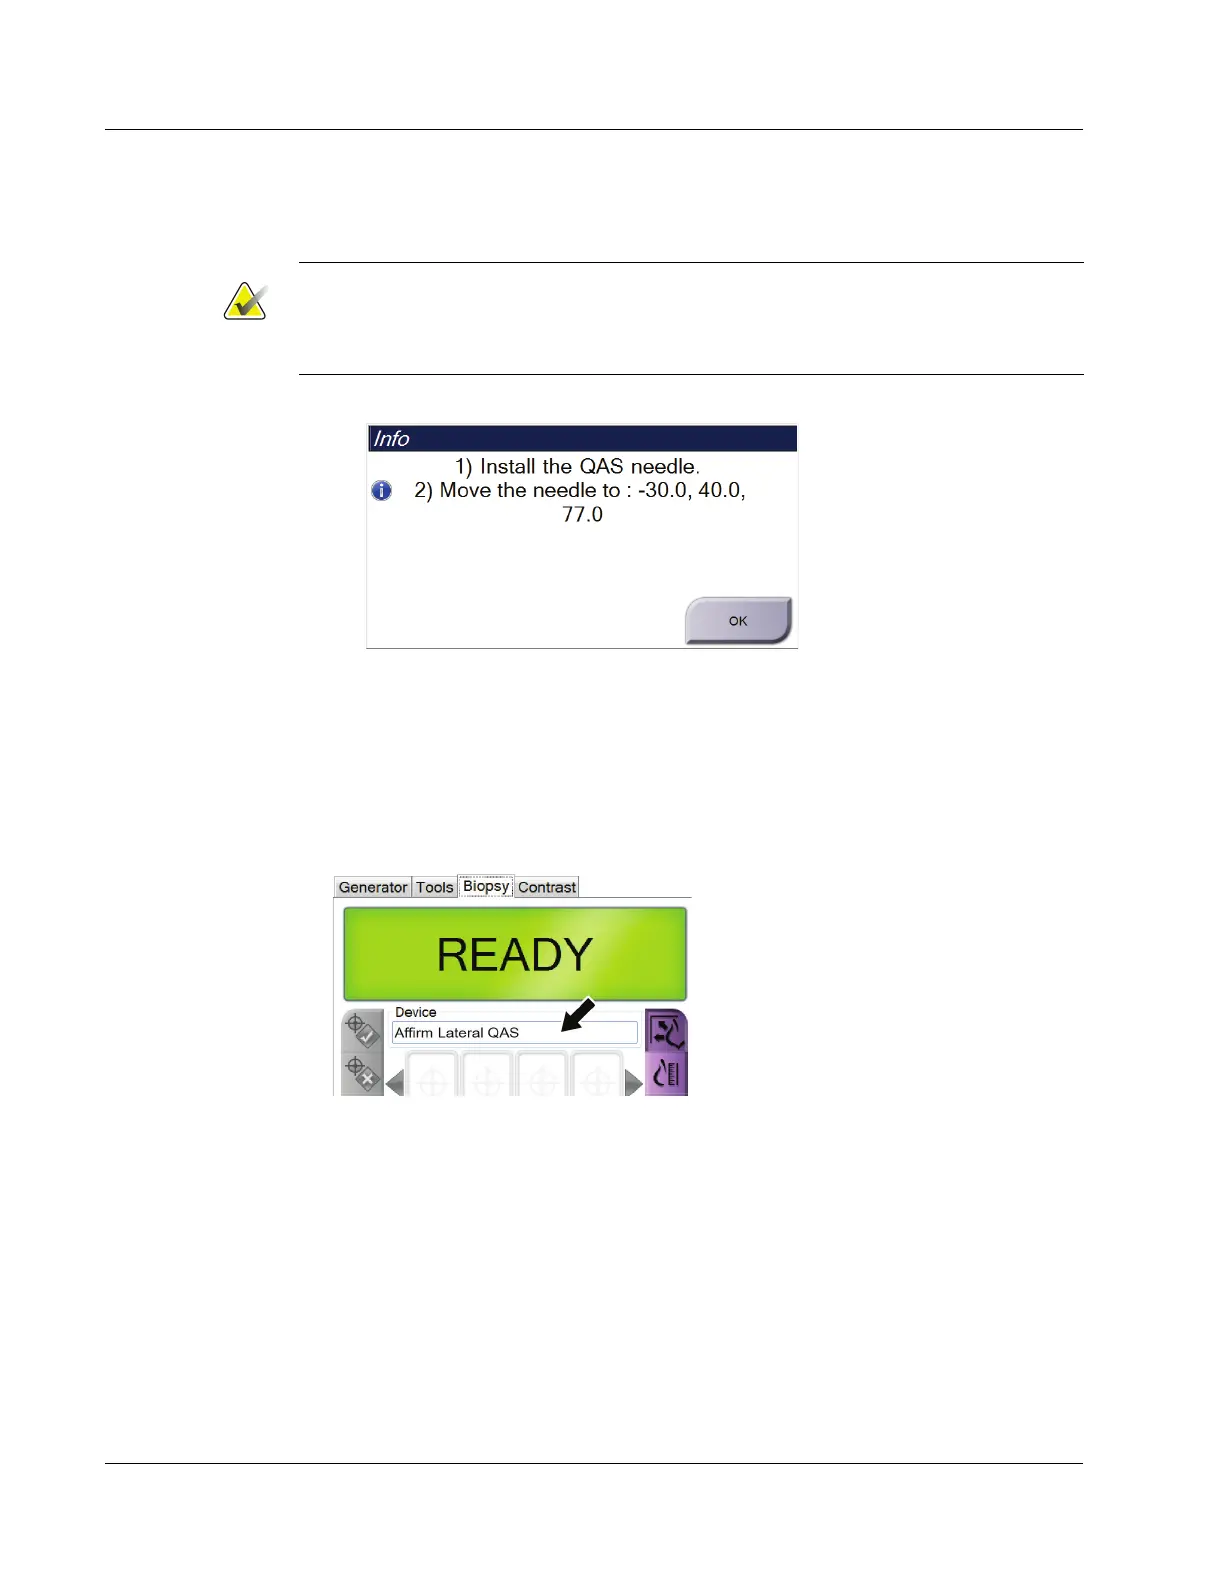
The QAS screen opens. A dialog box prompts you to install the QAS phantom and
shows the position coordinates for the test.
Note
The dialog box says to install the QAS "needle" but is referring to the QAS phantom.
Also, some of the values display as negative, reflecting which side the lateral am is
mounted.
Figure 42: Lateral QAS Test Info Dialog Box
3. Install the Lateral Arm assembly and the Lateral Arm QAS Phantom on the left side
of the Affirm system.
4. In the Info dialog box, select OK.
5. On the QAS screen, select the Biopsy tab. Make sure that Affirm Lateral QAS
appears in the Device field.
Figure 43: Device Field in the Biopsy Tab
6. Press and hold a right or left Motor Enable button pair on the Biopsy Control
Module. The QAS Phantom moves automatically to pre-programmed X and Y
positions.
7. Turn the Biopsy Device Advance/Retract knob until "0.0" displays on the Diff line in
all three columns of the Biopsy Control Module.
8. Move the Lateral Arm carriage assembly to the "Lat X" value shown on the Biopsy
Control Module (normally this value is "100"). Use the top scale on the Lateral Arm
for the values.
9. Select Manual exposure mode, 25 kV, 30 mAs, Rhodium filter in the QAS screen.