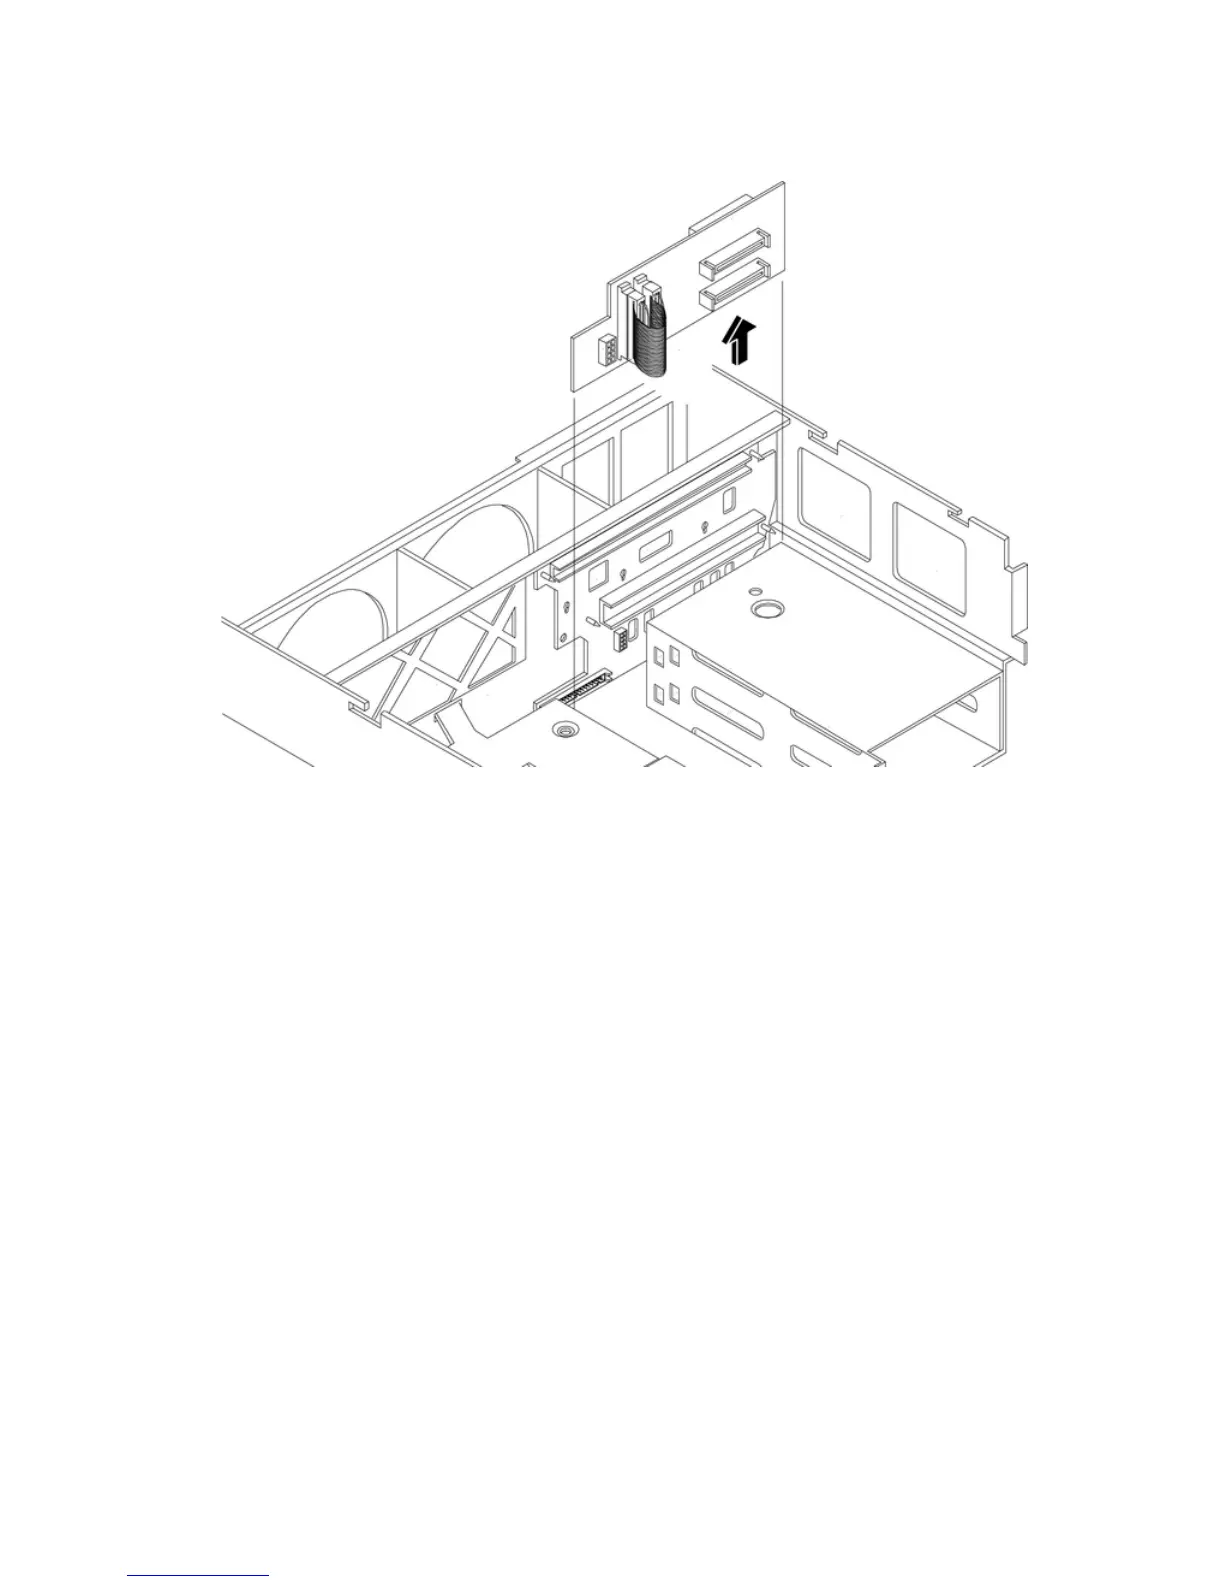
12. Push the SCSI backplane board away from the disk drive cage and lift it up and out of the
chassis. Figure 4-38 shows how to remove the SCSI backplane.
Figure 4-38 Removing and Replacing the SCSI Backplane Board
Replacing the SCSI Backplane Board
To replace the SCSI backplane, follow these steps:
1. Replace the SCSI backplane to the rear of the disk drive cage.
2. Replace the two disk drives into the disk drive cage. See “Replacing a Hard Disk Drive”
(page 77).
3. Plug in the SCSI backplane-to-midplane cable back into the SCSI backplane.
4. Plug in the internal SCSI cable into the SCSI back plane.
5. Replace the processor extender board. See “Replacing the Processor Extender Board”
(page 44).
6. Replace the memory extender board. See “Replacing the Memory Extender Board” (page 38).
7. Replace the top cover. See “Replacing the Top Cover” (page 36).
8. Replace the front cover. See “Replacing the Front Cover” (page 35).
9. Replace the front bezel. See “Replacing the Front Bezel” (page 34).
10. If rack mounted, slide the HP server back into the rack until it stops. See “Inserting the Server
into the Rack” (page 32).
80 Removing and Replacing Components
 Loading...


