Procedure
Step 1 Put on an ESD wrist strap (or ESD gloves) and insert the ground terminal into the
ESD jack in the cabinet.
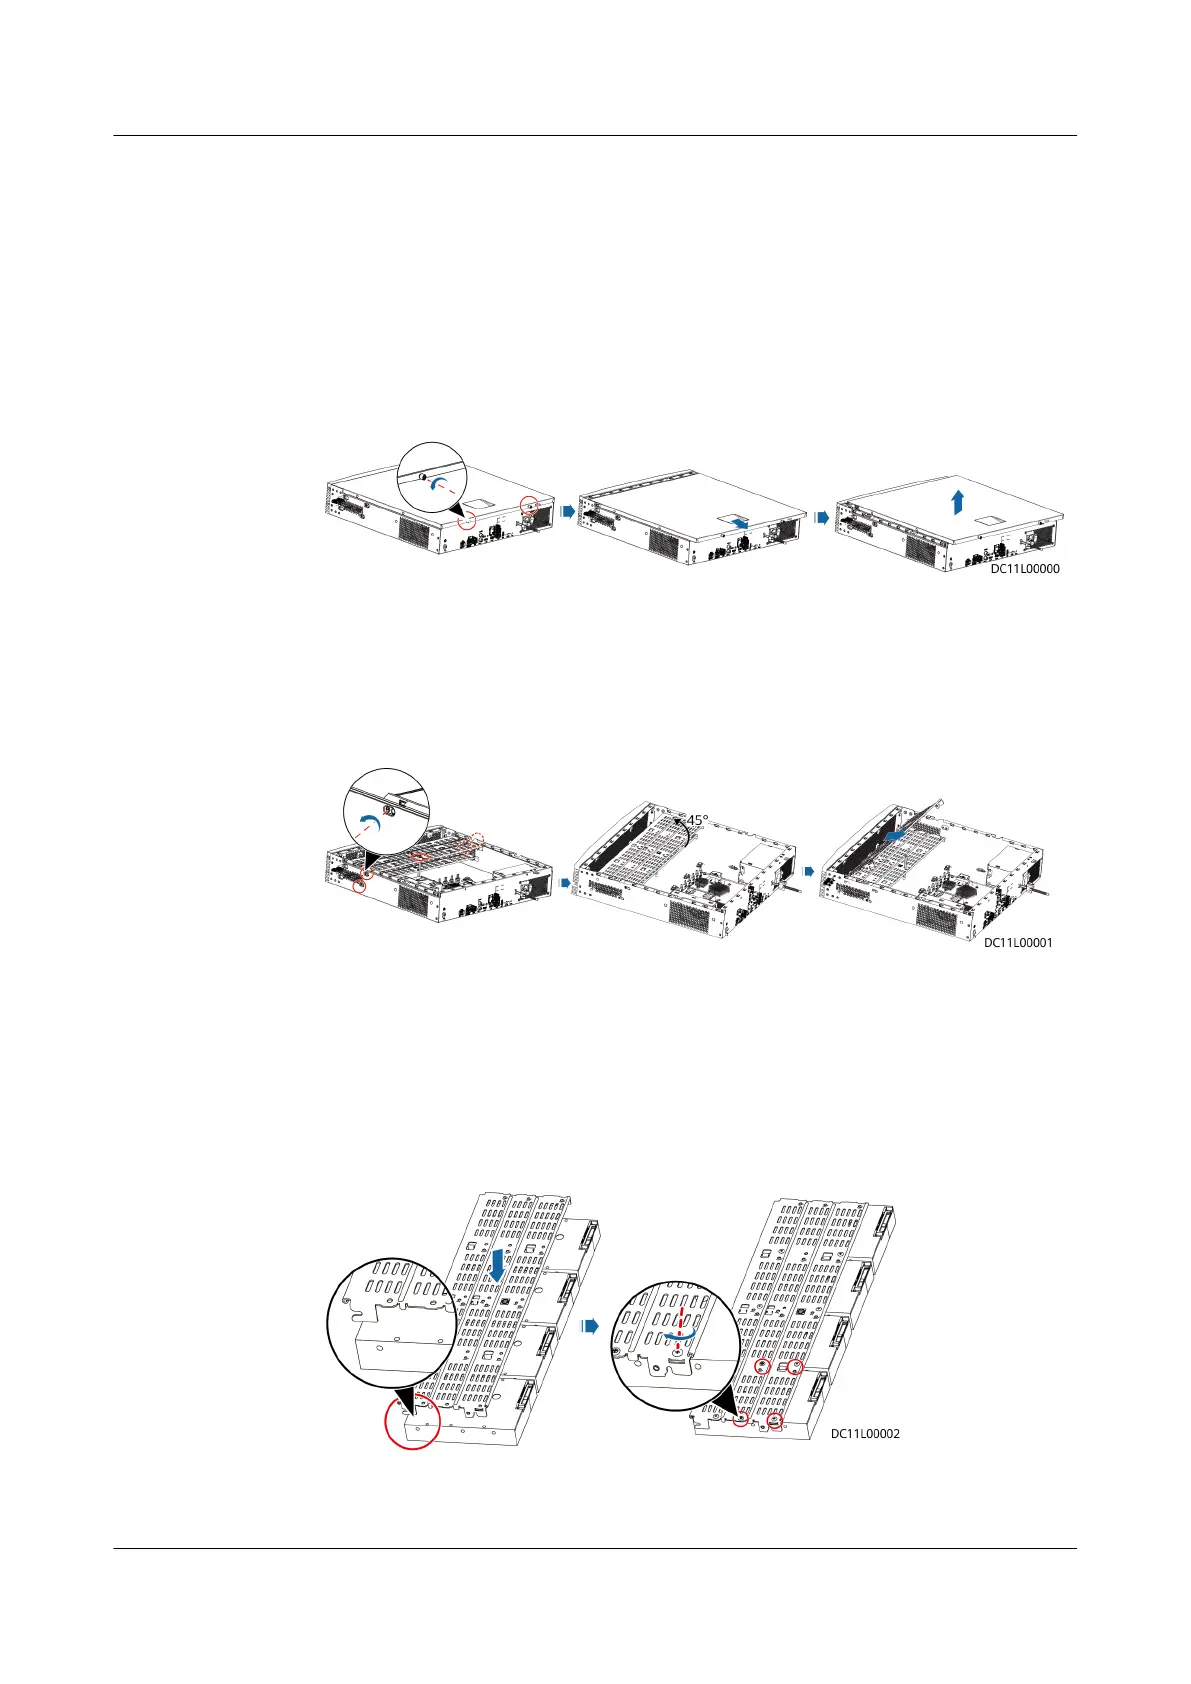
Step 2 Remove the faulty hard disk.
1. Use a PH2 screwdriver to remove the two black screws on the rear of the
chassis cover, and take
o the chassis cover.
Figure 5-25 Removing the chassis cover
2. Remove two black screws on each side of the chassis and the silvery white
one on top of the hard disk tray, raise the hard disk tray by 45 degrees, and
take out the upper and then lower layers of hard disk tray.
Figure 5-26 Removing the hard disk tray
Step 3 Install a new hard disk.
1. Place the hard disk with ports facing upwards and align the screw holes on
the hard disk tray with the hard disk and fasten the screws. Before the
installation, ensure that the fastener of the hard disk tray is on a
dierent
side from the hard disk port, as shown in the lower left gure.
Figure 5-27 Installing hard disks
2. Insert the hard disk tray back at 45 degrees with the opening of its locking
buckle facing downwards, hold the screw in the red-framed part to lower the
FusionModule2000 Smart Modular Data Center
Maintenance Guide (Fusion Module Actuator) 5 Parts Replacement
Issue 01 (2020-12-25) Copyright © Huawei Technologies Co., Ltd. 82