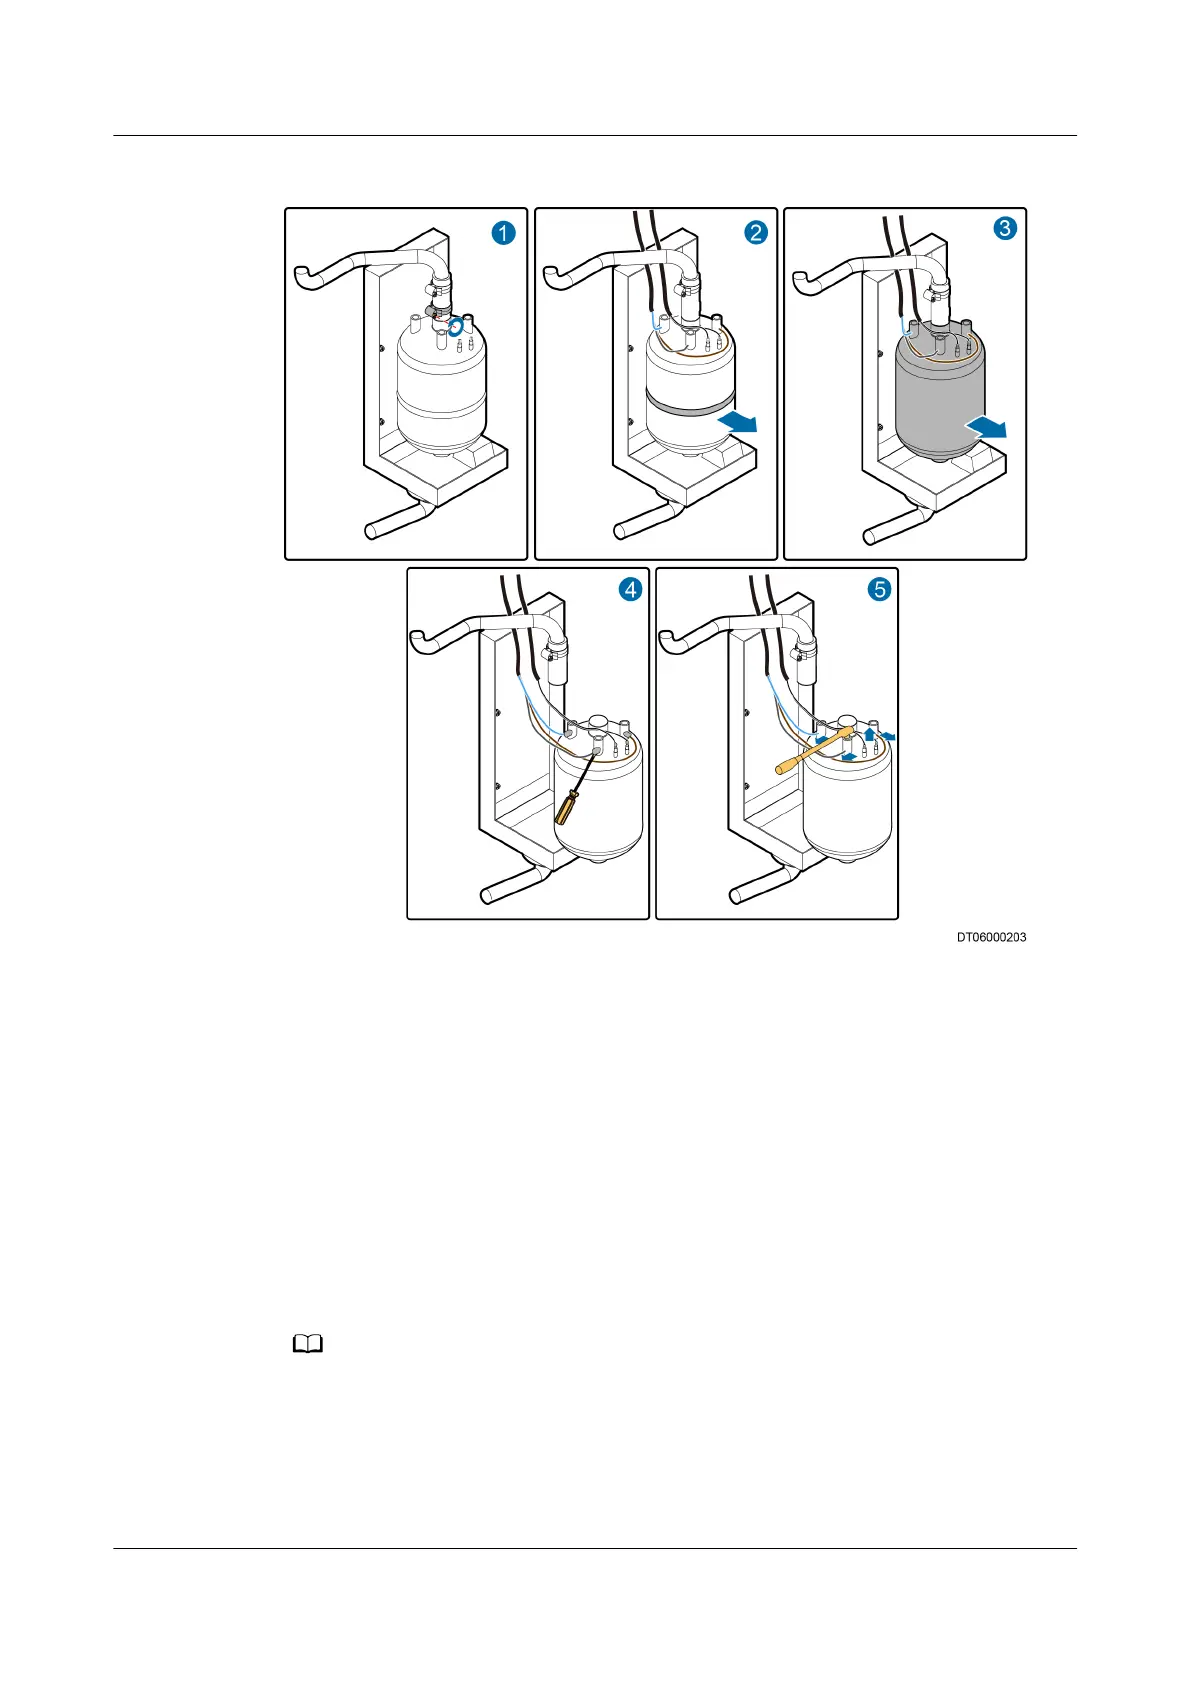
Figure 6-21 Replacing the humidier cylinder
Step 4 Loosen the belt around the humidier cylinder and remove the cylinder, as shown
by (2) and (3) in Figure 6-21.
Step 5 Open the rubber pad on the cable port, and clear the glue on the port using a
at-head screwdriver, as shown by (4) in Figure 6-21.
Step 6 Remove the screws from the electrode cable connection terminals above the
humidier cylinder using the 10# socket wrench, remove the cable connection
terminals, and remove the cable from the high water level sensor, as shown by (5)
in Figure 6-21.
Step 7 Install a new humidier cylinder by performing Step 3 to Step 6 in the reverse
order, and start the humidier.
When replacing the humidier cylinder, you do not need to apply glue to the cable
connection port again.
Step 8 Power on the
humidier, choose Maint > Diagnostic mode on the main menu,
and enter 100%. The water is injected to the
humidier. Check whether the
humidier works properly. If yes, exit the diagnostic mode.
NetCol5000-A(025, 035) In-row Air Cooled Smart
Cooling Product
User Manual (600 mm Width) 6 System Operation and Maintenance
Issue 17 (2020-10-22) Copyright © Huawei Technologies Co., Ltd. 221