a. Open the retaining clip on each end of the DIMM connector.
b. Lift the DIMM out of the connector.
5. If the DIMM is functional, place the DIMM in a static-protective package until
you are ready to install it.
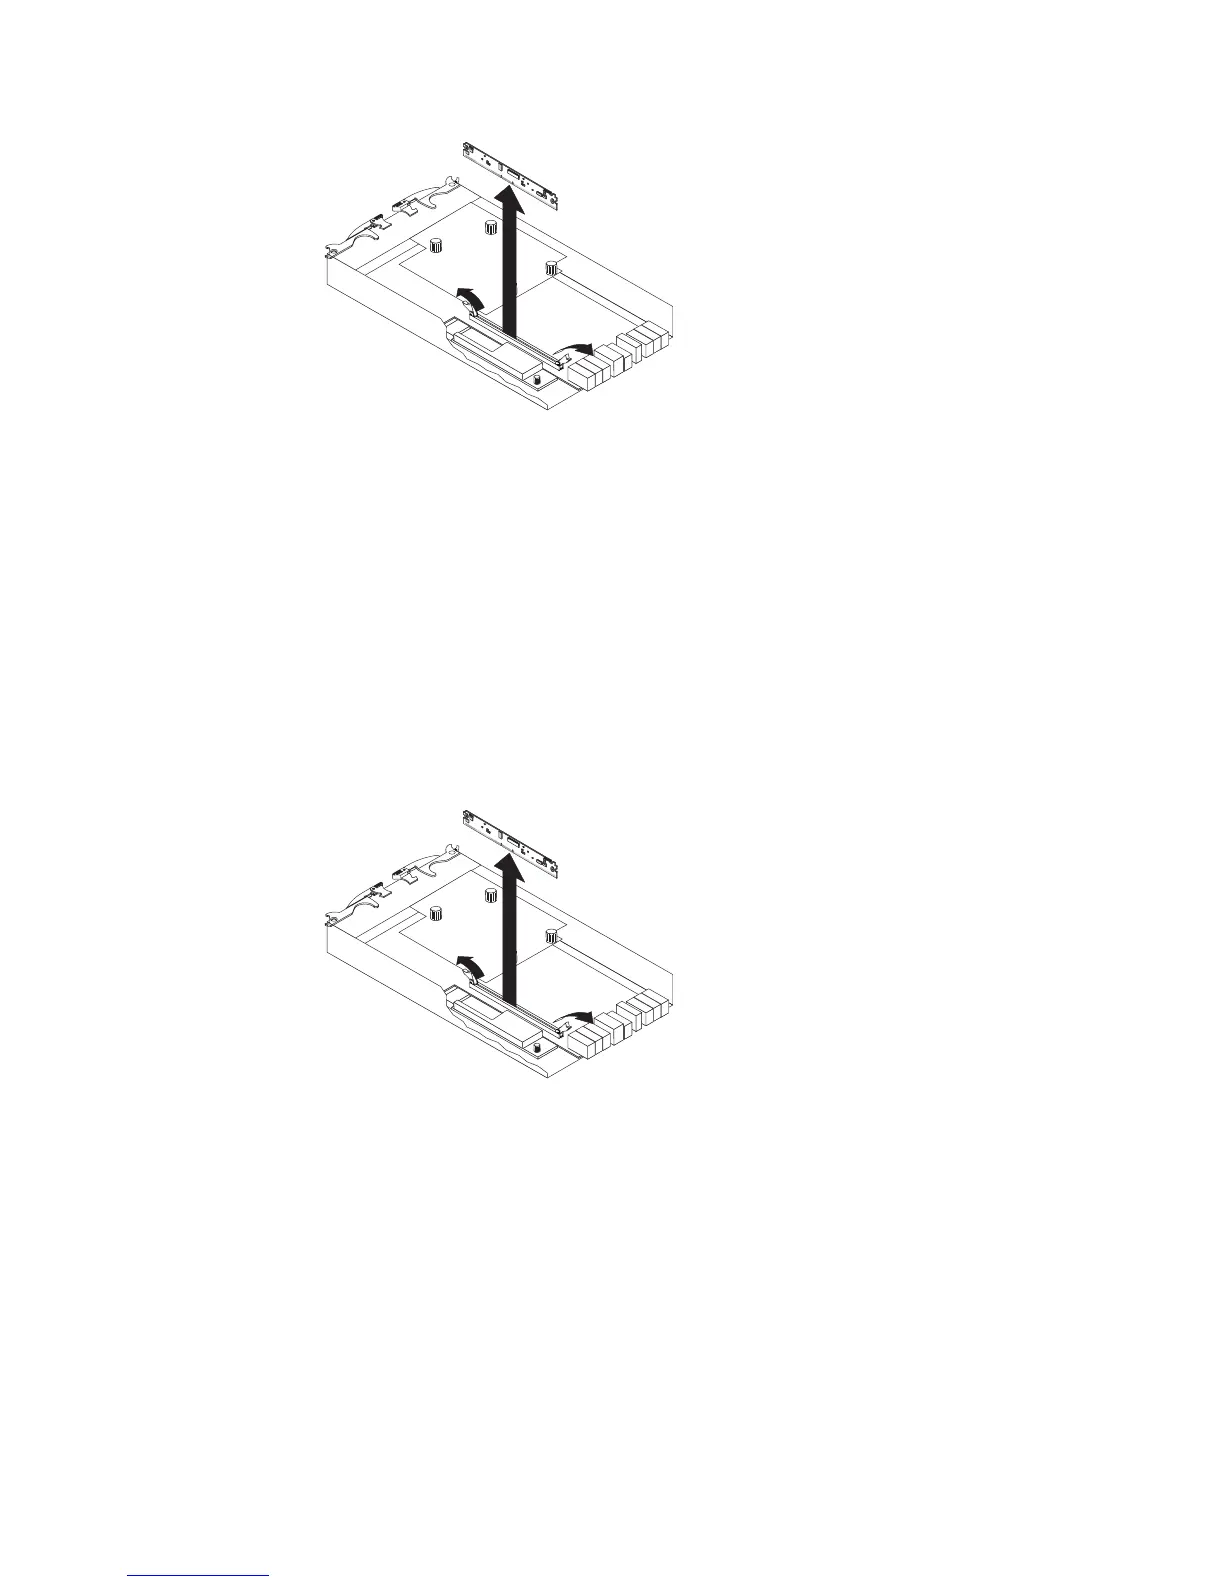
Installing the DIMM
Complete the following steps to install the DIMM in the controller:
1. Open the retaining clip on each end of the DIMM connector.
2. Touch the static-protective package that contains the DIMM to any unpainted
metal surface on the storage subsystem. Then, remove the DIMM from the
package.
3. Turn the DIMM so that the DIMM keys align correctly with the slot.
4. Match the angle of the DIMM with the angle of the connector.
5. Firmly press the DIMM into the connector. The retaining clips snap into the
locked position when the DIMM is firmly seated in the connector. If there is a
gap between the DIMM and the retaining clips, the DIMM has not been
correctly inserted; open the retaining clips, remove the DIMM, and then reinsert
it.
6. Install the cover (see “Removing and installing a cover” on page 107).
7. Insert the controller into the chassis.
a. Ensure that the release levers on the controller are in the open position.
b. Slide the controller into the bay until it stops.
c. Push the release levers to the closed position.
Figure 117. Removing the DIMM from the controller
Figure 118. Installing the DIMM in the controller
152 IBM System Storage DS3500 and EXP3500 Storage Subsystem: Installation, User's, and Maintenance Guide