Installing the IBM c-type SAN Director Shelf Bracket Kit into a Rack
About this task
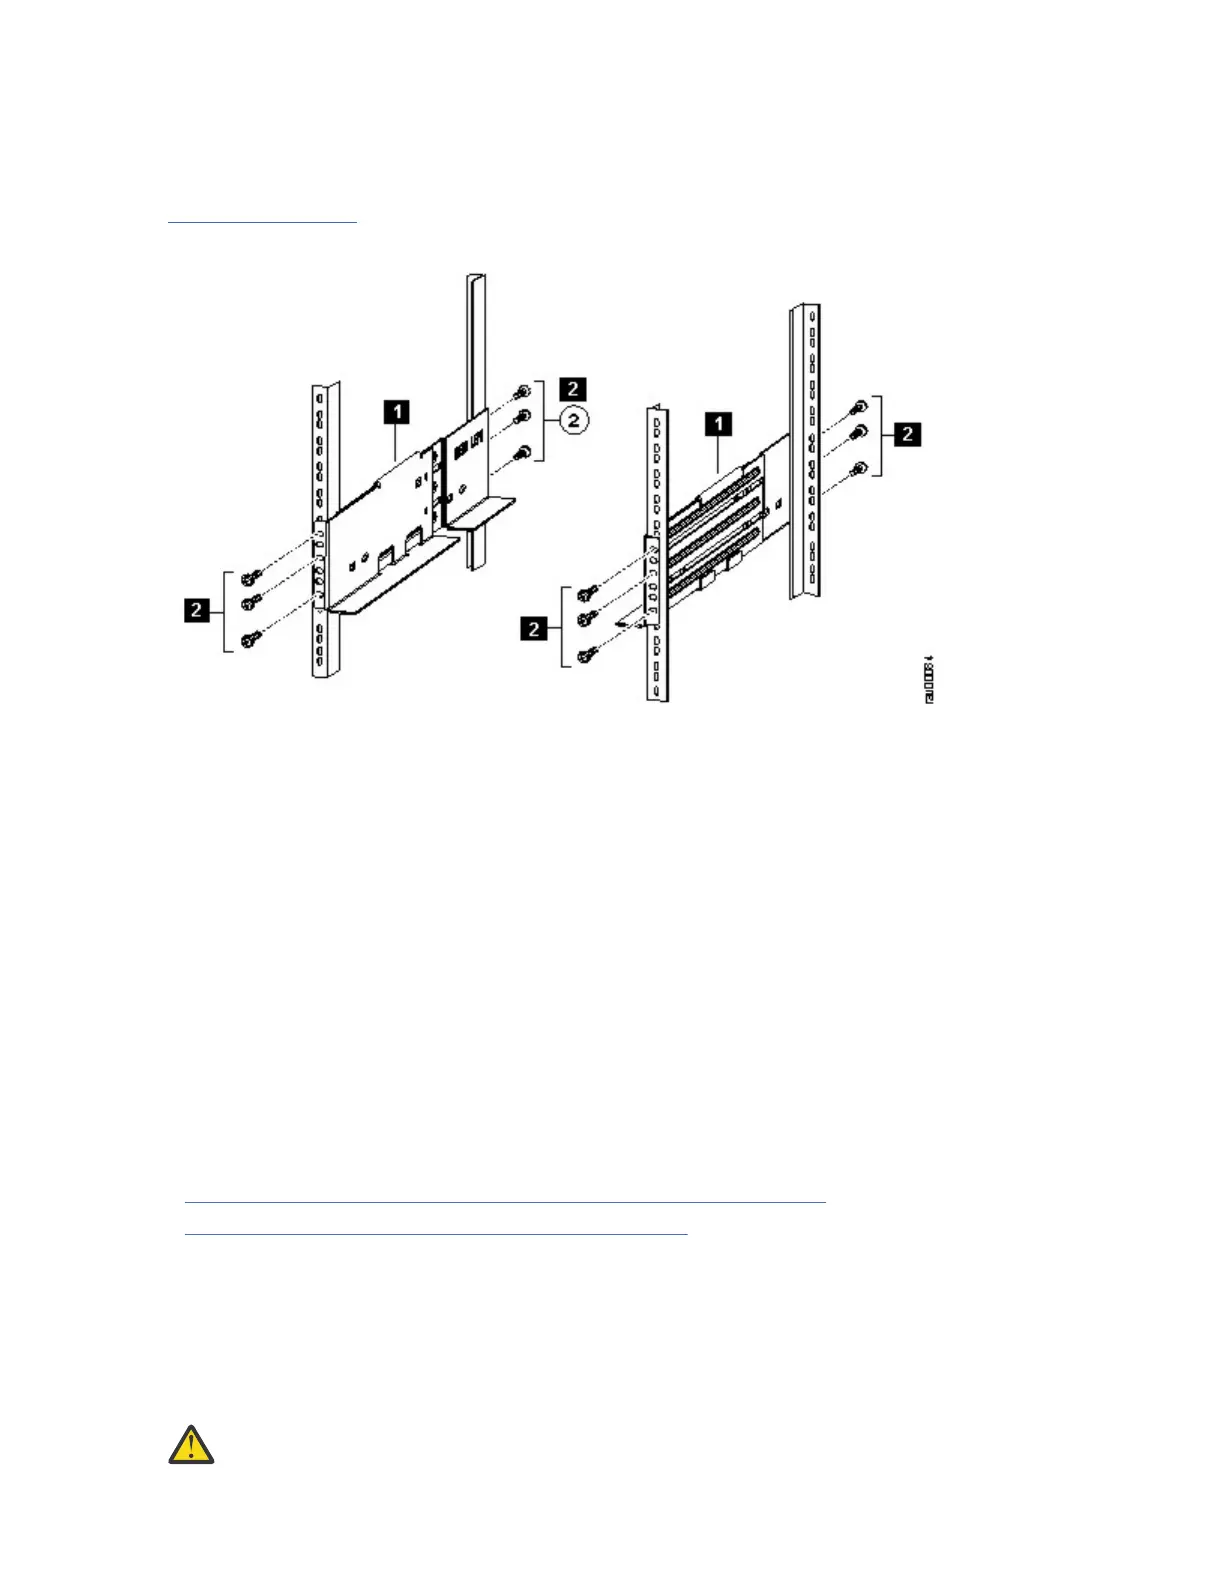
Figure 23 on page 50 shows the installation of the IBM c-type SAN Director Shelf Bracket Kit into a
four-post rack.
Figure 23. Installing the Shelf Bracket Kit into a Rack
Use this procedure to install the shelf brackets in a rack.
Procedure
1. Position a shelf bracket inside the rack-mounting rails. Align the screw holes at the front of the shelf
bracket with the holes in the front rack-mounting rail, and then attach the shelf bracket to the front
rack-mounting rail using a minimum of three (M6, 12-32 or 12-24) screws.
2. Align the screw holes at the back of the shelf bracket with the holes in the back rack-mounting rail,
and then attach the shelf bracket to the back rack-mounting rail using a minimum three (M6, 12-32 or
12-24) screws.
3. Verify that the shelf brackets are at the same height (using the level or tape measure as desired).
Installing the Switch on the Brackets
This section provides information on how to install the switch on the rack-mount support brackets and on
the shelf brackets and includes the following subsections:
• “Installing the Switch on the Rack-Mount Support Brackets” on page 50
• “Installing the Switch on the Shelf Brackets” on page 51
Installing the Switch on the Rack-Mount Support Brackets
About this task
This topic provides general instructions for installing the switch on top of the rack-mount support
brackets.
Warning: This unit is intended for installation in restricted access areas. A restricted access area
can be accessed only by using a special tool, lock and key, or other means of security.
50IBM Storage Networking SAN192C-6, SAN384C-6 and SAN768C-6: SAN192C-6, SAN384C-6 and
SAN768C-6 Installation, Service, and User Guide

 Loading...


