Attention: Incomplete insertion might cause damage to the server or the
adapter.
7. Connect any required cables to the ServeRAID adapter.
Attention:
v When you route cables, do not block any connectors or the ventilated space
around any of the fans.
v Make sure that cables are not routed on top of components that are under
the PCI riser-card assembly.
v Make sure that cables are not pinched by the server components.
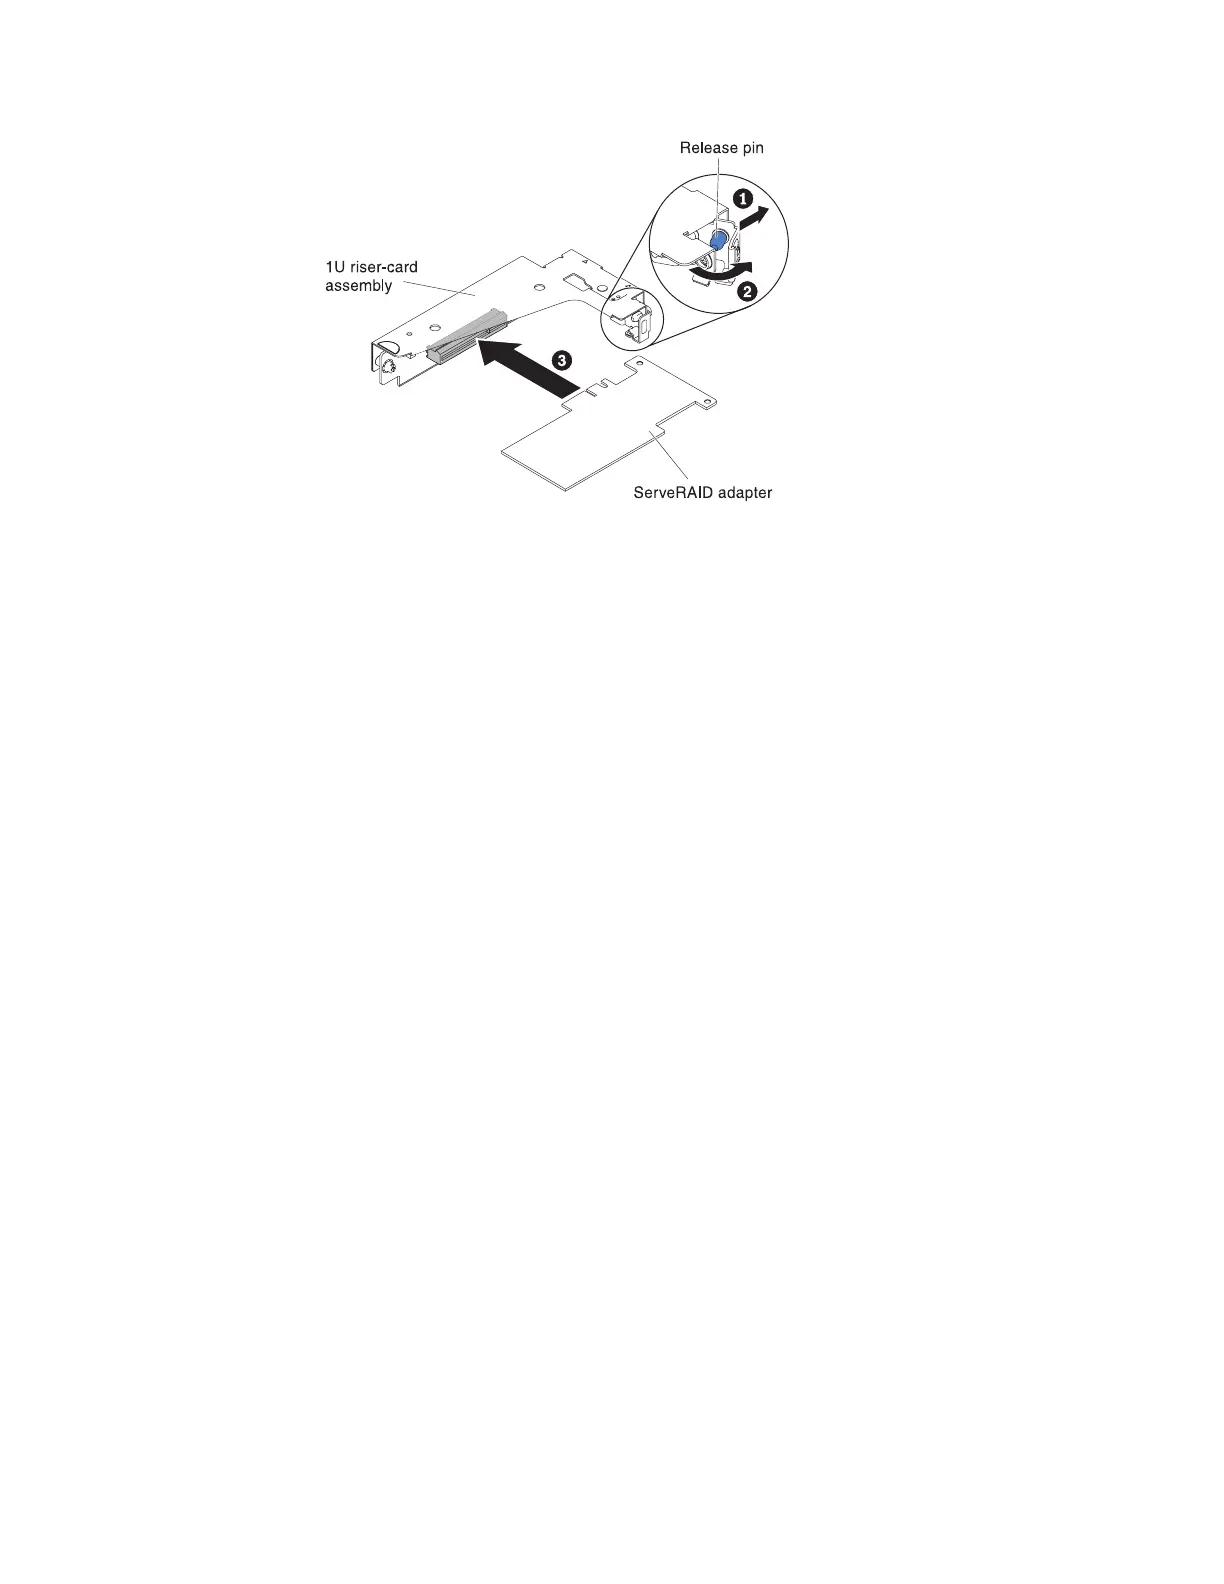
8. Rotate the retention latch to the closed position, making sure the retention latch
engages the ServeRAID adapter. Then, push in the release pin to lock the
retention latch in place.
9. Install PCI riser-card assembly 2 (see “Installing a PCI riser-card assembly” on
page 81).
Results
Note:
1. When you restart the server for the first time after you install a ServeRAID
adapter with a battery, the monitor screen remains blank while the controller
initializes the battery. This might take a few minutes, after which the startup
process continues. This is a one-time occurrence.
Important: You must allow the initialization process to be completed. If you do
not, the battery pack will not work, and the server might not start.
The battery comes partially charged, at 30% or less of capacity. Run the server
for 4 to 6 hours to fully charge the battery. The LED just above the battery on
the controller remains lit until the battery is fully charged.
Until the battery is fully charged, the controller firmware sets the controller
cache to write-through mode; after the battery is fully charged, the controller
firmware re-enables write-back mode.
2. When you restart the server, you are given the opportunity to import the
existing RAID configuration to the new ServeRAID adapter.
Figure 106. ServeRAID adapter installation
194 System x3650 M4 BD Type 5466: Installation and Service Guide

 Loading...


