Replacing the fan cage assembly
Use this information to replace the fan cage assembly.
About this task
To install the fan cage assembly, complete the following steps:
Procedure
1. Read the safety information that begins on “Safety” on page vii and
“Installation guidelines” on page 283.
2. Turn off the server and peripheral devices and disconnect all power cords.
3. Remove the top cover (see “Removing the top cover” on page 146).
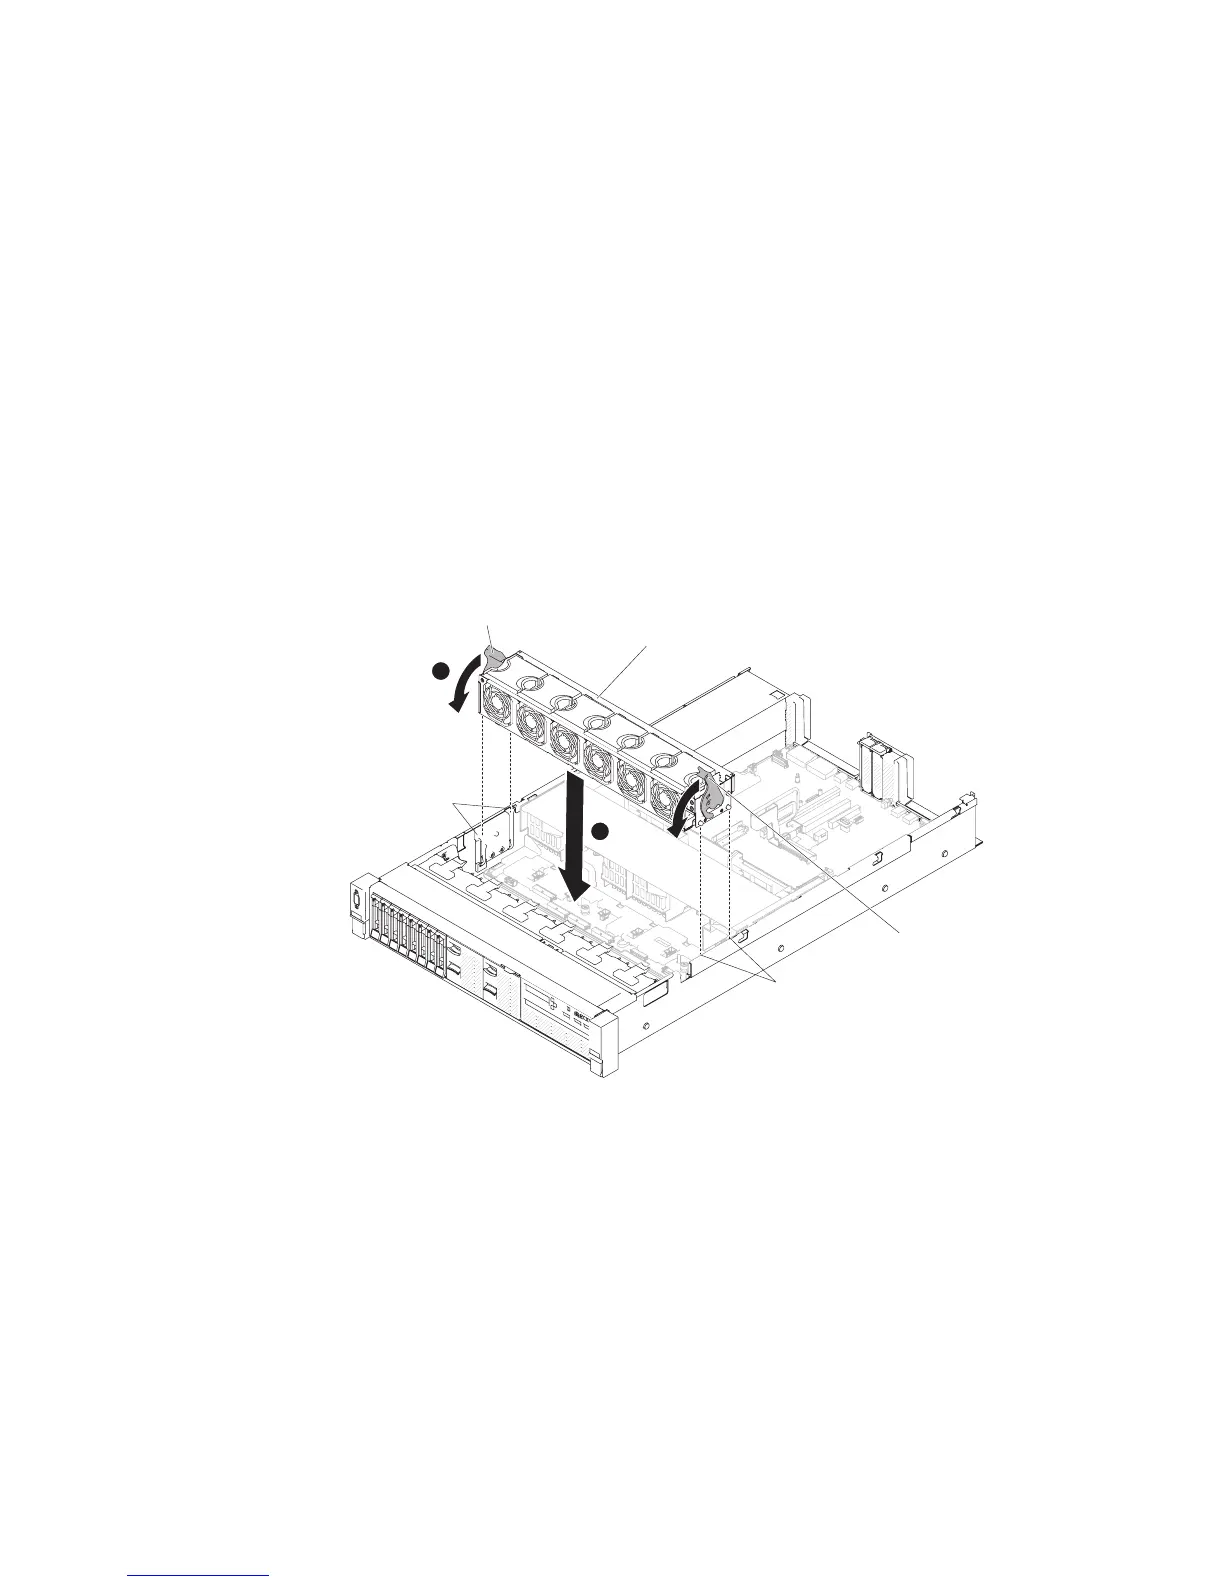
4. ▌1▐Align the pins on the fan cage assembly with the slots on both sides of the
chassis and lower it into the server.
5. ▌2▐Rotate the fan cage assembly release latches down until the release latches
are in the locked position and make sure the assembly is correctly seated into
place.
6. Replace the fans, if needed (see “Replacing a hot-swap fan” on page 175).
7. Replace the top cover (see “Replacing the top cover” on page 147).
8. Slide the server into the rack.
9. Reconnect the power cords and any cables that you removed.
10. Turn on the peripheral devices and the server.
Slots
Slots
Release latch
Release latch
Fan cage assembly
1
2
Figure 97. Fan cage assembly installation
Chapter 5. Removing and replacing components 173
 Loading...


