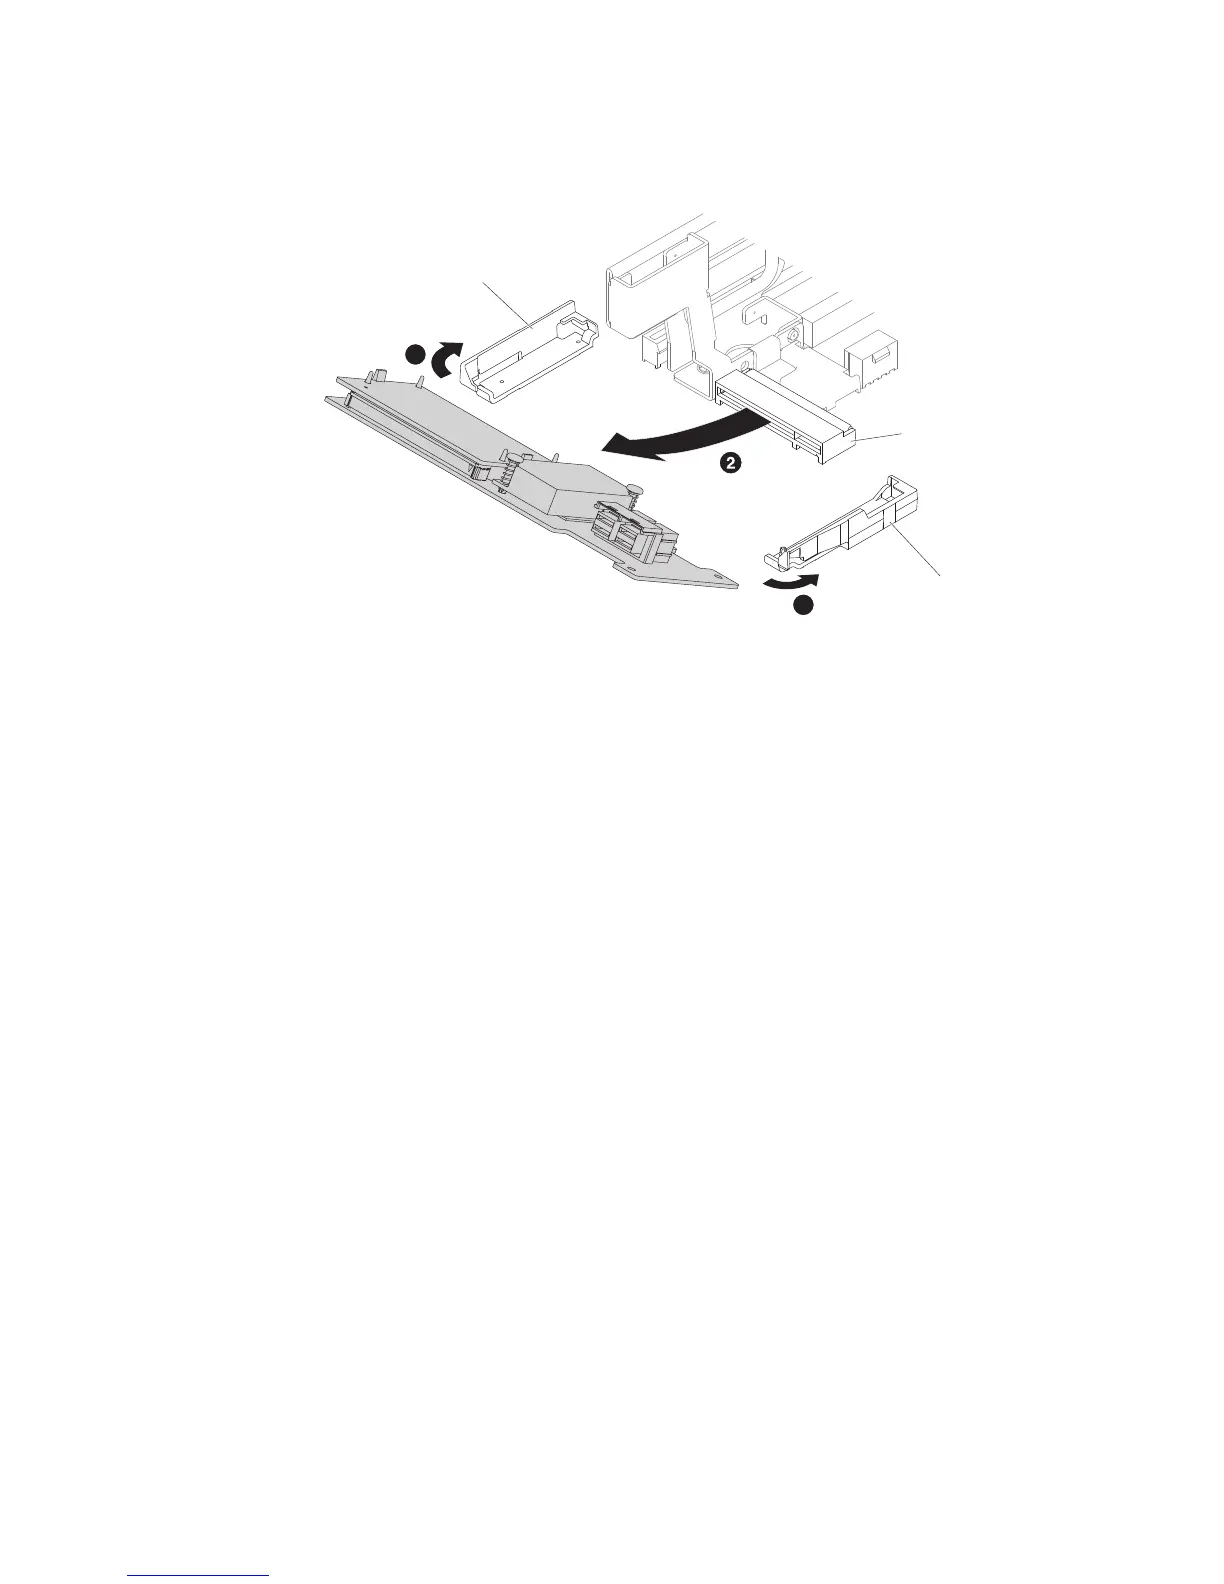
5. ▌1▐Press the retention tabs away from the controller; then, slightly lift up the
rear of the controller, and ▌2▐pull it out of the connector on the system board.
6. If you are instructed to return the dedicated slotless RAID controller, follow all
of the packaging instructions, and use any packaging materials for shipping
that are supplied to you.
Replacing the dedicated slotless RAID controller
Use this information to replace the dedicated slotless RAID controller.
About this task
The dedicated slotless RAID controller can be installed in the dedicated connector
on the system board (see “System-board internal connectors” on page 29 for the
location of the connectors).
To replace the dedicated slotless RAID controller, complete the following steps:
Procedure
1. Read the safety information that begins on “Safety” on page vii and
“Installation guidelines” on page 283.
2. Turn off the server and peripheral devices and disconnect the power cords
and all external cables, if necessary.
3. Remove the top cover (see “Removing the top cover” on page 146).
4. If you are installing a new or replacement controller, touch the
static-protective package that contains the new controller to any unpainted
metal surface on the server. Then, remove the new controller from the
package.
5. Align the controller so that the keys align correctly with the connector on the
system board.
6. Insert the controller into the RAID connector on the system board until it is
firmly seated. The retention brackets secure the controller in place when the
controller is firmly seated into the connector.
1
1
Dedicated slotless
RAID connector
Retention bracket
Retention bracket
Figure 110. Dedicated slotless RAID controller removal
184 System x3650 M5 Type 5462: Installation and Service Guide

 Loading...


