3. If you are installing a hot-swap power supply into an empty bay, remove the
power-supply filler from the power-supply bay.
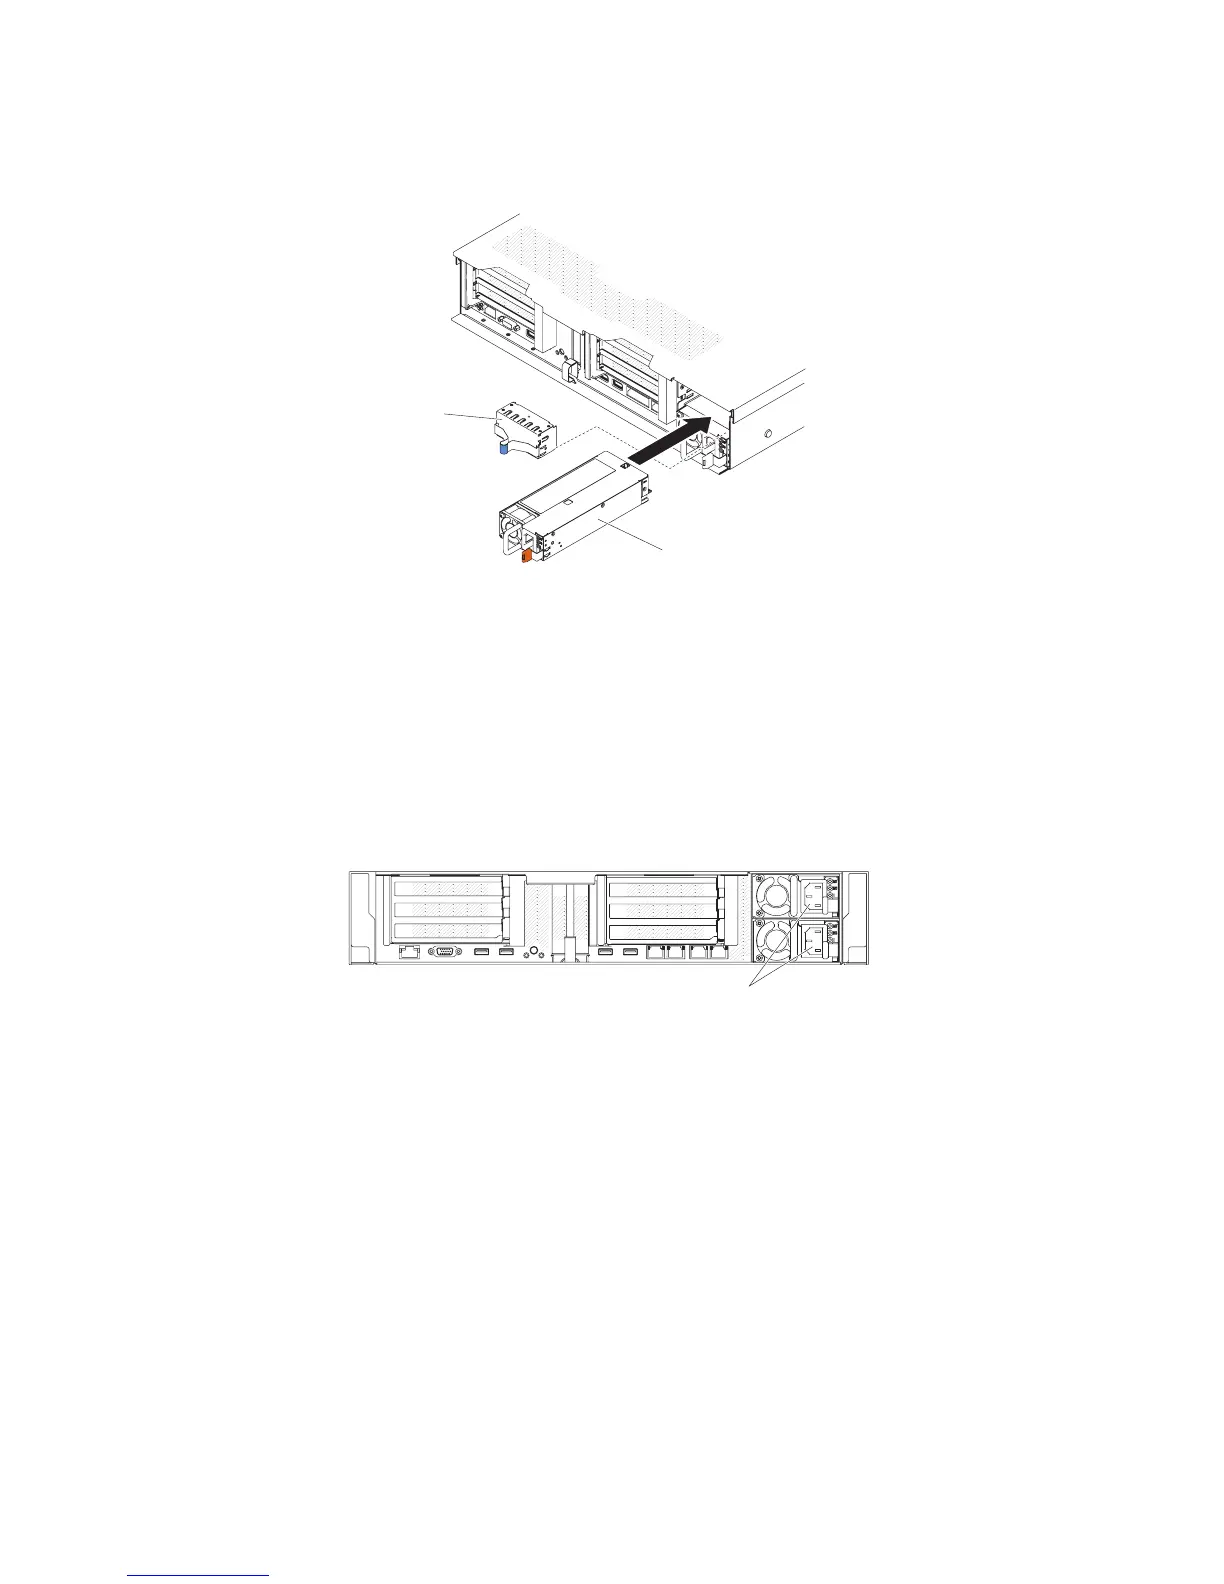
4. Grasp the handle on the rear of the power supply and slide the power supply
forward into the power-supply bay until it clicks. Make sure that the power
supply connects firmly into the power-supply connector.
Attention: Do not mix two power supplies with different rating, wattage and
efficiency in the server, it is not supported.
5. Connect the power cord for the new power supply to the power-cord connector
on the power supply. The following illustration shows the power-cord
connectors on the back of the server.
6. Route the power cord through the cable hook-and-loop on the rear of the
server, to prevent the power cord from being accidentally pulled out when you
slide the server in and out of the rack.
7. Connect the other end of the power cord to a properly grounded electrical
outlet.
8. Make sure that the ac power LED and the dc power LED on the ac power
supply are lit, indicating that the power supply is operating correctly. The two
green LEDs are to the right of the power-cord connector.
9. If you are adding a power supply to the server, attach the redundant power
information label that comes with this option on the server cover near the
power supplies.
Hot-swap
power supply 2
Power supply
filler panel
Figure 179. Power supply installation
Power cord
connectors
Chapter 5. Removing and replacing components 231

 Loading...


