To install a ServeRAID controller on the PCI riser-card assembly, complete the
following steps:
1. Touch the static-protective package that contains the new ServeRAID controller
to any unpainted metal surface on the server. Then, remove the ServeRAID
controller from the package.
2. If you are installing a new or replacement ServeRAID controller that uses a
battery, complete the following steps:
a. Remove the battery from the ServeRAID controller package or the battery
package.
b. Install the battery and connect the battery to the ServeRAID controller as
instructed in the documentation that comes with the ServeRAID controller
or the battery, or see “Installing a ServeRAID controller battery on the
remote battery tray” on page 172.
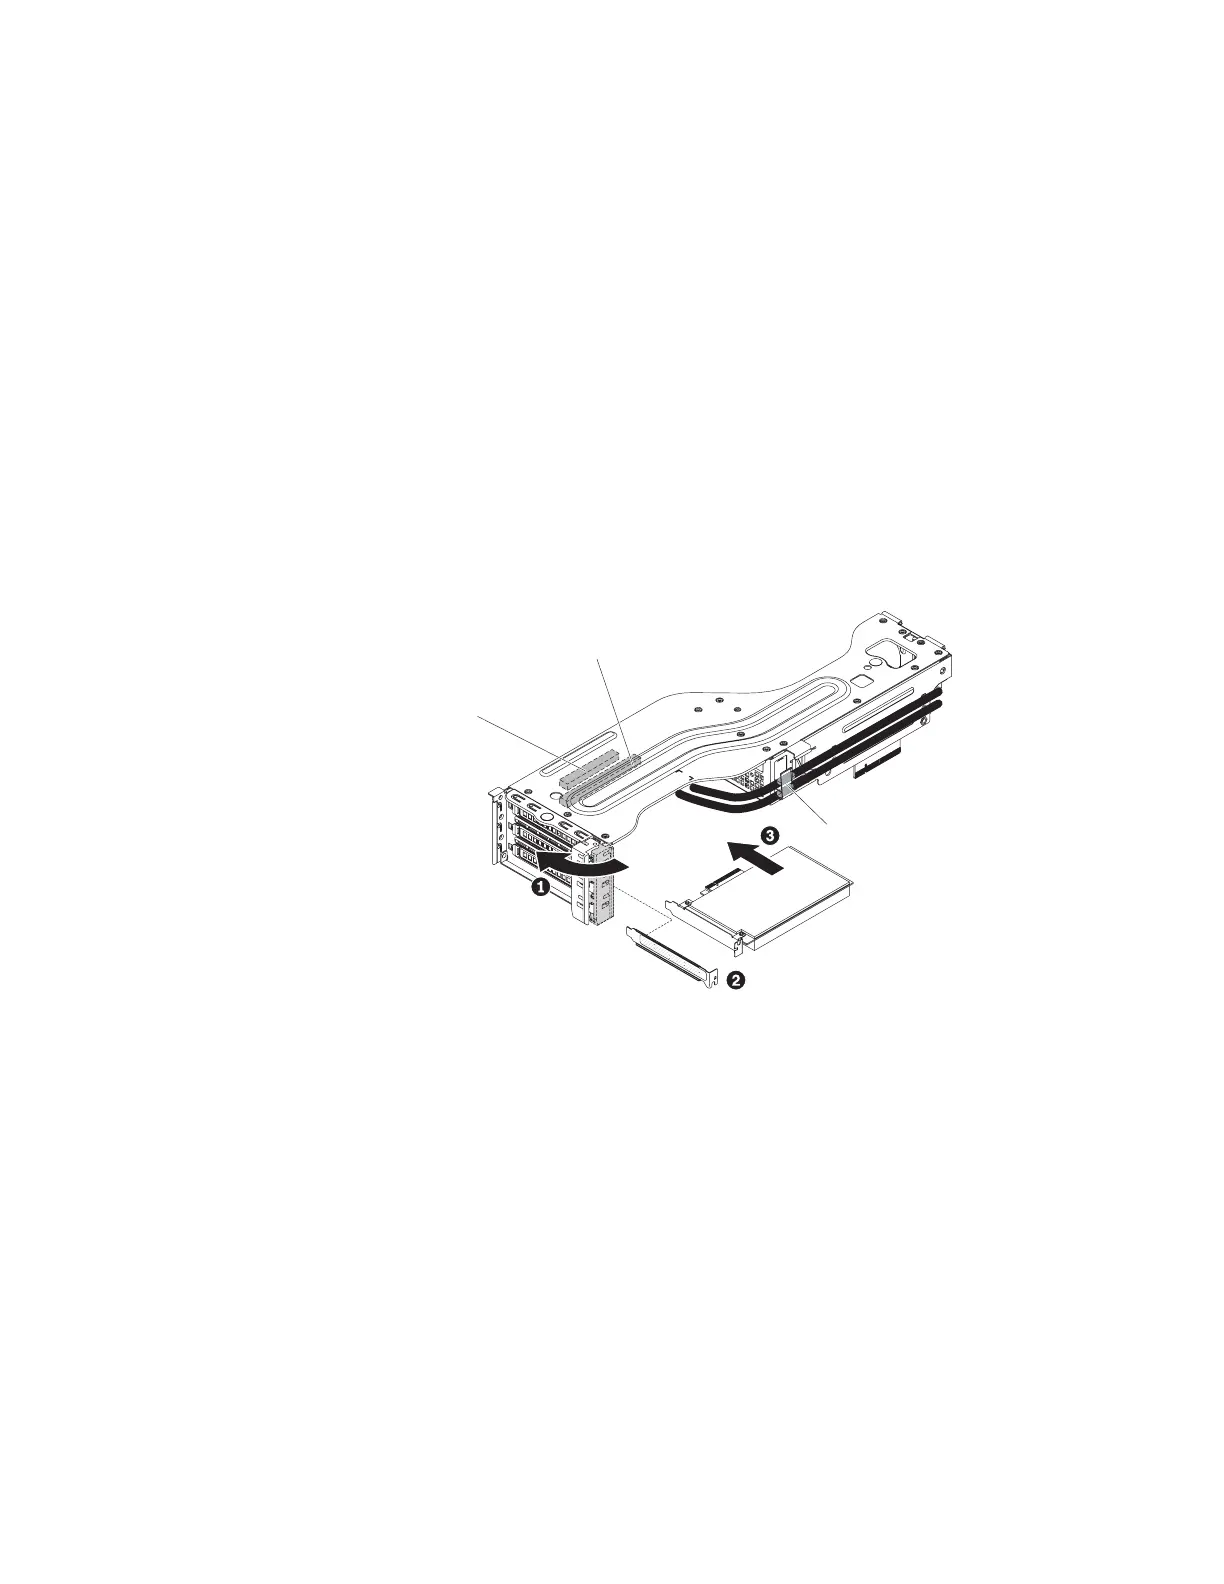
3. Install the ServeRAID controller:
a. If you are installing the ServeRAID controller in expansion slot 3 or 4,
rotate the retention latch on the rear of the PCI riser-card assembly to the
open position; then, slide the expansion-slot cover out of the expansion
slot.
Cable Routing
Slot 4 PCIe2 x8 (8)
Slot 3 PCIe2 x16 (8)
b. Align the ServeRAID controller with the connector on the PCI riser card.
c. Firmly press the ServeRAID controller into the connector on the PCI riser
card.
4. Route the signal cables and connect the signal cables to the ServeRAID
controller (see “Internal cable routing and connectors” on page 136).
5. Rotate the adapter retention latch back to secure the adapter on the PCI
riser-card assembly.
6. Install the PCI riser-card assembly (see “Installing the PCI riser-card assembly”
on page 151).
7. Secure the signal cables with any retention clips.
8. Install the server cover (see “Installing the cover” on page 146).
9. Reconnect the external cables; then, reconnect the power cords and turn on
the peripheral devices and the server.
10. Perform any configuration tasks that are required for the ServeRAID controller.
160 IBM System x3630 M3 Type 7377: Problem Determination and Service Guide
 Loading...


