Note: You must wait approximately 2.5 minutes after you connect the power
cord of the server to an electrical outlet before the power-control button
becomes active.
7. Start the Setup utility and reset the configuration.
v Set the system date and time.
v Set the power-on password.
v Reconfigure the server.
See Chapter 6, “Configuration information and instructions,” on page 233 for
details.
Removing and replacing Tier 2 CRUs
You may install a Tier 2 CRU yourself or request IBM to install it, at no additional
charge, under the type of warranty service that is designated for your server.
The illustrations in this document might differ slightly from your hardware.
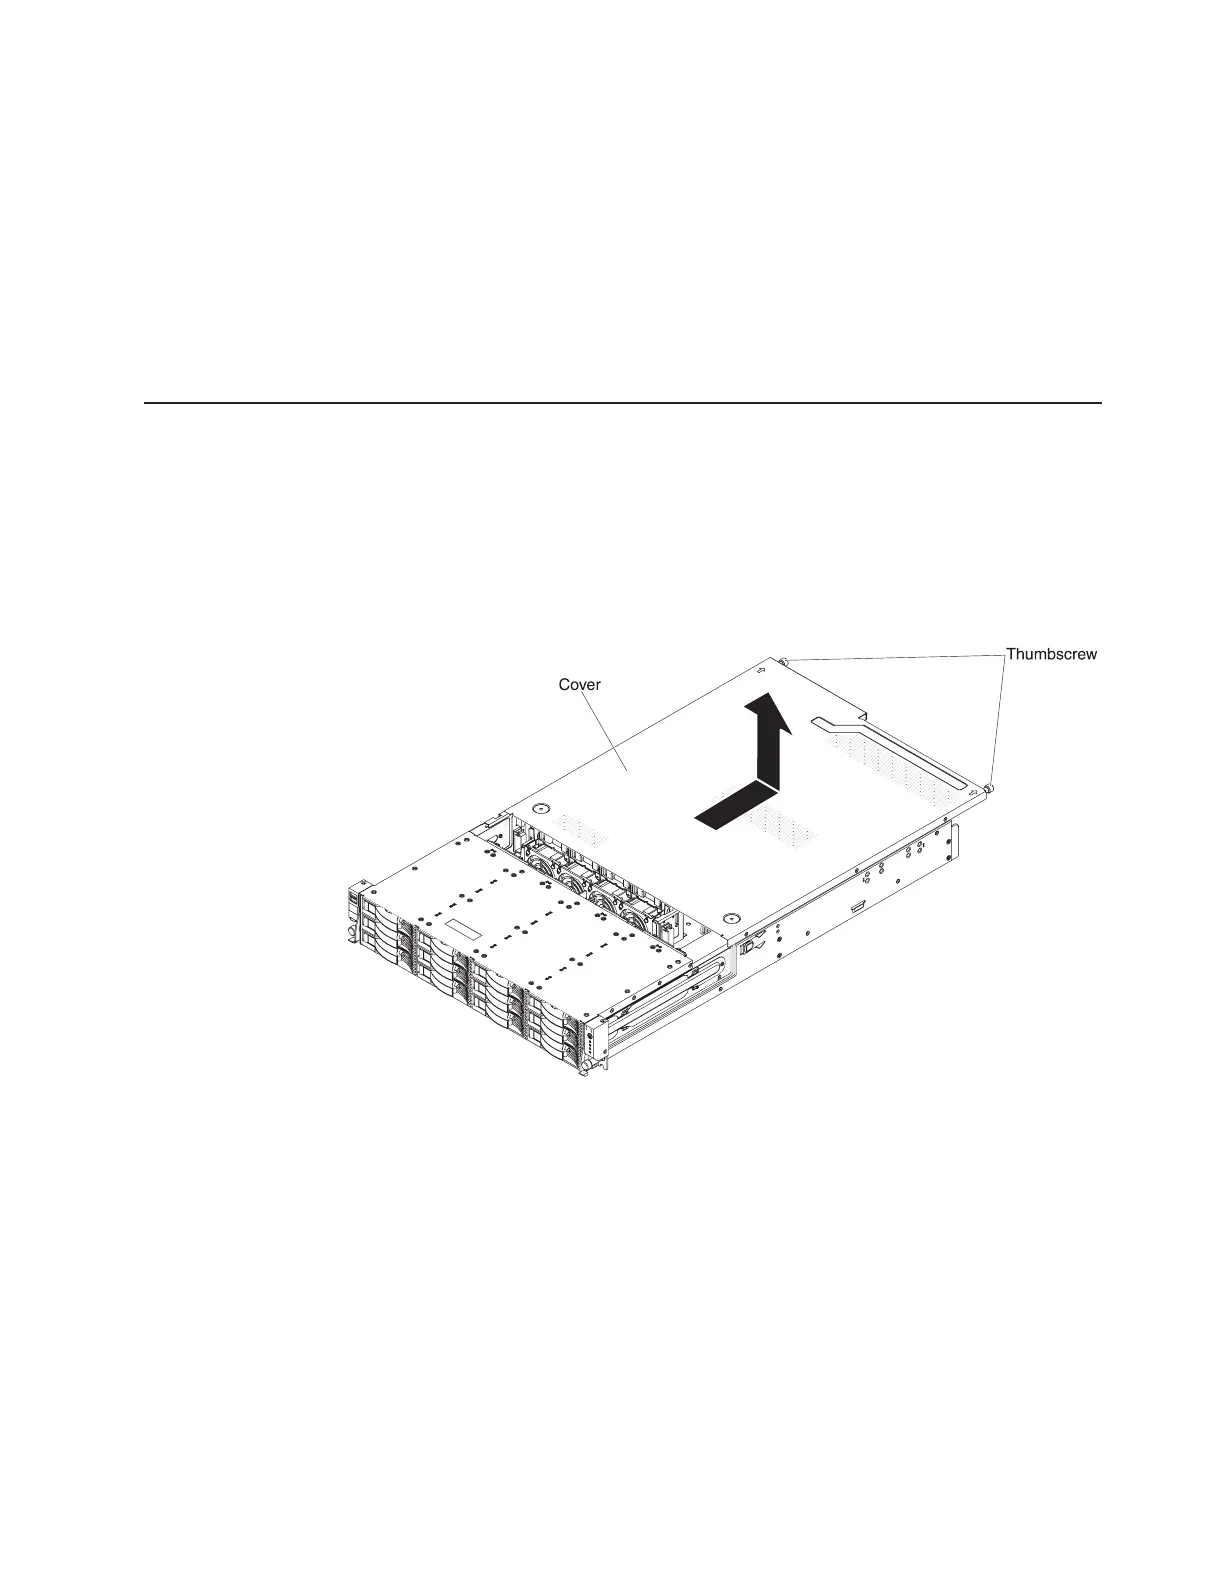
Removing the cover
To remove the cover, complete the following steps.
1. Read the safety information that begins on page vii and “Installation guidelines”
on page 133.
2. If you are planning to view the error LEDs that are on the system board and
components, leave the server connected to power and go directly to step 4.
3. If you are planning to install or remove a microprocessor, memory module, PCI
adapter, battery, or other non-hot-swap optional device, turn off the server and
all attached devices and disconnect all external cables and power cords.
4. If the server has been installed in a rack, loosen the two thumbscrews on the
front of the server and remove the server out of the rack enclosure.
Chapter 5. Removing and replacing server components 145
 Loading...


