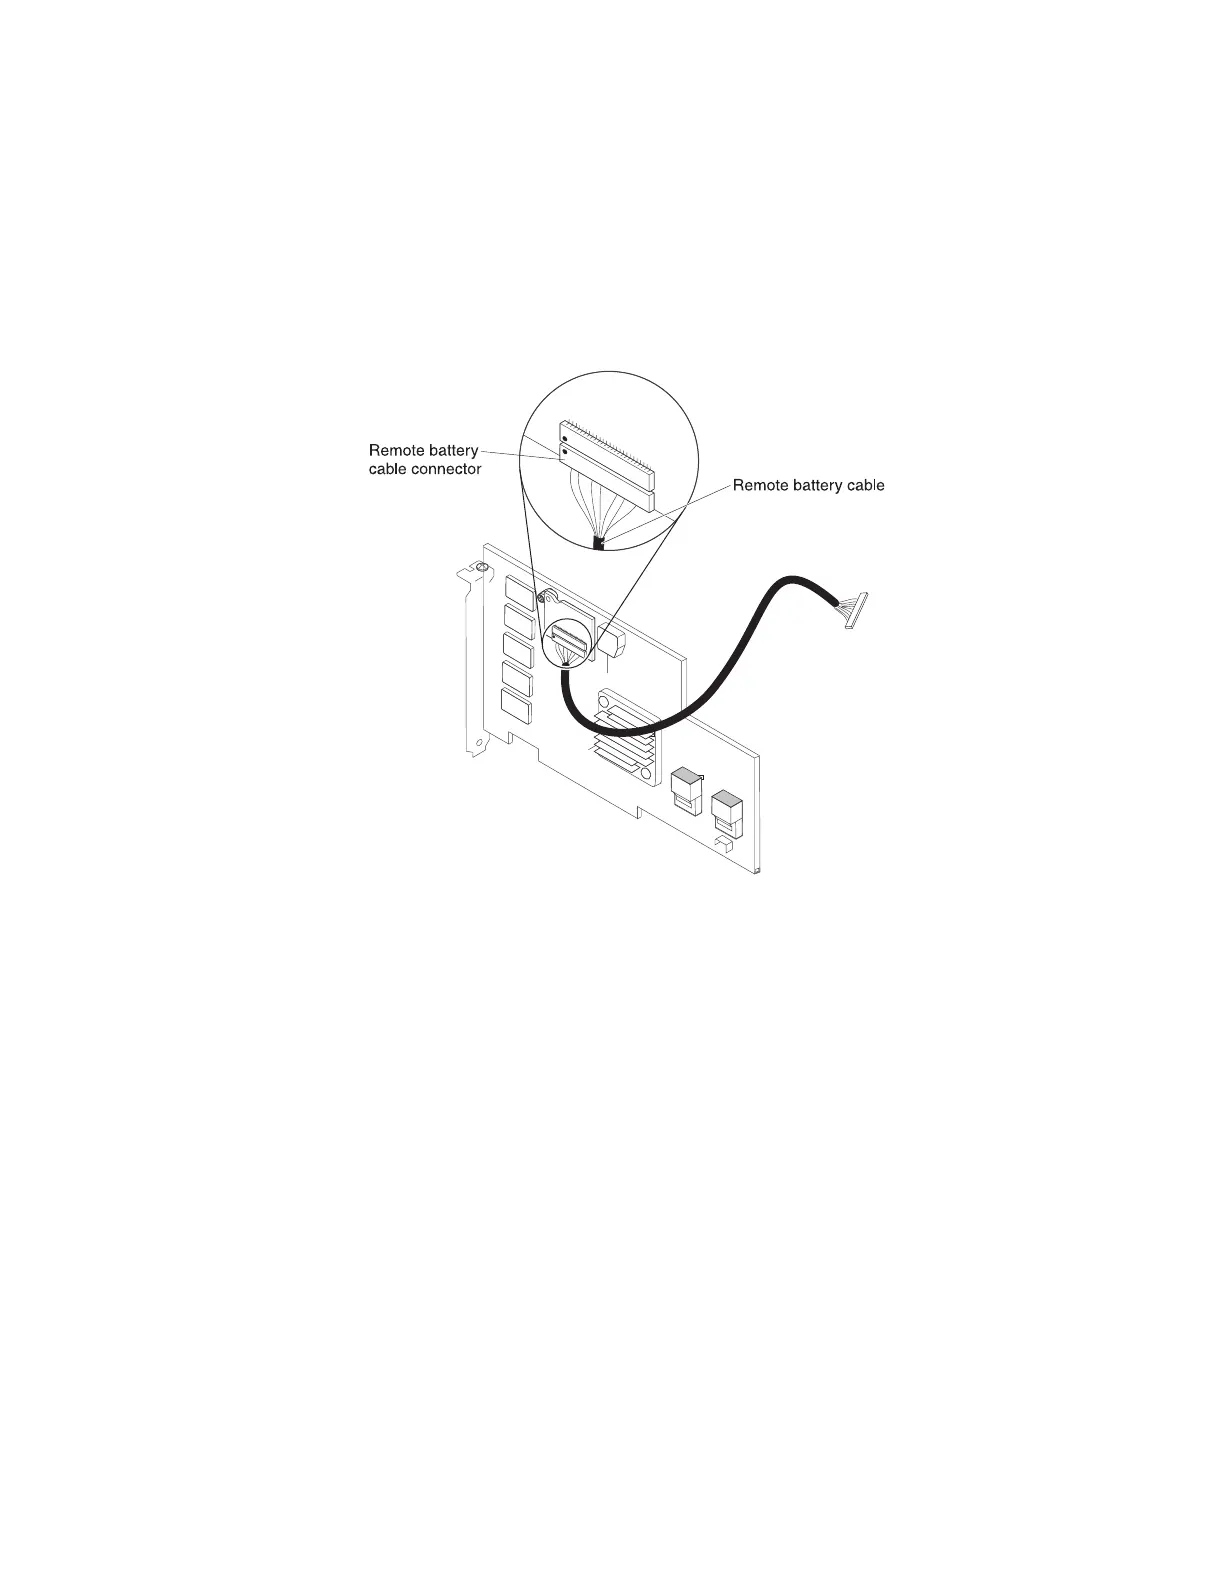
Attention: To avoid damage to the hardware, make sure that you align the
black dot on the cable connector with the black dot on the connector on the
interposer card. Do not force the remote battery cable into the connector.
7. Connect the other end of the remote battery cable to the interposer card on
the ServeRAID controller. Route the remote battery cable through the cage
hole on the PCI riser-card assembly.
Attention: To avoid damage to the hardware, make sure that you align the
black dot on the cable connector with the black dot on the connector on the
interposer card. Do not force the remote battery cable into the connector.
8. Install the ServeRAID controller on the PCI riser-card assembly (see “Installing
a ServeRAID controller on the PCI riser-card assembly” on page 159).
9. Install the PCI riser-card assembly (see “Installing the PCI riser-card assembly”
on page 151).
10. Install the cover (see “Installing the cover” on page 146).
11. Reconnect the external cables; then, reconnect the power cords and turn on
the peripheral devices and the server.
Removing an optional ServeRAID adapter advanced feature key
To remove an optional ServeRAID adapter advanced feature key, complete the
following steps:
1. Read the safety information that begins on page vii and “Installation guidelines”
on page 133.
2. Turn off the server and peripheral devices and disconnect all power cords and
external cables.
3. Remove the cover (see “Removing the cover” on page 145).
4. Remove the PCI riser-card assembly (see “Removing the PCI riser-card
assembly” on page 150).
5. Grasp the upgrade key and lift to remove it from connector on the ServeRAID
adapter.
176 IBM System x3630 M3 Type 7377: Problem Determination and Service Guide
 Loading...


