23
Initial PDM Setup 22 Initial PDM Setup
Turning on and personalising the PDM
1. Turn on the PDM by pressing and holding the Power button on the right side
until the Omnipod® logo appears. e PDM runs through a series of checks.
Caution: Do not turn o the PDM power. e PDM must be ON in order
to sound an alarm. If you press the Power button for too long, the PDM will
display a menu with a Power O option. Do NOT tap Power O. Tap outside
the menu to dismiss it and to keep the PDM on.
Note: You can press the Power button briey to toggle the PDM between
the wake and sleep modes. Omnipod DASH™ System alarms will also wake
aPDM from sleep mode.
2. When a screen with the Omnipod DASH™ logo appears, use your nger to
swipe from le to right across the screen.
Note: If you see an unexpected screen instead of the Omnipod DASH™ logo
screen, see “Troubleshooting PDM Start-up” on page175.
3. Tap a language to select your preferred language for the PDM screens. en
tap the arrow (>).
4. Tap Select One to display the list of countries. Select your country, then tap
CONTINUE.
5. Review the terms and conditions, including the End User Licence Agreement
(EULA), Warranty and Legal Notices, as follows:
a. Tap the EULA, Warranty and Legal
Notices link to read the Omnipod
DASH™ System’s legal notices.
en tap AGREE.
b. Tap the box to add a tick symbol.
c. Tap CONTINUE.
Note: If you are under 18, your parent
or guardian must accept for you.
6. Tap BEGIN SETUP.
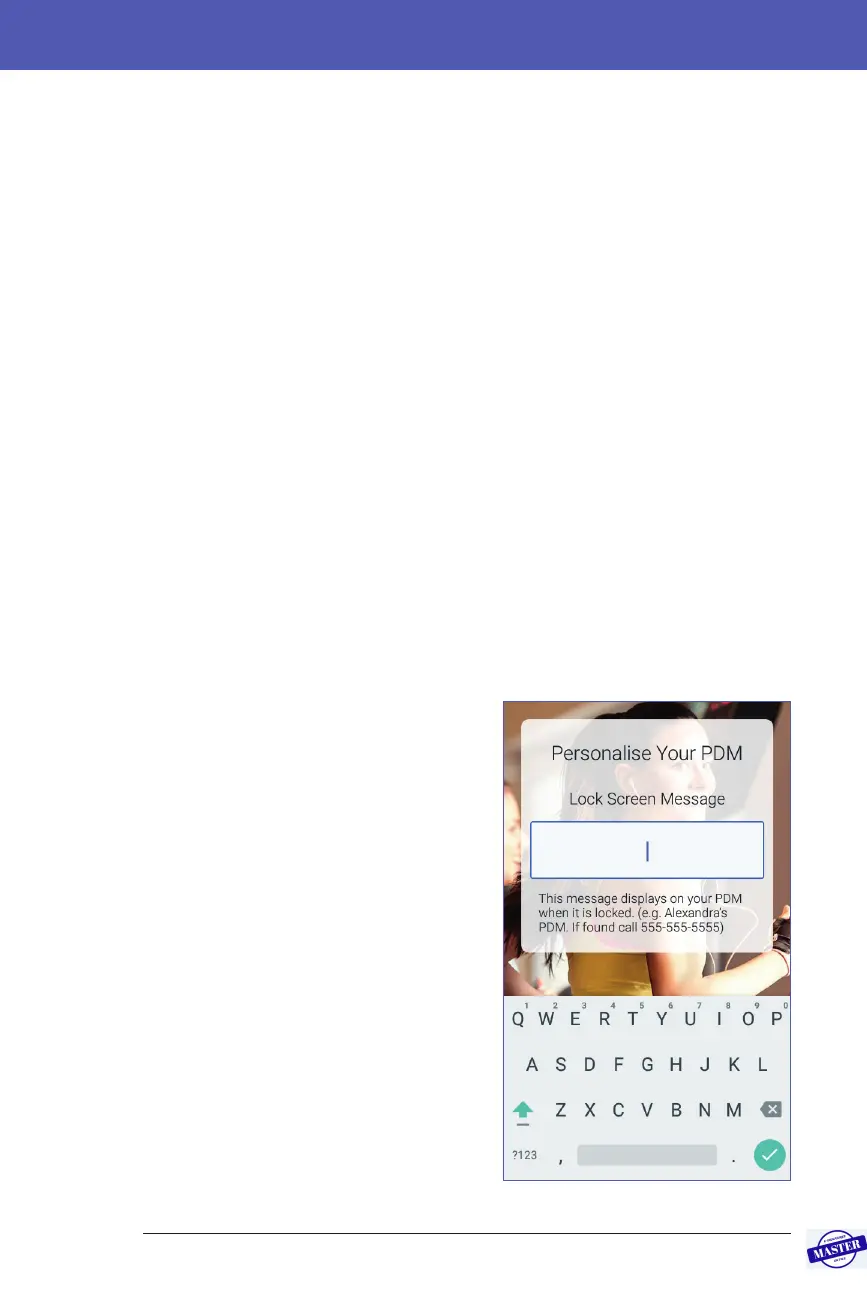
7. Tap letters on the keypad to
enter a personalised screen
message (see “Selecting, Adding
and Deleting Items” on page 7).
en tap the tick symbol.
Effective Date: 27SEP2019, ECO-000240