Changing Your Pod 3
46
3 Changing Your Pod
Prepare the infusion site
To reduce the risk of infection at the infusion site:
1. Wash your hands with soap and water.
2. Wash your selected infusion site with soap and water.
Note: Antibacterial soap may irritate skin, especially at the infusion site.
Askyour healthcare provider how to treat any skin irritation.
3. Dry the infusion site with a clean towel.
4. Use an alcohol prep swab to disinfect the infusion site. Start at the centre
of the site and gently rub outwards in a circular motion.
5. Let the infusion site air-dry thoroughly. Do not blow on the site to dry it.
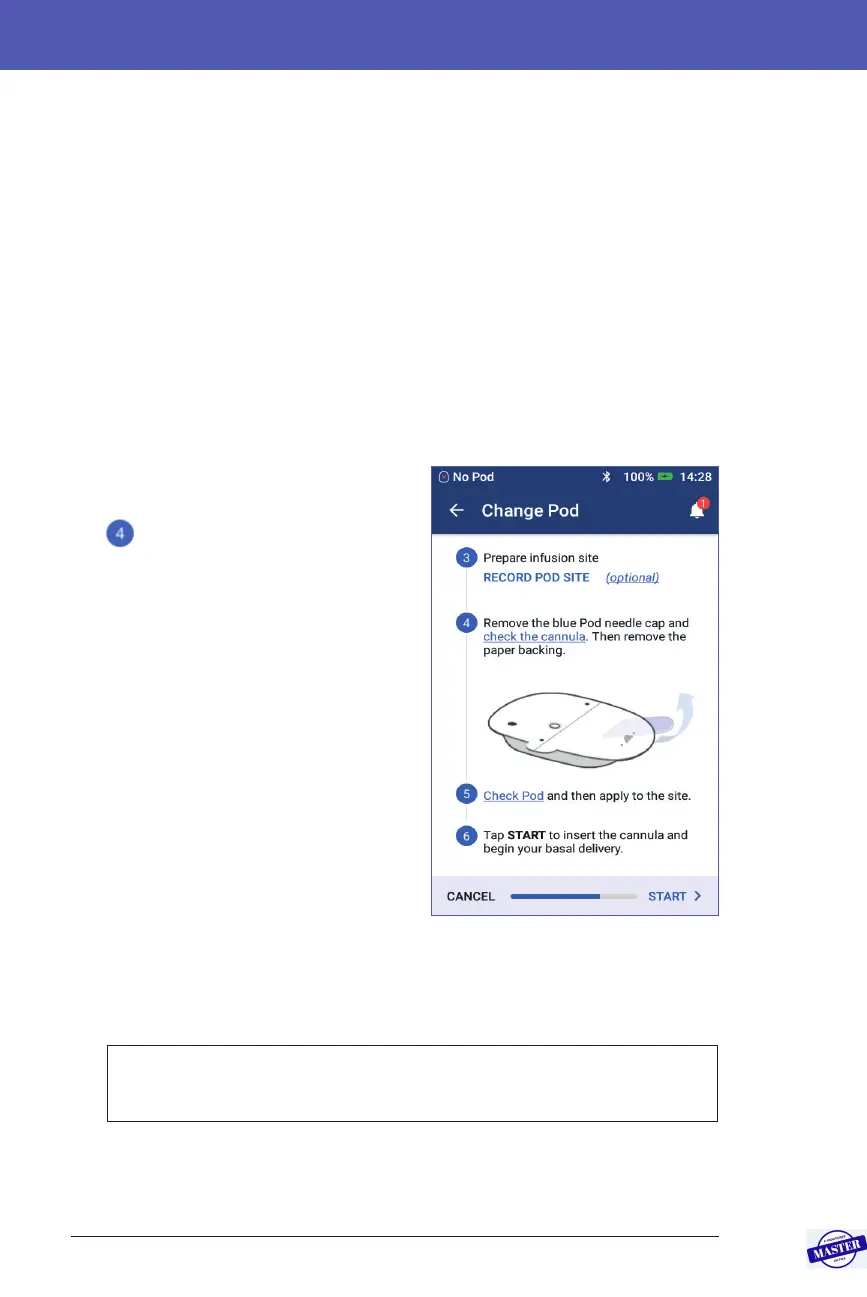
Remove the Pod’s blue cap
Remove the Pod’s blue needle cap (screen
step
):
1. Turn the Pod so the blue needle cap is
up and facing you.
2. Place your thumb on the bottom (at
edge) of the blue cap and pull the cap
upwards. e cap snaps o. row the
cap away.
When you remove the blue cap, a drop
of insulin may be visible at the end of
the cannula or in the well.
3. If any of the following apply, tap
CANCEL and then dispose of the Pod
and begin again with a new Pod:
• e Pod is accidentally dropped, as
this may compromise sterility.
• e Pod or its adhesive pad is wet, dirty or damaged.
• e cannula extends beyond the adhesive backing when the blue needle
cap is removed.
Warning: Verify that the cannula does not extend beyond the adhesive
backing once the Pod’s blue needle cap is removed.
4. Using the pull tabs, remove the white paper backing covering the adhesive
pad. Be careful not to remove the adhesive pad itself. Do not allow the
adhesive to fold back on itself.
Effective Date: 27SEP2019, ECO-000240