USER MANUAL
INTEL® FALCON™ 8+ UAS
© 2017 Intel Corporation. All rights reserved 171
• Store in a place that is not subject to large temperature fluctuations and direct
sunlight.
• Make sure the storage place is dry and that no condensation moisture can come
into contact on with the system.
• Best practice is to always keep the UAV in the closed approved case.
Transportation
Only transport the system in the case or the backpack as described, see “TRANSPORT
CASES & INTEL® BACKPACK” on page 57.
6.1.3. Propeller Replacement
Before taking-off, check all propellers for any signs of defects such as scratches, cracks
or stress points (whitening - color change of the propeller surface caused by abnormal
bending). If a blade shows any defect, it should be replaced before the next flight.
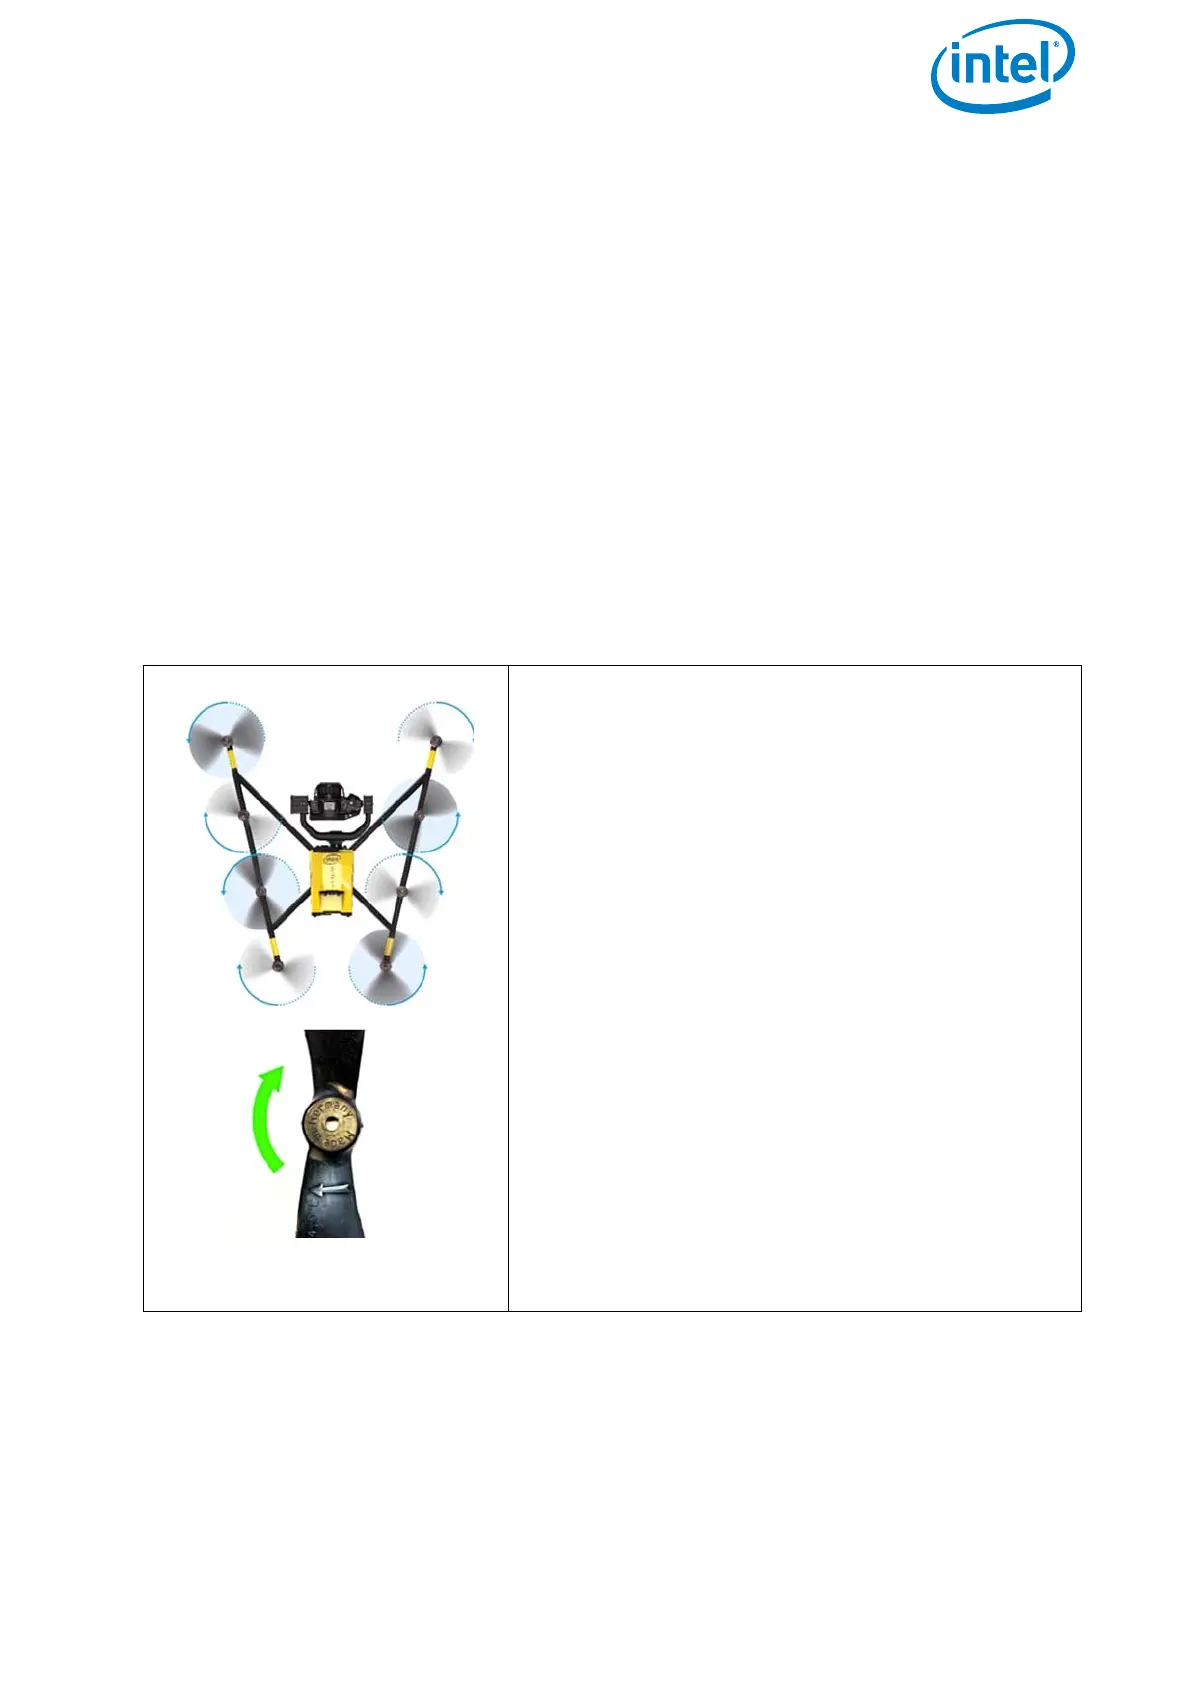
Figure 6.1: Changing the Propellers of the UAV
The only tool you need for changing a propeller
blade is the 5.5 mm wrench, which is delivered
with your Intel® Falcon™ 8+ UAV.
1. Loosen the nut, of the defective propeller with
the 5.5 mm wrench.
2. Lift the propeller carefully – without too much
pressure downwards on the motor.
Note: There are two varieties of propellers (right-
and left-spinning). The propeller direction is
shown on the propeller by an arrow (see example
for a right spinning propeller in the figure to the
left).
3. Check the propeller spin of the dismounted
propeller.
4. Align the new propeller with the correct
propeller spin to fit onto the propeller mount.
5. Press the propeller completely down on the
mount.Put the new self-tightening nut onto the
motor shaft.
6. Put the new self-tightening nut onto the motor
shaft.