USER MANUAL
INTEL® FALCON™ 8+ UAS
© 2017 Intel Corporation. All rights reserved 69
CAUTION: THE INTEL® FALCON™ 8+ UAV MUST ALWAYS BE FLOWN
WITH TWO BATTERIES INSERTED.
Figure 3.2: Preparing the UAV (Continued)
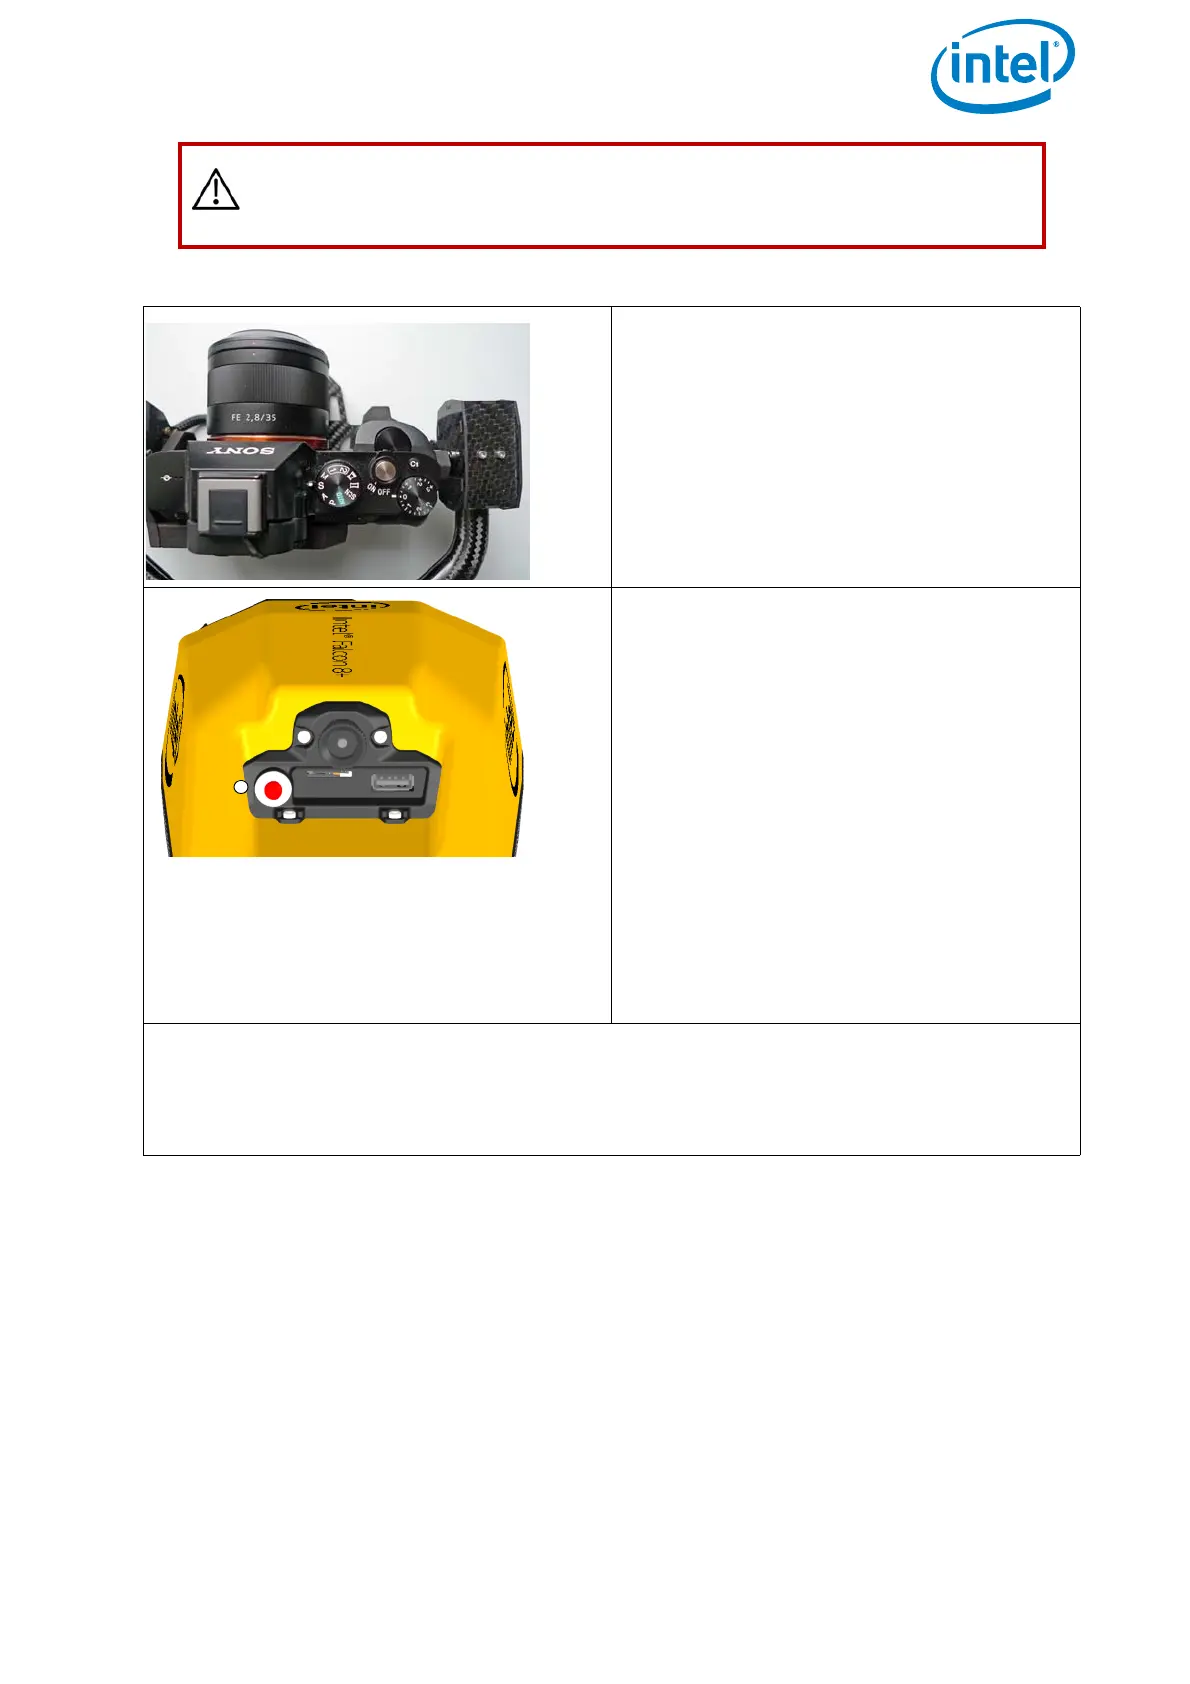
2. Switch on the camera and remove the
lens cap. The image shows the Sony
Alpha 7R as an example.
Please note that the ON/OFF switch on
each payload is different.
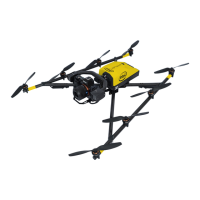
3. Press the power button (1) for
approximately 2 seconds until you
hear a short beep. After
approximately 3 seconds the LEDs on
both sides of the Intel® Falcon™ 8+
UAV will be lit and you will hear the
internal fan running. The UAV is
initialized when the camera mount
(gimbal) starts to automatically
correct movements of the UAV, which
also can be heard. It requires
approximately 15 seconds to
completely power the UAV ON, and is
indicated by a triple beep from the
Intel® Falcon™ 8+ UAV
The AscTec Trinity Control Unit allows you to start the UAV even from a moving plat-
form, for example a boat.
The UAS is ready for take-off as soon as the initialization has successfully finished
and the link to the CTR has been established.