TAIKO Servic e Manual
5-8
CHAPTER
5
© 2006 Japan Cash Machine Co.Ltd. All rights reserved.
5-3-6. Solenoid Test Procedure
Test the condition of the solenoids.
1. Set the switch Nos.1, 2, 3 and 4 ON and turn ON the power to the TAIKO unit.
2. Set the switch No.1 OFF to start the test. The TAIKO unit repeates the following
operation.
Entrance Flapper (Solenoid) On/Off => Exit Flapper (Solenoid) On/OFF
3. If the Blue LED lamp lights, no error is found.
- If TAIKO’s red LED lights, the Solenoid has a problem.
5-3-7. Accepting Test Procedure
Test the condition of the acceptance of the bils.
1. Set the switch No.1, 2, and 5 ON and supply the power ON.
2. Set the switch No.1 OFF to start the test. Then insert the bill to the TAIKO unit.
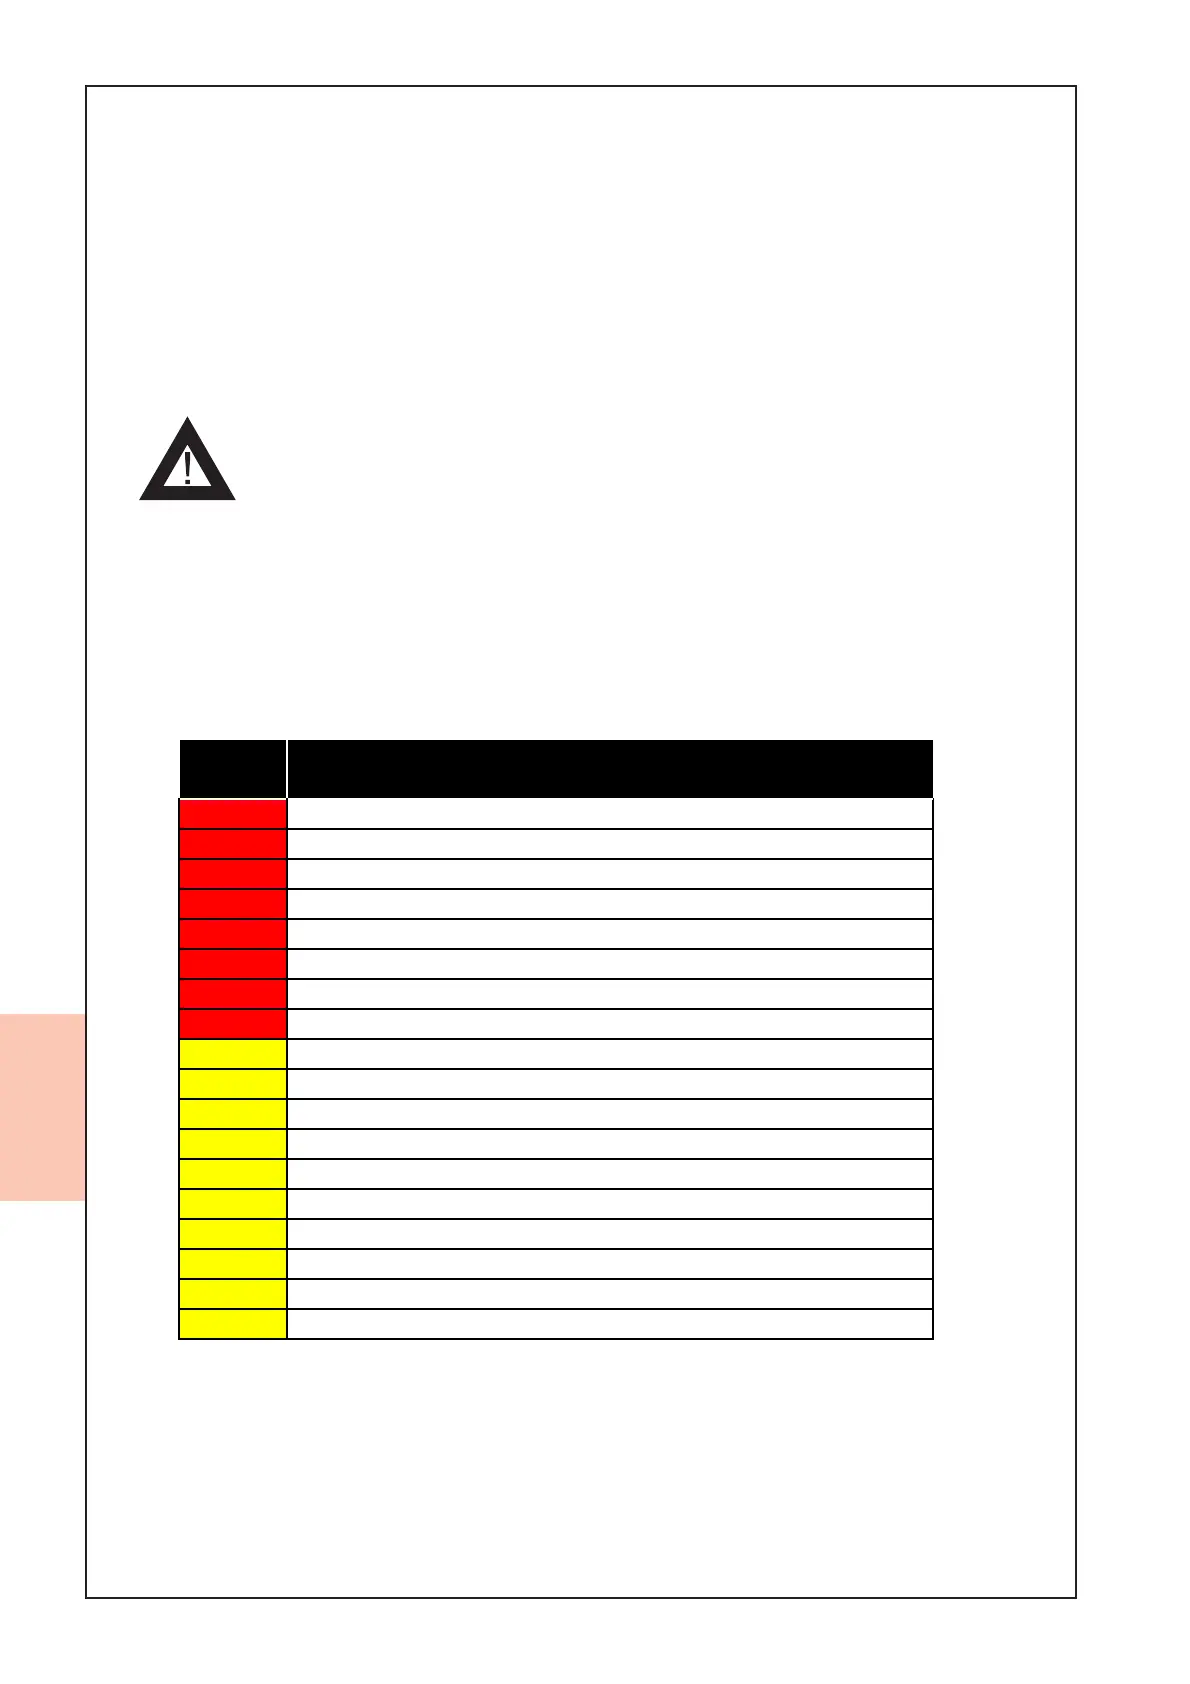
3. If the bill is returned, the LED flashes depending on the reason for the reterning.
# of
Flashes
Diagnostic Description
2ROM Error
3 JAM inside Acceptor
4 Bill remains inside transport path
5 Adjustment Error
6Motor Error
8 Entrance Solenoid Error
9 Exit Solenoid Error
12 Sensor operation at the abnormal timing
1 Reject by slant insertion
4 X-rate Error
5 Bill Transportation Error
7 Pattern Error
8Photo Level Error
9 Reject by Inhibit Setting
12 Magnetism Pattern Error (PUB-11 Only)
13 Bill Length Error
14 Ir/Red Error
15 Reject by counterfeiting currency