2. Attach the vertical stand to the right side of the chassis as shown in Figure 8 on
page 42.
3. Place the chassis vertically on the desk with the stand resting on the desk.
Related Topics ■ Required Tools and Parts for Installing and Maintaining the SRX100 Services
Gateway on page 29
■ Preparing the SRX100 Services Gateway for Desk-Mount Installation on page 36
■ SRX100 Services Gateway Safety Requirements, Warnings, and Guidelines on
page 39
■ Installing the SRX100 Services Gateway in a Rack on page 40
■ Installing the SRX100 Services Gateway on a Wall on page 43
Installing the SRX100 Services Gateway on a Wall
You can install the SRX100 Services Gateway on a wall. The device is shipped with
the rubber feet attached. The rubber feet help stabilize the device on the wall and
enhance airflow.
NOTE: The wall-mounting kit is not shipped with the device and must be ordered
separately.
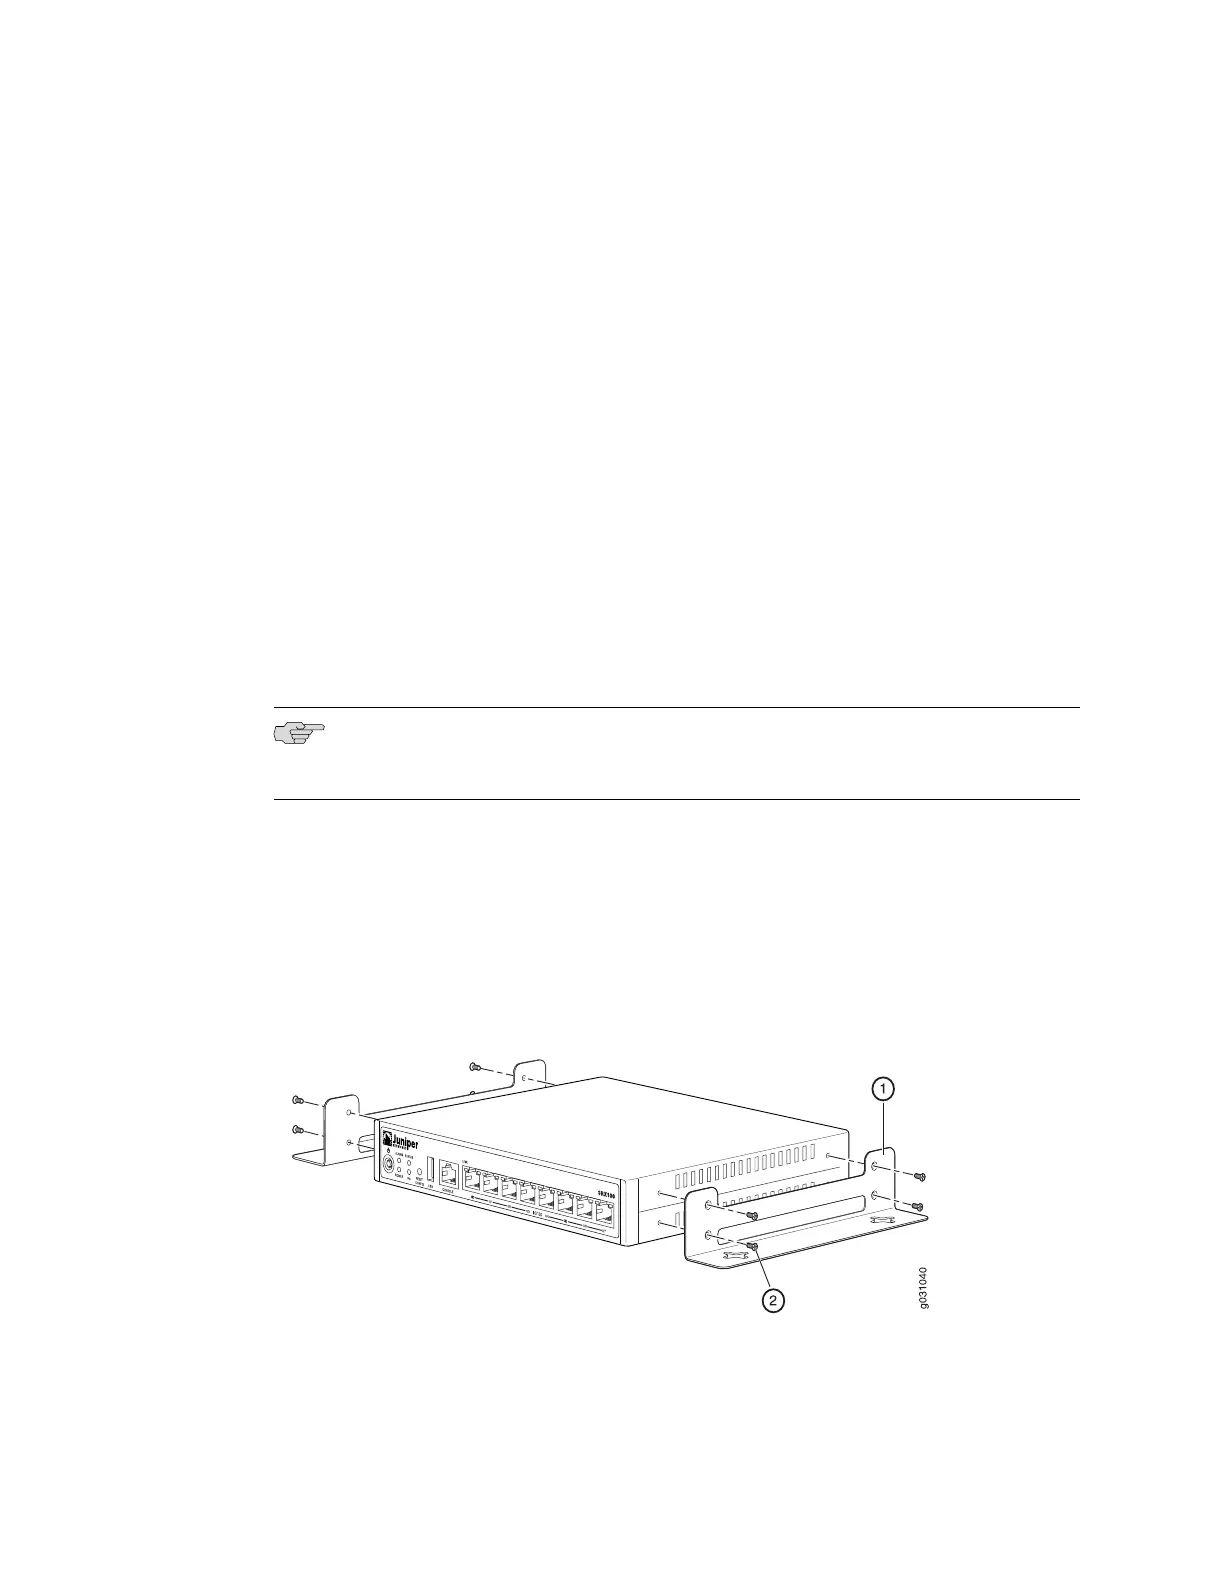
To install the device on a wall:
1. Place the device on a flat and level surface with the Juniper Logo facing up. Turn
the chassis upside down on a desk or work surface where you intend to operate
the device.
2. Position a mounting bracket on each side of the chassis as shown in Figure 9 on
page 43.
Figure 9: Installing the SRX100 Services Gateway on a Wall
3. Use a number–2 Phillips screwdriver to install the screws that secure the
mounting brackets to the chassis.
Installing the SRX100 Services Gateway on a Wall ■ 43
Chapter 8: Installing the SRX100 Services Gateway