• Preparing the SRX210 Services Gateway for Wall-Mount Installation on page 89
Adjusting the Power Supply Adapter Tray for the SRX210 Services Gateway for
Rack-Mount Installation
This topic provides details on the power supply adapters provided with different models
of the SRX210 Services Gateway and the procedure for adjusting the power supply
adapter tray to hold the power supply adapter.
The following power supply adapters are provided with the SRX210 Services Gateway:
•
60-watt power supply adapter for the SRX210 Services Gateway Low Memory and
High Memory models
•
150-watt power supply adapter for the SRX210 Services Gateway with PoE
To adjust the power supply adapter tray:
•
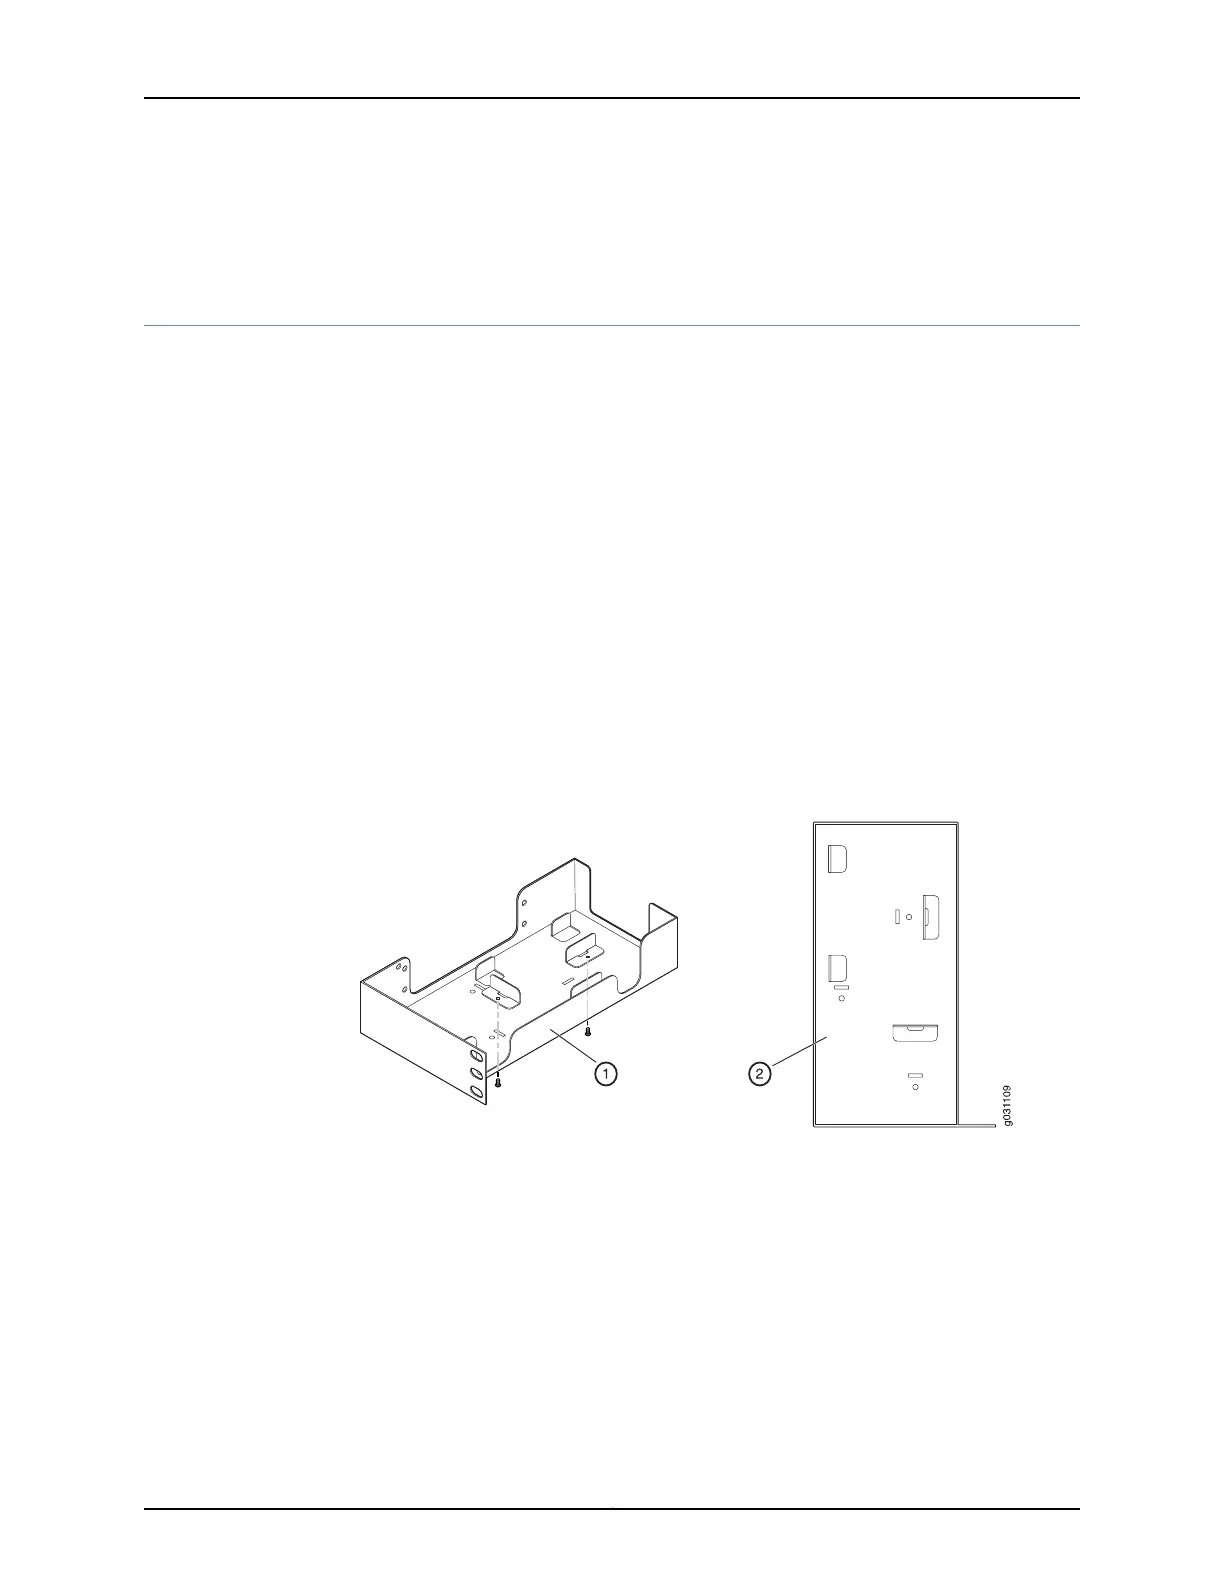
To accommodate the 60-watt power supply, use the two 420–028535 screws to
attach the adapter stopper brackets at the point on the chassis marked B.
Figure 14 on page 87 shows the adjustments to the power supply adapter tray required
for the 60-watt power supply.
Figure 14: Adjusting the Power Supply Adapter Tray to Accommodate the
60-Watt Power Supply
1. Location for the adapter stopper brackets in the power supply adapter tray
2. Fully configured power supply adapter tray
•
To accommodate the 150-watt power supply, use the 420–028535 screw to attach
the adapter stopper bracket at the point on the chassis marked A.
Figure 15 on page 88 shows the adjustments to the power supply adapter tray required
for the 150-watt power supply.
87Copyright © 2012, Juniper Networks, Inc.
Chapter 12: Installing the Mounting Hardware


 To Next Page