3. Select the COM port to which the modem is connected (for example, COM1).
4. Configure the port settings shown in Table 39 on page 123.
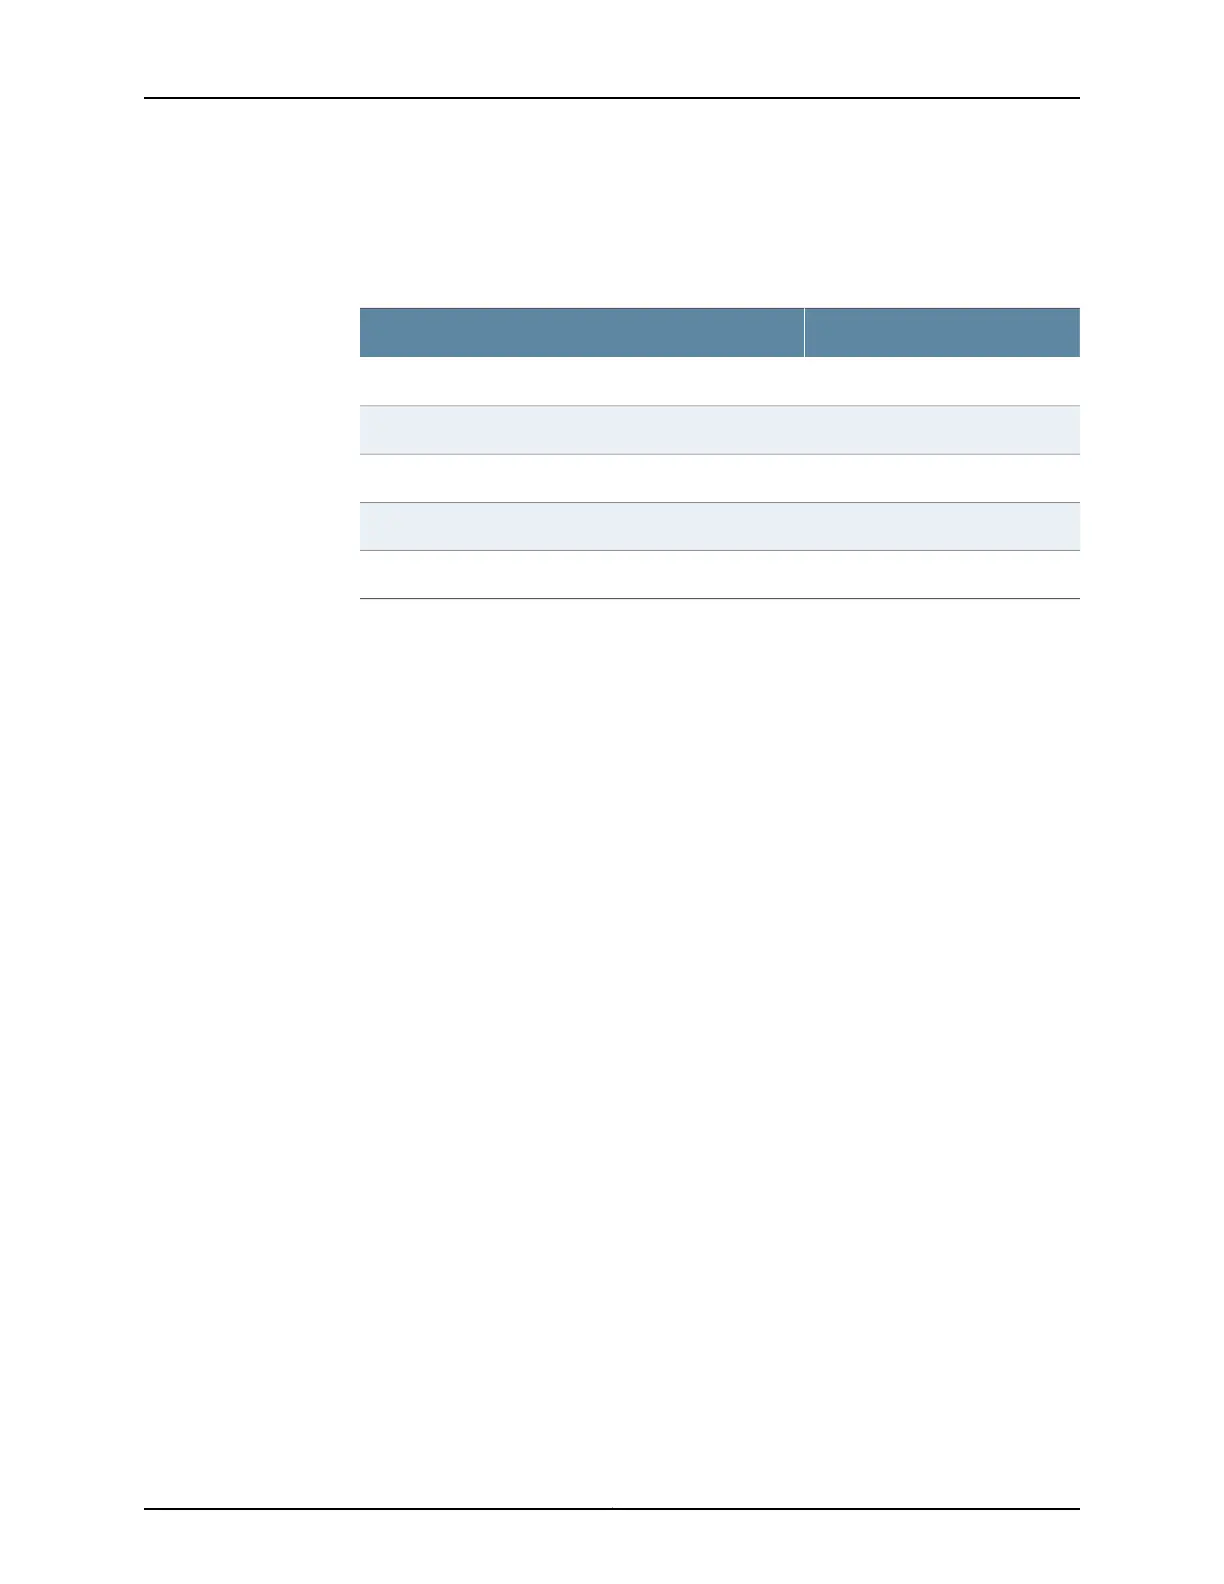
Table 39: Port Settings for Connecting to the CLI at User End
ValuePort Setting
9600Bits per second
8Data bits
NoneParity
1Stop bits
NoneFlow control
5. In the HyperTerminal window, enter AT.
For more information on the AT commands, see the following guides:
•
Junos OS Initial Configuration Guide for Security Devices
•
Junos OS Monitoring and Troubleshooting Guide for Security Devices
An OK response verifies that the modem can communicate successfully with the COM
port on the PC or laptop.
6. Dial the modem that is connected to the console port on the services gateway by
entering ATDT remote-modem-number. For example, if the number of the modem
connected to the console port on the services gateway is 0013033033030, enter ATDT
0013033033030.
The services gateway login prompt appears.
7. Log in as the user root. No password is required at initial connection, but you must
assign a root password before committing any configuration settings.
Related
Documentation
• Connecting the Modem at the SRX210 Services Gateway End on page 121
• Connecting the Modem to the Console Port on the SRX210 Services Gateway on page 122
• SRX210 Services Gateway Software Configuration Overview on page 125
123Copyright © 2012, Juniper Networks, Inc.
Chapter 16: Establishing Basic Connectivity