ESP32 Starter Kit
(continued from previous page)
int CS = 15;
int sensor = 34;
LedControl lc=LedControl(DIN,CLK,CS,1);
byte data_val[8][8]= {
{0x00, 0x00, 0x00, 0x00, 0x00, 0x00, 0x00, 0x01},
{0x00, 0x00, 0x00, 0x00, 0x00, 0x00, 0x03, 0x01},
{0x00, 0x00, 0x00, 0x00, 0x00, 0x07, 0x03, 0x01},
{0x00, 0x00, 0x00, 0x00, 0x0f, 0x07, 0x03, 0x01},
{0x00, 0x00, 0x00, 0x1f, 0x0f, 0x07, 0x03, 0x01},
{0x00, 0x00, 0x3f, 0x1f, 0x0f, 0x07, 0x03, 0x01},
{0x00, 0x7f, 0x3f, 0x1f, 0x0f, 0x07, 0x03, 0x01},
{0xff, 0x7f, 0x3f, 0x1f, 0x0f, 0x07, 0x03, 0x01}
};
void setup(){
lc.shutdown(0,false); //When powering on, MAX72XX is in the power saving mode.
lc.setIntensity(0,8); //Set the brightness to the maximum
lc.clearDisplay(0); //Clear the display
}
void loop(){
int val = analogRead(sensor);
Serial.println(val);
int temp = map(val,0,800,0,7); //The range of analog values in the 0-800 is the most␣
˓→appropriate
for(int i=0;i<8;i++)
{
lc.setRow(0,7-i,data_val[temp][i]);
}
}
4. Test Code
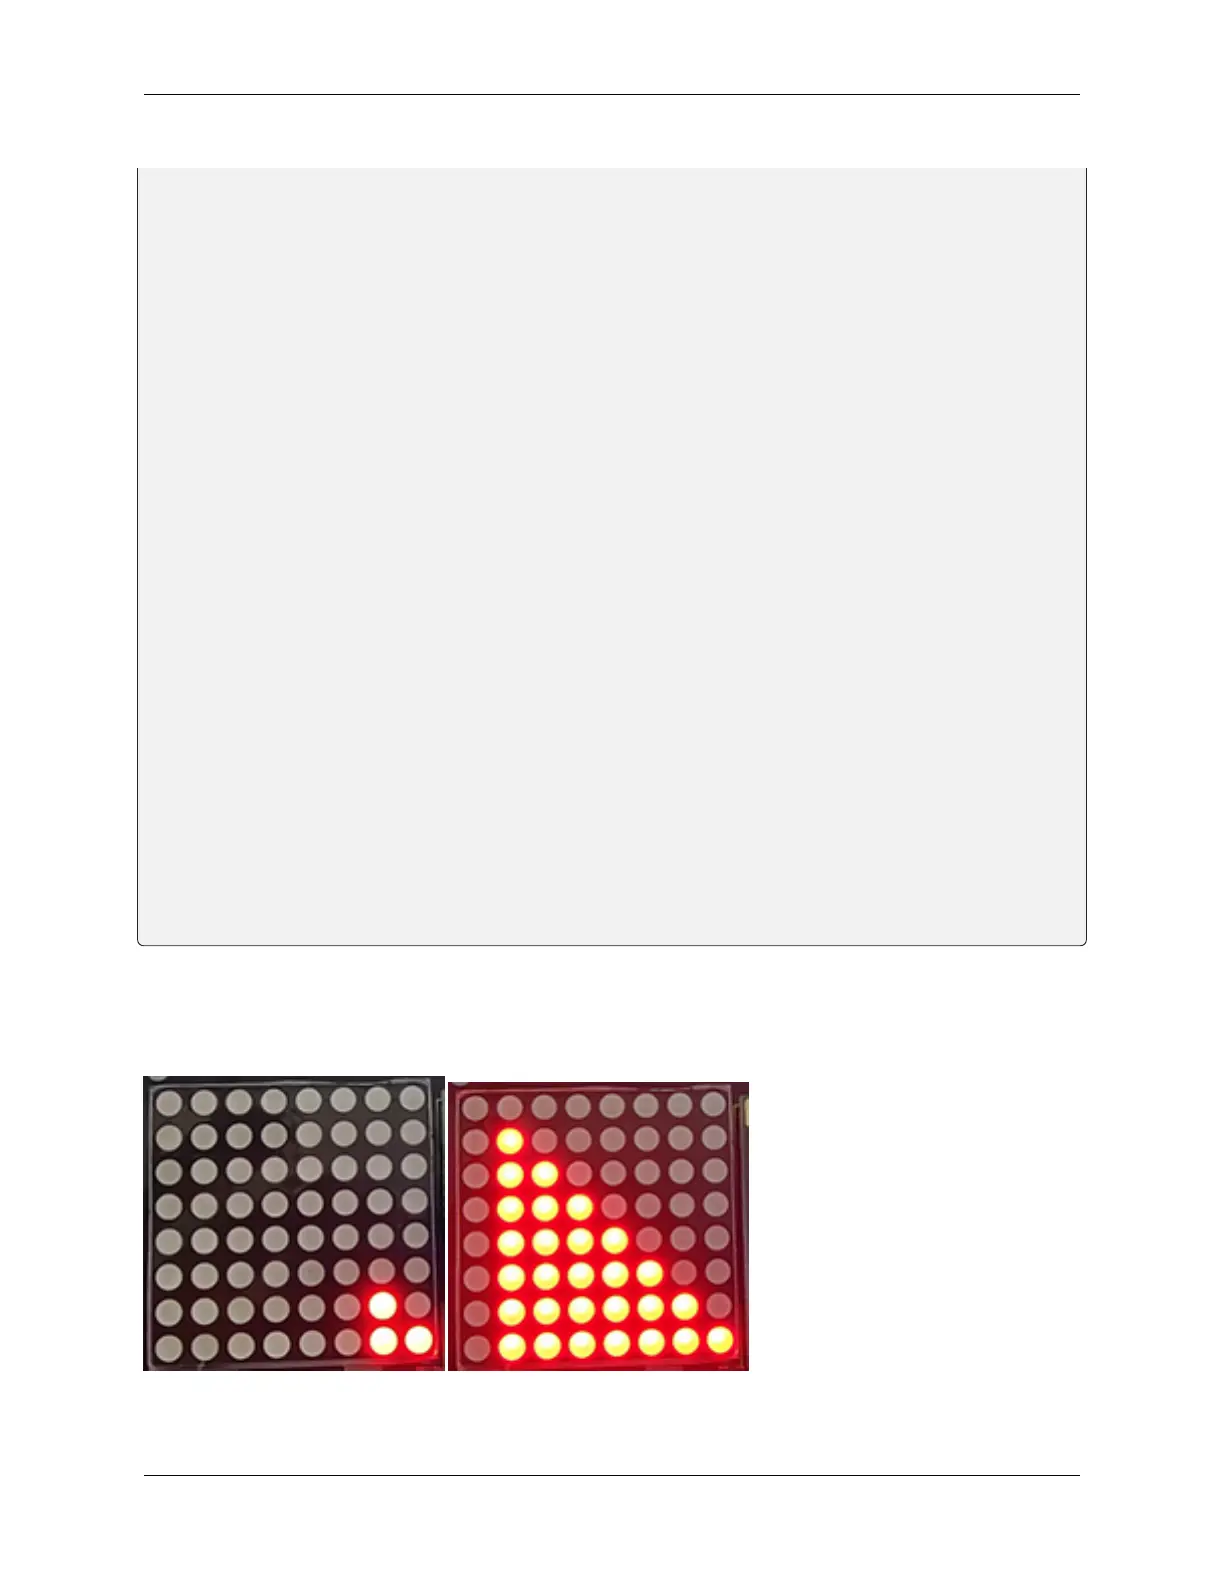
After connecting the wiring and uploading code, the noise level view is displayed on dot matrix, as shown below.
8.5. Arduino Project 127