EN UG-020 Link 6 user guide r1.0 19
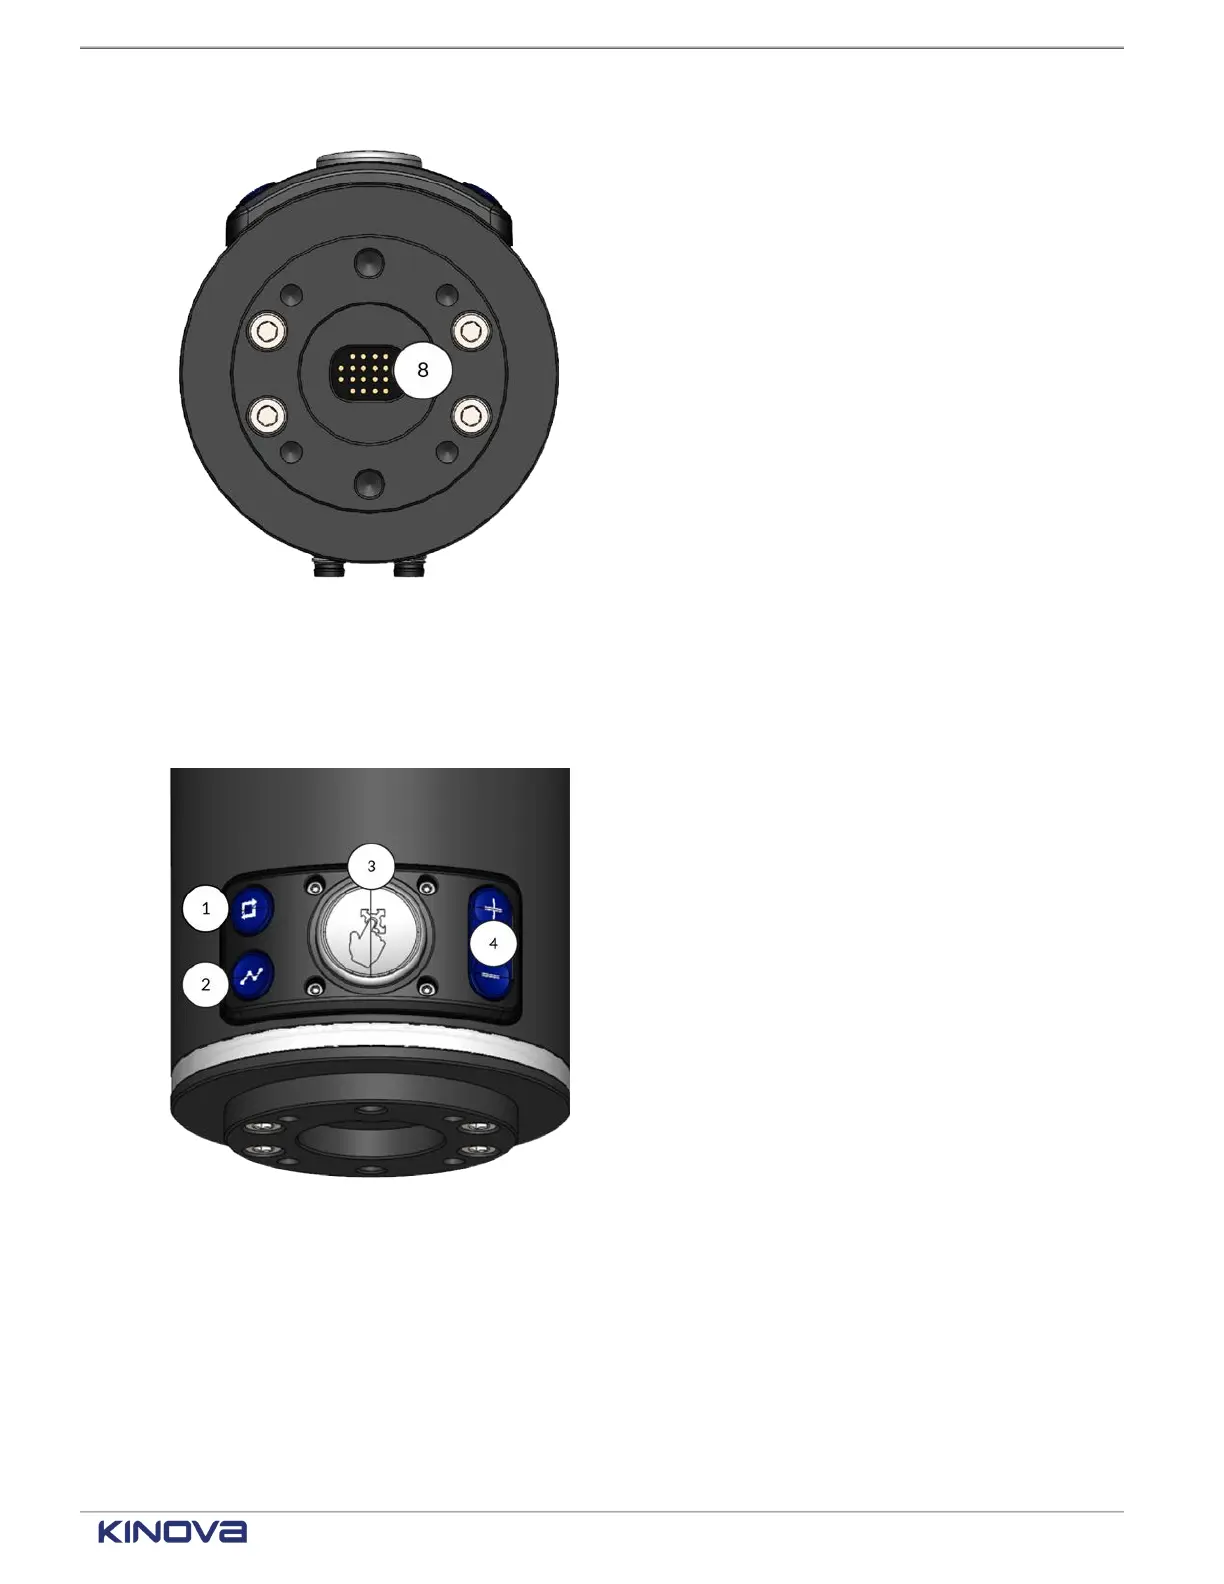
Central pogo pin connector
Gigabit Ethernet
RS-485 for Modbus RTU
Figure 11: Bottom of wrist, pogo pin
connector
8
24 V power
Use the buttons on the top of the wrist to control the arm manually.
1 Hand Guiding mode
Toggle button
Press to toggle between
Cartesian and angular
Hand Guiding modes.
2 Waypoint capture
(Snapshot button)
Press to capture a
snapshot of the current
location of the arm
when you are editing a
waypoint block during
visual programming.
3
Wrist enabling device
Press and hold while
moving the arm to teach
it the trajectory.
Figure 12: Buttons on the wrist
4
End effector actions
Press + and - as a way of
using the actions of the
end effectors as defined
by the plugin of the end
effector. For example, +
can close grippers and -
can open grippers.
Related topics
Modes of operation of Link6 on page 92
Robot lights and what they mean: a reference on page 107
+1 514-277-3777 kinovarobotics.com
© 2022 Kinova inc. All rights reserved.