66 General Maintenance
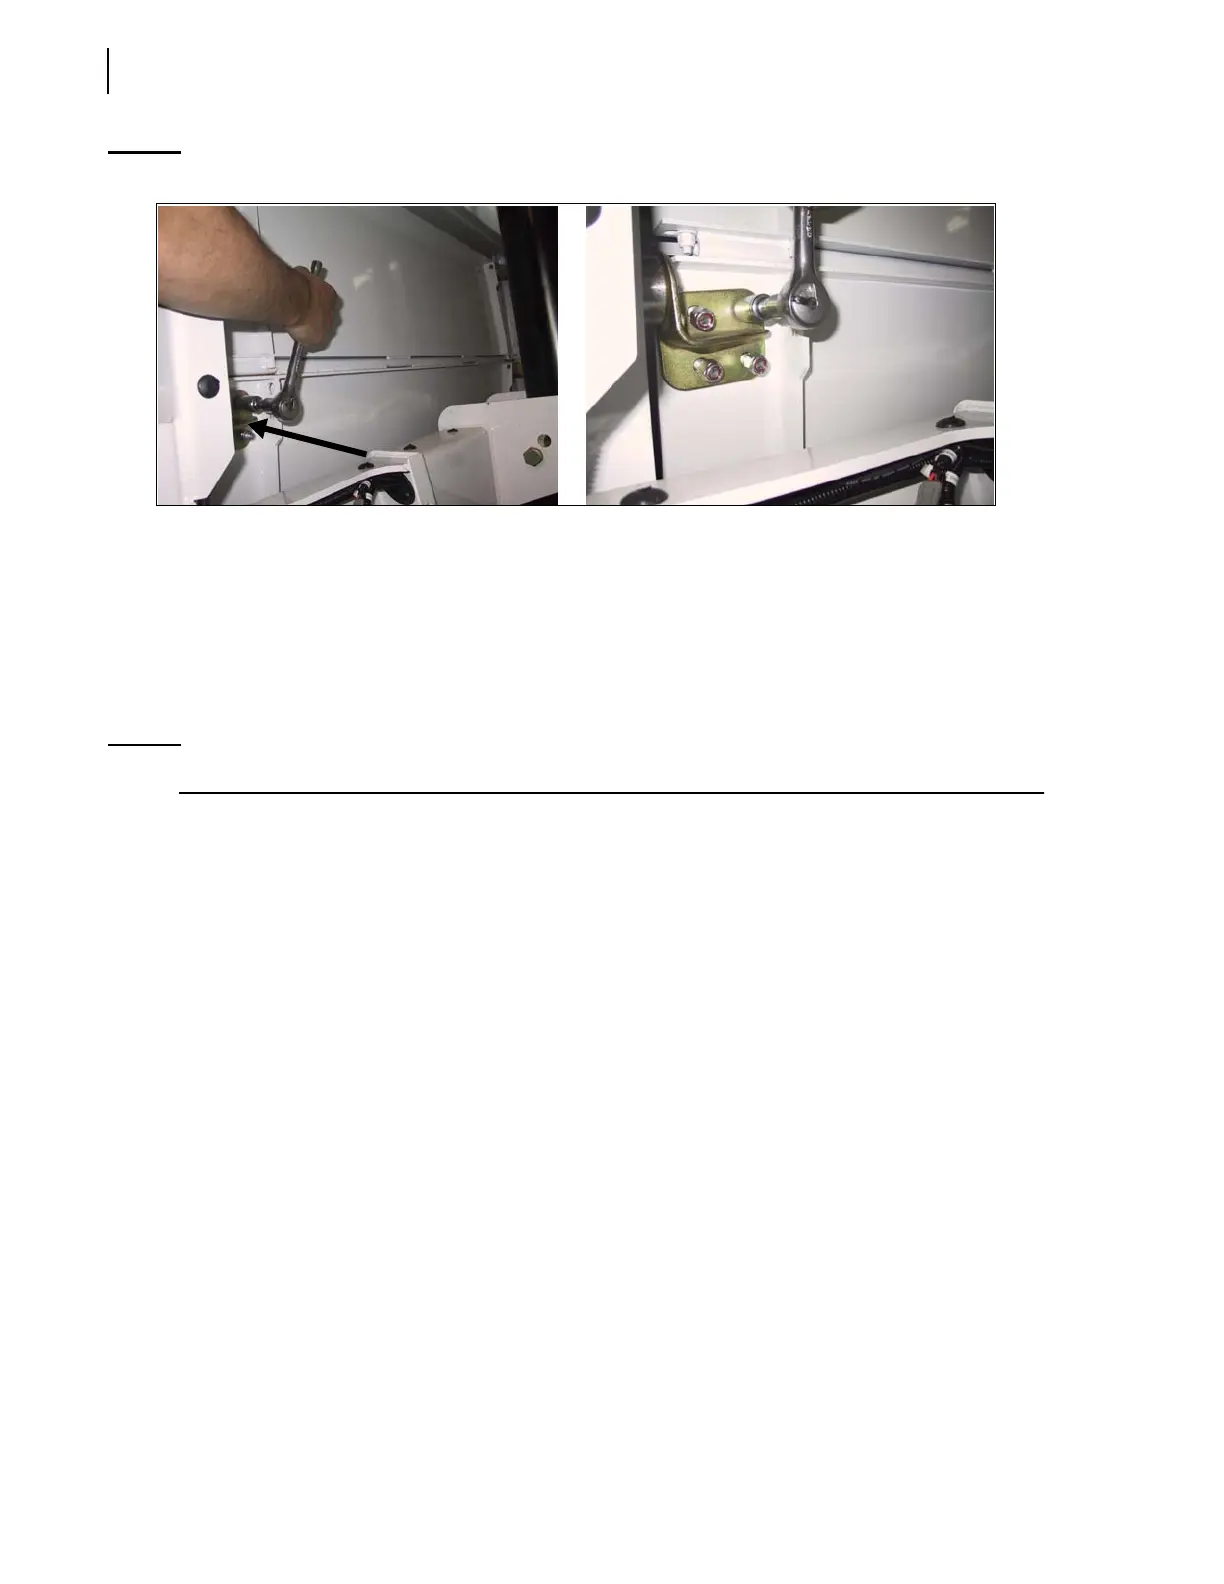
Figure 3-60
Removing all 4 bolts
4 b. Remove the roller assembly and replace it with a new one.
4 c. Put back all 4 bolts in their respective holes before tightening them up.
5. Remove the right-hand side bottom roller and replace it by repeating Step 4.
6. Run full cycle to check for proper operation.
Replacing Top Roller Assemblies
NOTE: This task must be performed by 2 people.
To replace the top roller assemblies, apply the following procedure:
1. Once you have replaced the bottom rollers (see above procedure), start the engine and engage
the hydraulic pump.
2. Extend the packer until the top rollers are at the same height as the bottom rollers were in the
previous procedure.
3. Lock out and tag out the vehicle (see Locking Out and Tagging Out the Vehicle on page 12).
4. Replace both top rollers (one at a time):
4 a. Using a 5 ⁄ 16-inch Allen wrench and a 3 ⁄ 4-inch box, remove all 4 bolts that keep the roller in
place (see Figure 3-60).
4 b. Remove the roller assembly and replace it with a new one.
4 c. Put back all 4 bolts in their respective holes before tightening them up.
5. Close back the floating panel.
In a co-mingle unit: After closing back the floating panel, put back all 4 bolts that secure the
panel to the hopper posts. Follow the chute-removing procedure (on page 38) in reverse order to
reinstall the chute inside the hopper.
6. Run full cycle to check for proper operation.