52 General Maintenance
Replacing Sliding Shoes
Mechanics must first follow the preceding procedure (Preparing for Sliding Shoe Replacement on
page 49) before continuing with the procedure below.
To replace the worn-out sliding shoes, proceed this way:
NOTE: This procedure includes removing and replacing the floor guides.
1. Turn OFF the hydraulic pump and the engine.
2. Lock out and tag out the vehicle (see Locking Out and Tagging Out the Vehicle on page 12).
3. Remove the old sliding shoes and temporary steel tubing.
NOTE: Removal of the packer panel is not necessary within this procedure. However, should you
prefer to proceed with such removal, refer to “Removing the Packer Panel - Std. Units
(Method B)” on page 36 if you have a standard unit or “Removing the Packer Panel - Co-
Mingle Units” on page 42 if you have a co-mingle unit.
4. Mark the exact location of both floor guides.
5. Using a grinder or cutting tool, remove the floor guides by cutting the stitch welds.
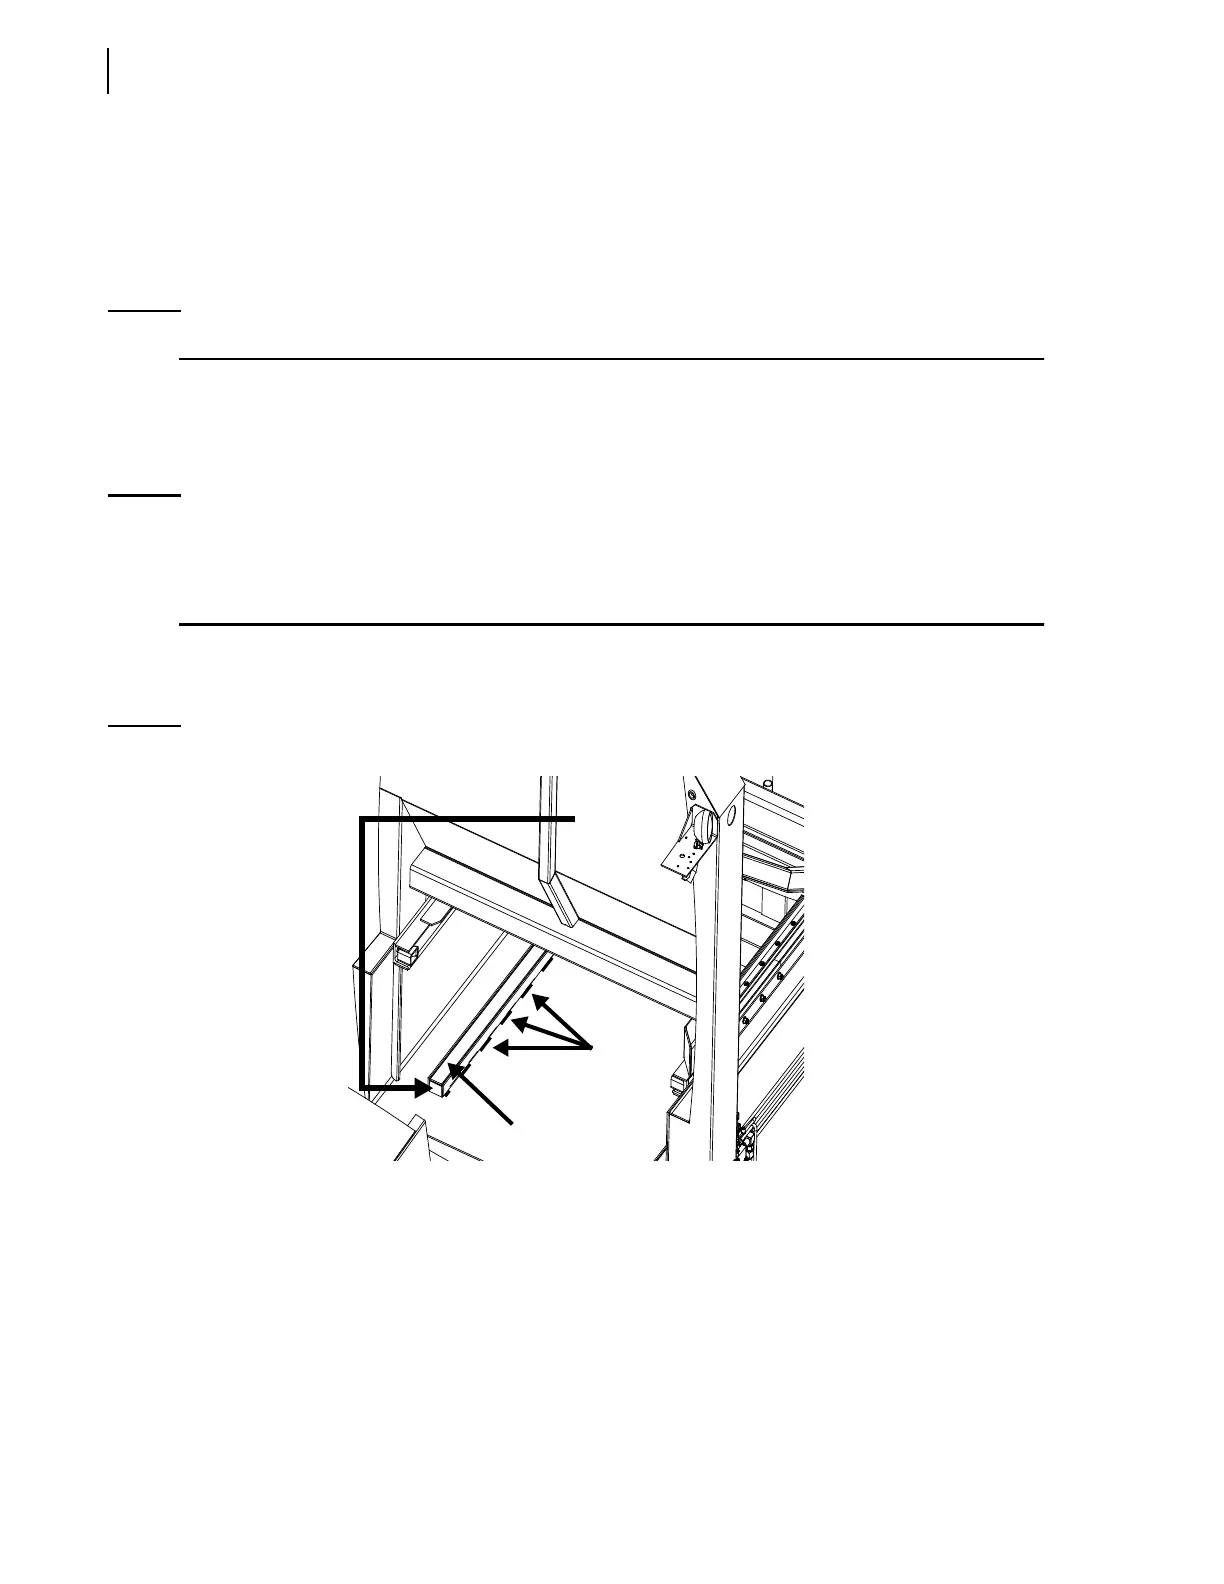
Figure 3-42
Stitch welds
6. Clean the hopper floor and wall surfaces.
7. Install temporary steel tubes on the body side end of both floor guides (see Figure 3-42).
8. Position the new guides on the hopper floor using the marks made in Step 4 (do not tack or weld
yet).
Make sure the floor guides are parallel to the hopper walls.
9. (If packer has been removed) Reinstall the packer on the floor guides with the new sliding shoes on
it.
Floor
guide
Stitch
welds
Place
temporary
steel tube
here