xii
D-I012.1109EN
innovators in agriculture
4.3.3 Settings 4-24
4.3.4 Alarms 4-25
4.3.5 Service 4-26
4.4 Operation 4-26
4.4.1 Routes, Actions, Manual Routes and Time Paths 4-26
4.4.2 Control System 4-27
5. Installation 5-1
5.1 Introduction 5-1
5.2 Preparation 5-1
5.2.1 Preparation by the Owner 5-1
5.2.2 Preparation by the Lely Service Provider 5-1
5.2.3 List of Supplied Parts 5-1
5.2.4 Plan the Location of the Charging Station 5-3
5.3 Install the Safety Decal 'Danger, Area with Unmanned Autonomous Vehicle 5-3
5.4 Install the Charging Station 5-4
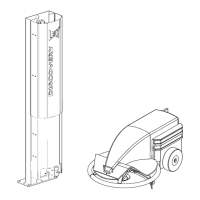
5.4.1 Install a Floor Column 5-4
5.4.2 Install the Electrode Assembly on the Mounting Plate 5-5
5.4.3 Install the Mounting Plate 5-6
5.4.4 Install the Battery Charger 5-7
5.4.5 Install the Earthing 5-8
5.4.6 Install the Cover 5-9
5.4.7 Install the Inductive Metal Guiding Strips 5-10
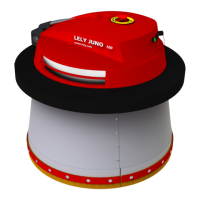
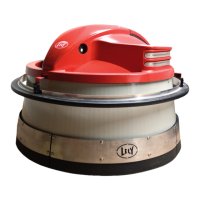
5.5 Install the JUNO 150 5-12
5.5.1 Hoist the JUNO 150 5-12
5.5.2 Install the Safety Bar 5-13
5.5.3 Put the JUNO 150 in Operation 5-13
5.6 Setup the JUNO 150 5-14
5.6.1 Adjust the Skirt Height 5-14
5.6.2 Modify the Feed Push Power 5-15
5.6.3 Set the Height of the Inductive Sensor 5-15
5.6.4 Make Different Routes per Distance to the Feed Fence 5-17
6. Operating Instructions 6-1
6.1 Open or Close the Lid 6-2
6.2 Operate the E-Link Manual Controller 6-2
6.3 Switch ON or OFF the JUNO 150 6-3
6.4 Manually Drive the JUNO 150 6-4
6.5 Drive the JUNO 150 to the Charging Station 6-4
6.6 Prepare for Programming 6-5
6.6.1 Requirements for a Good Route 6-5
6.7 Program the JUNO 150 6-5
6.7.1 Program a New Route 6-5
6.7.2 Copy a Route 6-9
6.7.3 Modify a Route 6-9
6.7.4 Reset a modified Route to the previous Version 6-10
6.7.5 Delete a Route 6-10
6.7.6 Set or Delete a Manual Route 6-10