WRS – Installation Manual
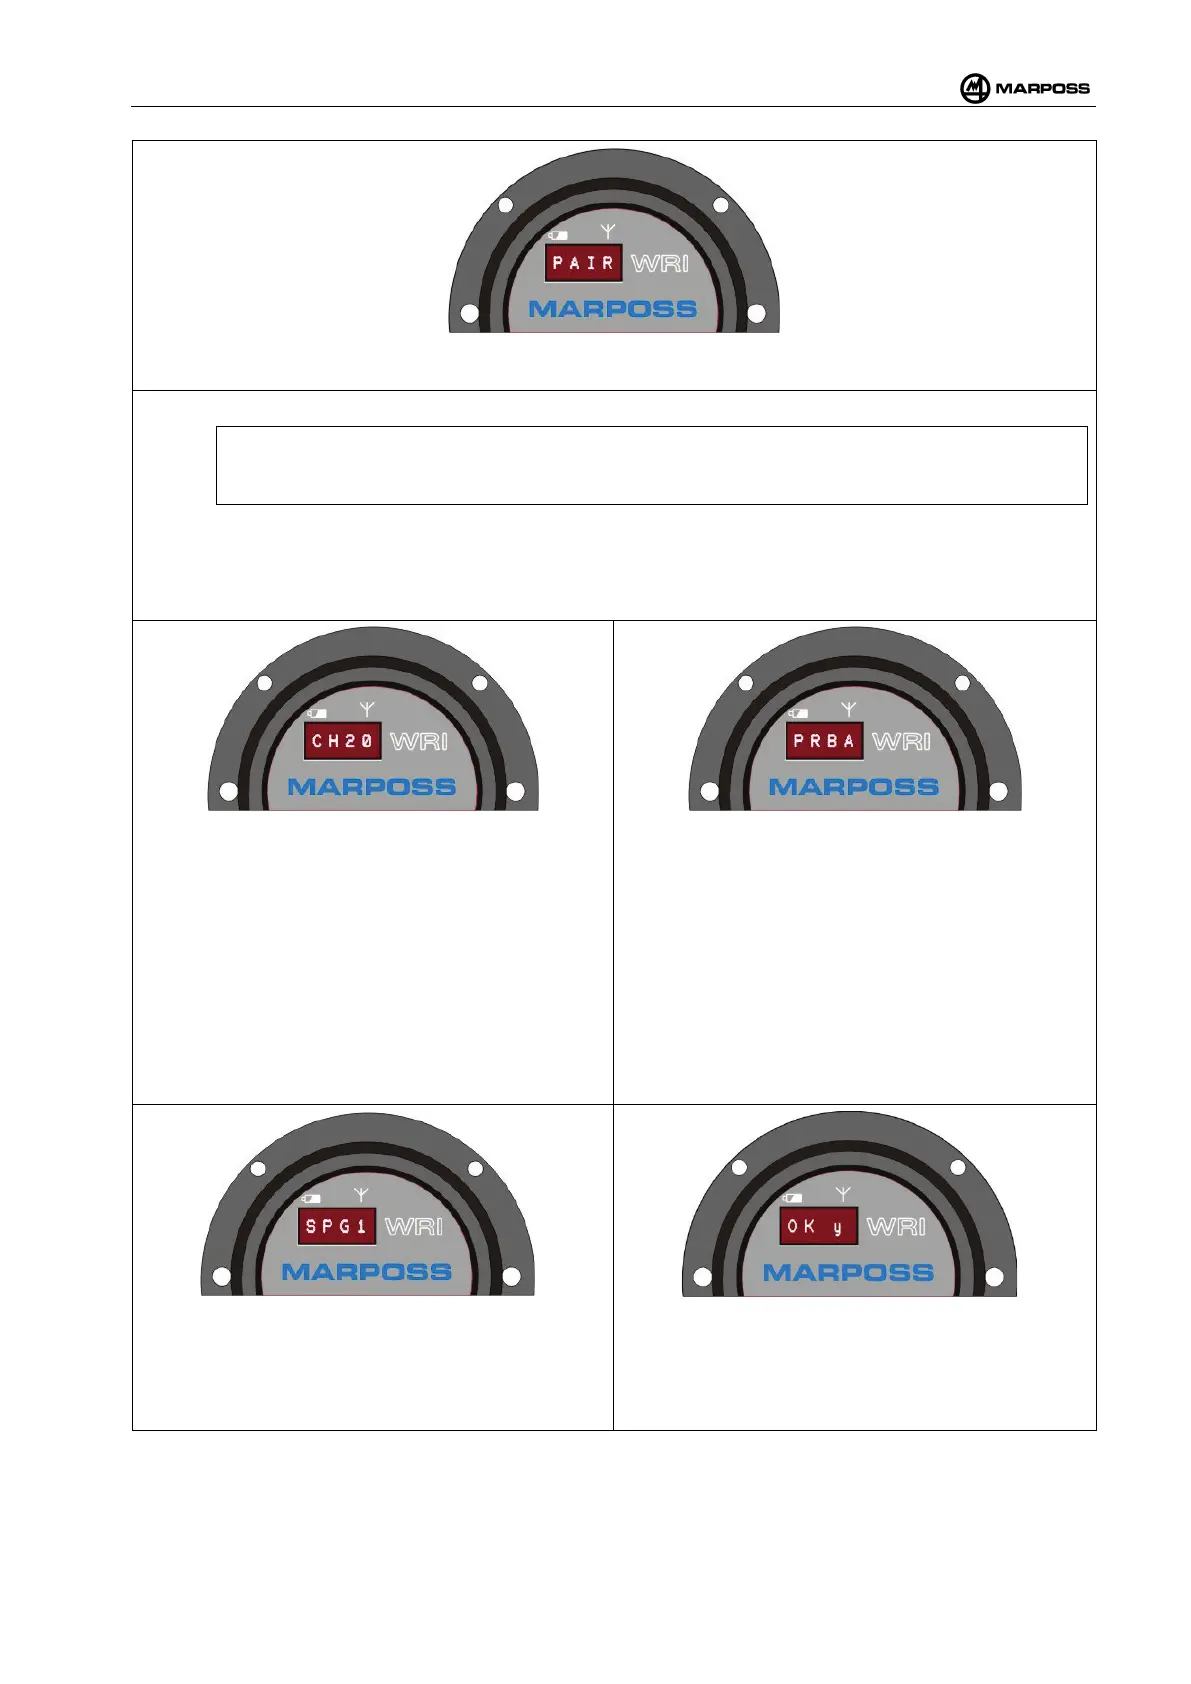
The display will show PAIR. ENTER the PAIR programming menu by pressing the ENTER optical button or
E+ on the remote control unit. The SCAN function is automatically activated.
Wait for the PROBE FOUND message to appear.
N.B.:
If the message PROBE NOT FOUND appears, repeat the procedure from the start.
Check that the serial number shown on display corresponds to the one of the WRP transmitter and press
ENTER or E+ on the remote control unit. The firmware version is displayed. Press ENTER or E+
remote control uni
t to proceed. When the transmitter has been identified by the base station, it is necessary
to set its parameters:
Channel selection (CH
): We recommend accepting
the channel suggested by the system by pressing
the ENTER optical button or E+ on the
remote
control unit for both tens and units. In order to
change the settings, simply select the
communication channel to be used between the
WRP transmitter and the WRI receiver using the
SELECT optical button or S+
unit and confirm b
y touching the ENTER optical
button or E+
on the remote control unit (first the
tens, followed by the units). For more information,
see para. 4.10.9.
Probe selection (PRB
): We recommend accepting
the identificat
ion code suggested by the system by
pressing the ENTER optical button or E+
on the
remote control unit. To modify the transmitter
identification code, select the letter (A, B, C, D) using
the SELECT button or S+
on the remote control unit,
and confirm by t
ouching the ENTER optical button or
E+ on the remote control unit.
SPG selection: Set-
up the probe activation speed
(SPEED GRADE) using the SELECT optical button
or S+.
Confirm the selection by touching the ENTER
optical button or E+ on the remote control unit.
more information, see para. 4.12.2.2.
Confirm the modifications that have been
implemented. Select „y“ using the SELECT optical
button or S+
and confirm by touching the ENTER
optical button or E+ on the remote control unit.