258 of 271
E-Stop Engaged
This message is not necessarily an error, but you might receive other related errors if the E-Stop is show-
ing to be engaged, especially when you attempt to execute a machine function and the E-Stop button is
not engaged (released and extending completely forward).
Possible Causes of a False E-Stop Engaged Message
• User Interface Harness not plugged in correctly at keypad or control PCB (most probable)
• faulty circuitry on Main PCB
• defective E-Stop switch (least likely)
Troubleshoot a false E-Stop engaged error following the steps described in the table below.
First, remove the base cover and locate the E-Stop LED located at position D49 on the main PCB. Observe
the condition of this LED (on or off) as you perform the following troubleshooting steps (machine must
be turned on with the software loaded).
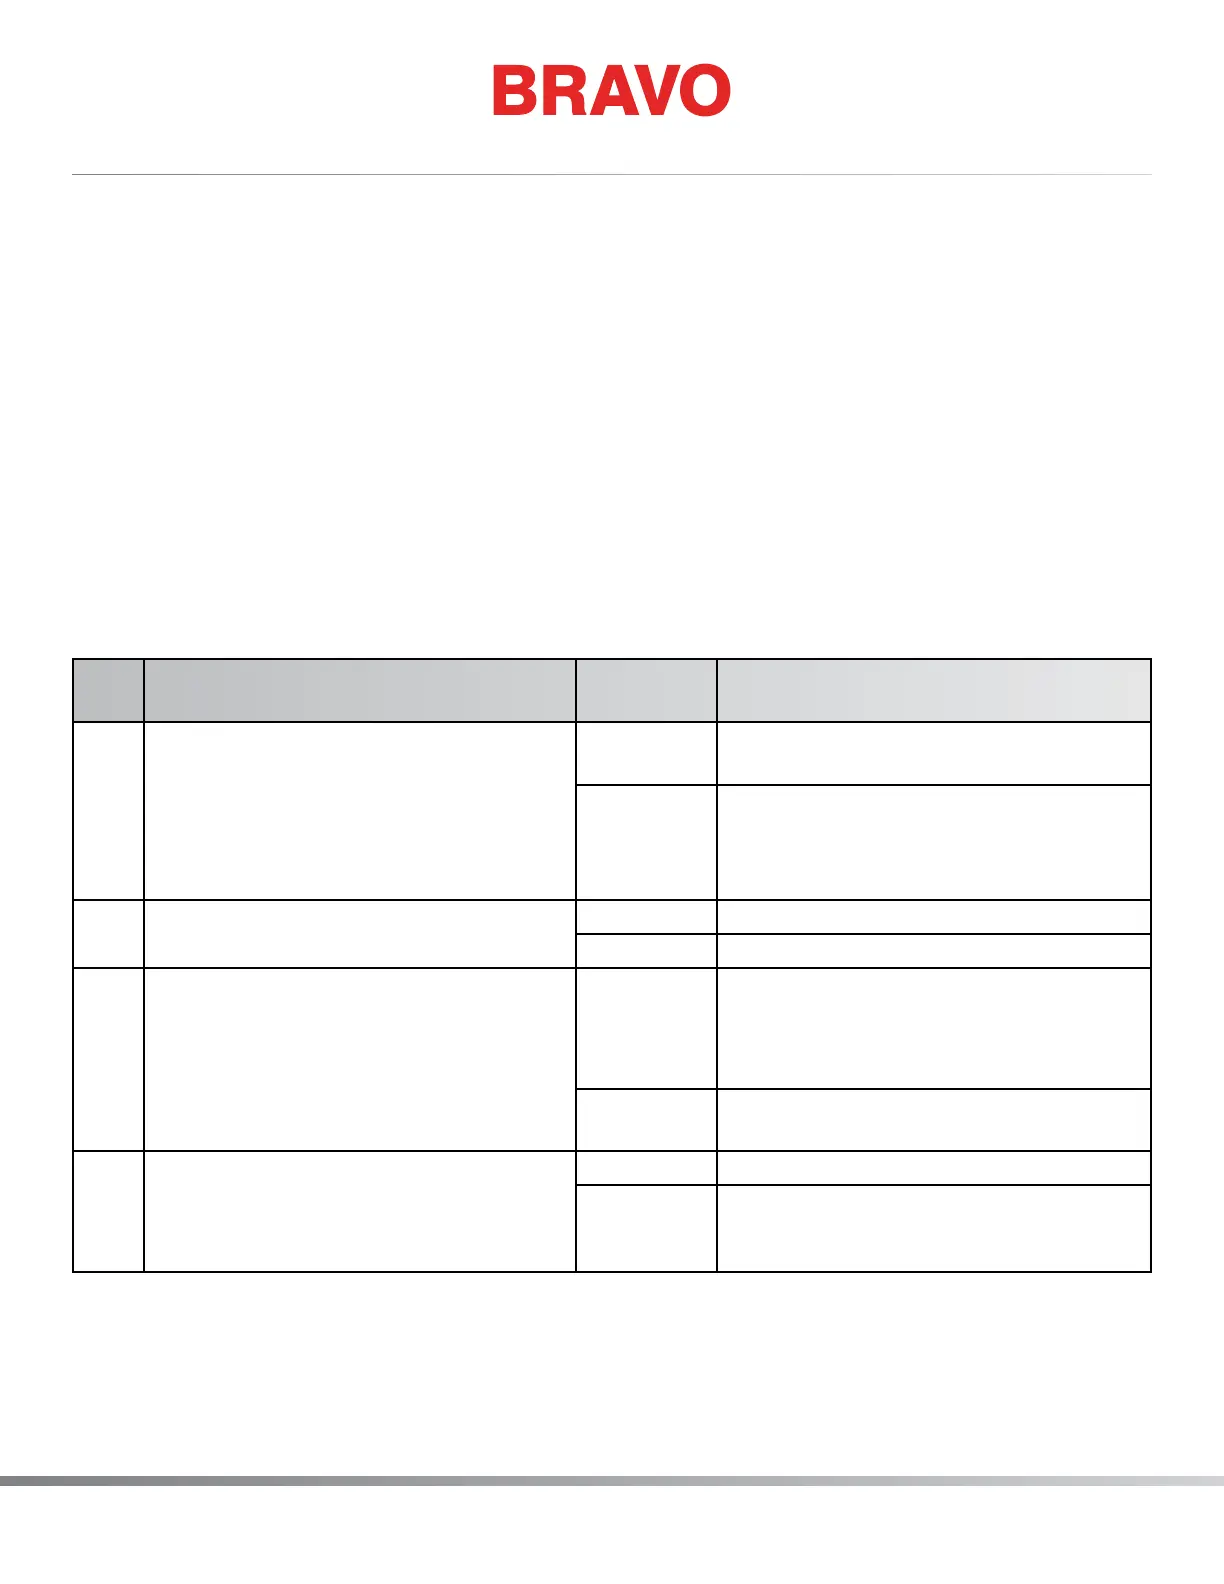
Step Action LED (D49)
Condition
Next Step/Solution
1 Inspect the user interface harness and
the harness connections. Make sure
the harness connections are secure.
Disconnect and reconnect both ends
of the harness and make sure they are
both securely connected.
OFF Problem was a loose or improper
connection.
ON Replace the harness if kinked, chaffed
or connectors damaged or worn.
Otherwise go to step 2
2 Disconnect the harness from the back of
the user interface.
OFF Replace the user interface assembly
ON Go to Step 3
3 Select the “Keypad” tab in the
“Tools>Maintenance” menu. Look at
the “E-Stop Button. This button and the
LED at D49 should be at the same state,
ON or OFF.
Same as
E-Stop
button in
keypad test
E-stop switch is defective, replace it
Different
State
Possible fault on the Main PCB. Contact
Technical Support.
3 Reconnect the harness to the back of
the user interface and disconnect the
user interface harness from the main
PCB.
OFF Replace user interface harness
ON Go to Step 4